
Over the last decade or more, portable GPS devices and more recently mapping apps on smartphones have overtaken printed maps and compasses as the main way that hikers navigate on the trail or in the wilderness. The advantages of these systems are obvious, but electronic devices can fail – especially if they take an unexpected dip in a stream – and batteries can also run flat if your hike takes longer than anticipated, so, it’s still regarded as best practice to carry a backup hard-copy map and compass, just in case. We think it’s fair to say that many hikers won’t have much experience of compasses, and the various scales and markings many units have can seem confusing and intimidating. Which may be one of the main reasons you feel put off from actually getting into using one in the first place. However, with just a little experience, you can navigate consistently with a map and compass and add a valuable extra layer of safety to your hikes.
Editor’s Note: This article is part of our overall guide to the best hiking compasses. Check out our other guides:
Table of Contents
ToggleBasic/Hiking Compass
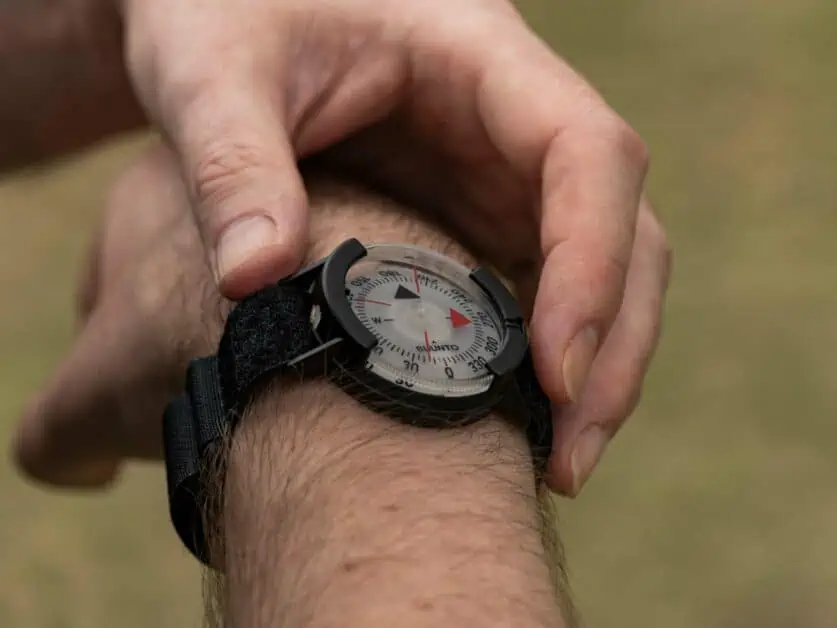
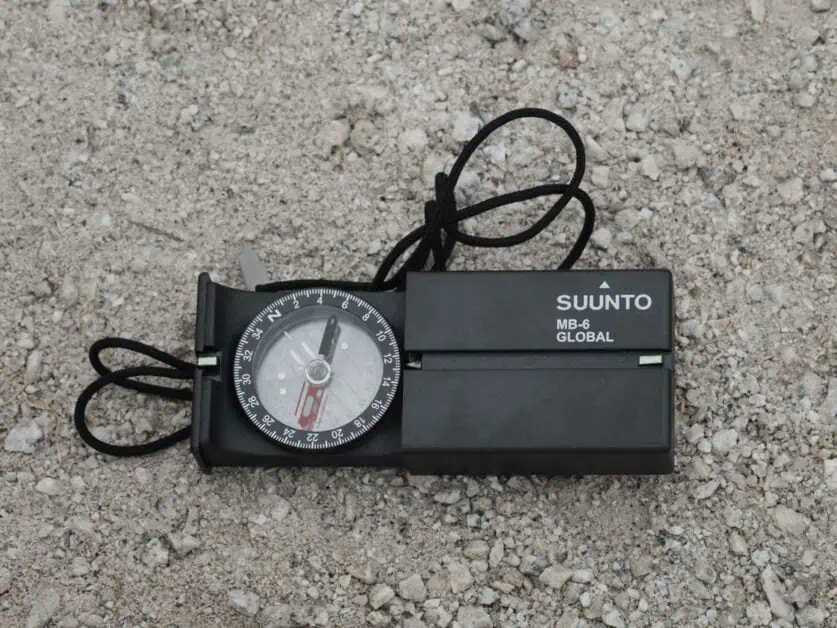
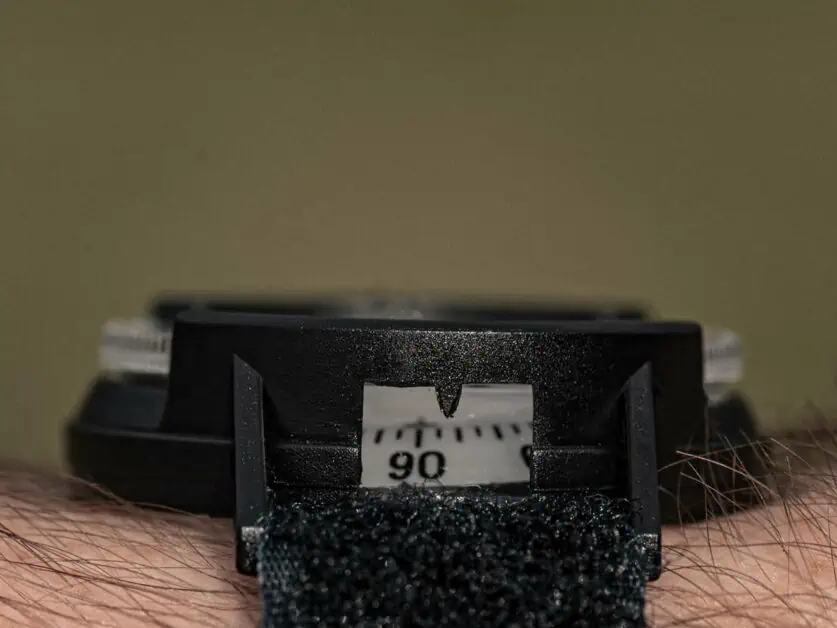
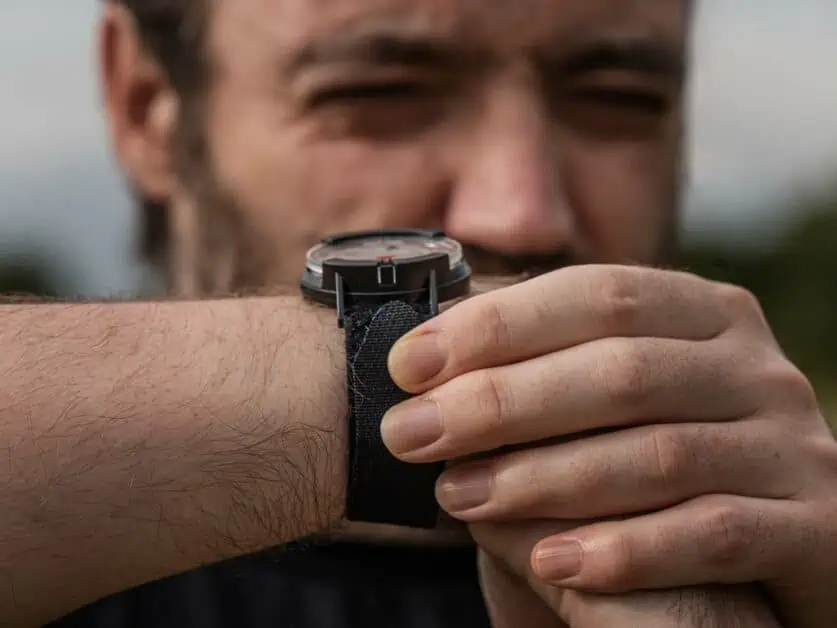
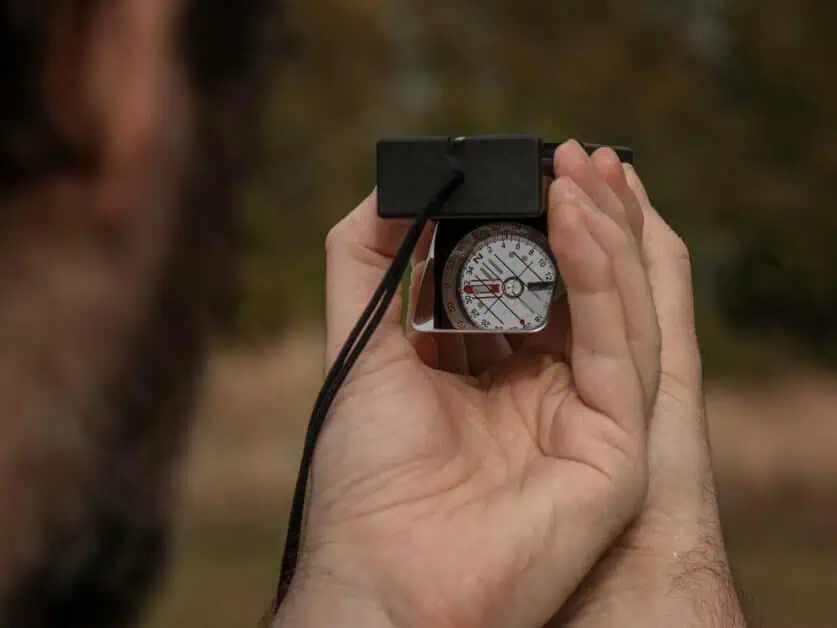
A basic, no-frills compass is a very simple thing indeed. The Suunto M-9 Wrist Compass is a great example of this kind of product, though some others are even more basic, not even featuring the wrist strap the M-9 does. A basic compass like this should ideally still have some way of reading an angular value for bearings, but don’t expect any other features like advanced sighting or map reading aids. In our opinion, basic compasses like this are not the best choice if you want to carry out involved navigation with a map and compass, but they do make for great, inexpensive and very small and lightweight backup devices for a GPS or even another compass. The wrist strap on the Suunto M-9 also means it’s a great choice if you want to regularly check your heading on the trail. A basic compass is also a great and inexpensive way to introduce younger hikers to navigation.
Button Compass
This is probably the most basic form a compass can take – it’s basically just the compass capsule on its own. These can be tiny, cost little and weigh virtually nothing. If you’re the kind of hiker who likes to keep an eye on every last gram or fraction of an ounce of equipment, these are well worth considering, but we find the design can be a bit too stripped back and a baseplate compass with a few extra features is a much more useful navigation tool – even if it does cost and weight a little more.
Thumb Compass
A Thumb Compass is a type of compass intended to be held in your hand – secured with a thumb loop. They may well be useful for people doing orienteering or cross-country running, but the slightly oddball design makes them a very specialized proposition. We don’t think they are a good choice for general hiking.
Orienteering/Baseplate Compass
We think that Baseplate Compasses – sometimes also called Orienteering compasses – are a great overall choice for general hiking and trekking. Relative to the basic compasses discussed above, you typically get a larger dial with finer marked increments on the bezel and the large flat base typically contains scales and rulers that help with tracking and plotting routes on printed maps. This type of compass is certainly bigger, heavier, bulkier and more expensive than a more basic option, but we think the added utility and accuracy they offer is more than worth any penalties here and, after all, a compass is not a large or heavy item in the grander scheme of equipment, so the extra size and weight here is unlikely to be an issue for many hikers. These compasses are generally largely transparent to help with working when placed directly over a map.
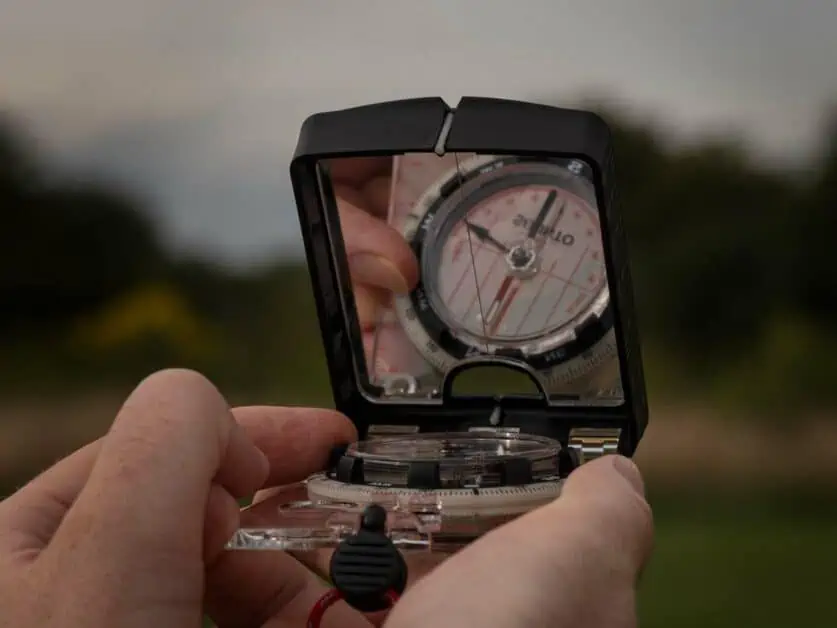
Mirror Compass
The Mirror Compass is a variant on the Baseplate Compass that adds a folding mirror to the design. This is our absolute favorite compass type for hiking and trekking – even though it adds more weight, bulk and cost to the standard baseplate compass. The folding mirror adds real utility to these compasses, allowing you to more easily and quickly take line of sight measurements. There’s a little bit of a learning curve to these compasses, but they are not difficult to work with and, once mastered, they allow for quicker and more accurate navigation relative to the other compass types discussed so far.
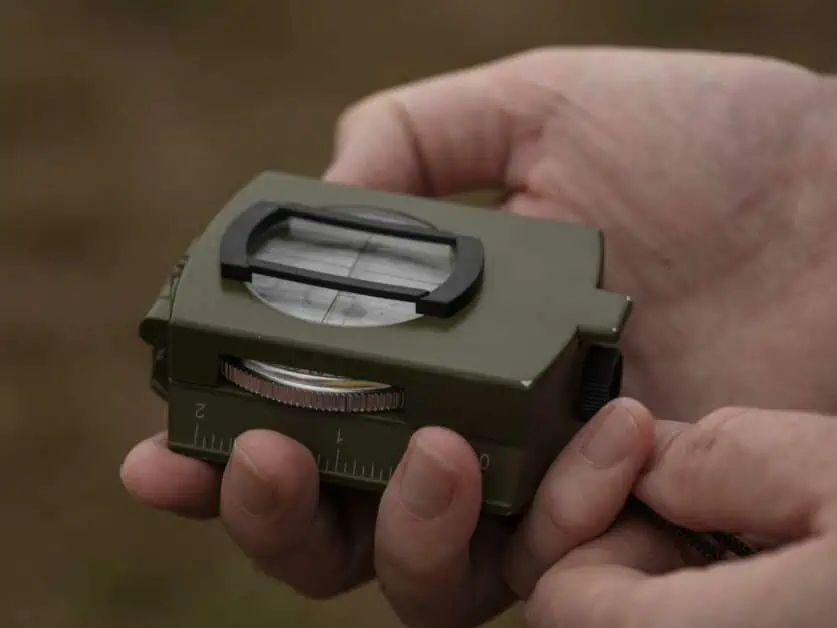
Military/Survival Compass
These compasses are more correctly called ‘Lensatic’ compasses. This compass type has been adopted as standard issue gear by militaries around the world, hence why they are often referred to as military compasses and they are understandably popular with those who have served in the military. This type of compass is often heavily ruggedised. Similar to a mirror baseplate compass, lensatic compasses have a sighting aid to help take line of sight references off features in the landscape. Some argue that lensatic compasses are more accurate in this regard, but we think either design is great for general hiking. lensatic compasses typically come with few – if any – navigation aids like scales integrated into their bases, and for this reason we personally prefer mirror baseplate compasses.
The Anatomy of a Compass
Baseplate
This feature is really only relevant to baseplate and mirror compasses (see previous sections). The baseplate is the flat ‘surround’ of the compass. It’s almost always made from tough transparent plastic – and indeed these compasses are generally very ‘see-through’. The idea is that you can lie the compass flat over a printed map whilst plotting or assessing your route and still see the map through the compass. The baseplate is often marked with various scales and navigation aids – all designed to help with your map reading. These might include distance measures matched to common map scales, rulers, or ‘Romer Scales’ which can be used to help pinpoint your position in a map’s grid squares. Other common tools on the baseplate can include magnifying lenses and even GPS accuracy indicators.
Housing
The housing is the part of the compass that contains the actual compass mechanism. It’s a circular section. At its heart is the capsule – often filled with liquid – that houses the rotating compass needle. The capsule is typically surrounded by a circular scale, divided into degrees (360 degrees equals one full turn) or, on certain compasses – generally military models – ‘mils’ or milliradians (technically, 6400 mils equals one full turn, though to confuse matters, some military compasses simplify this to 6000 mils for a full turn). Most hikers will find a degree scale more useful, though if you have military training you may well be more at home with mils. The scale is rotatable, and you use the compass by rotating the scale to match an orienting arrow with the magnetized needle to give a bearing (more on this later). On baseplate compasses, the housing is typically largely transparent, and you will likely see parallel lines marked on the face of the compass to help you accurately align the compass with the meridian lines (running from north to south) on your map.
Magnetic Needle
The magnetic needle really is the key part of the compass. It rotates on a pivot and, provided there’s no interference from other magnetic sources or large pieces of metal, will always point towards magnetic north. You start to see some of the same terminology used in watchmaking when you look at the pivot for the compass needle and it’s not unusual for compass makers to boast that their needles pivot on jewel or sapphire bearings. Jewel bearings offer consistently low friction and very long lifespans, so they are a feature that’s worth looking out for. In terms of the needle itself, some manufacturers use magnetized steel whereas others use rare earth metal magnets (like neodymium). A rare earth magnet – which is typically ‘stronger’ than a steel magnet – should, in theory, lock onto magnetic north and ‘settle’ faster. The reality is, though, that steel needles work just fine for most hiking applications, so don’t discount a compass just because it doesn’t feature a rare earth magnet.
Luminosity
We often find ourselves navigating in the dark or in failing light, so some form of luminosity – basically glow in the dark features – can be very useful on a compass. Typically, you’ll find key features in the compass housing – like the tip of the magnetized needle and the orienting arrow – marked with luminous material. Most compasses use phosphorescent paint for their luminous markings. This needs to be ‘charged up’ by exposure to daylight and will then glow for several hours after dark. Some compasses use tritium illumination. Tritium is an isotope of hydrogen, and it emits light as a consequence of its radioactive decay, so it glows constantly and no ‘charging’ is required. Radioactive decay may sound scary, but the small tritium filled capsules or vials used to illuminate some compasses (and watches too!), pose absolutely no health risk, with the weak beta particles they emit being completely blocked by the compass housing. Compasses featuring tritium illumination can also be safely carried on planes without needing to be declared. All types of luminous markings on compasses will degrade with time, but they should easily last for a decade or more on a new compass and, of course, a compass will still function perfectly well even if the luminous markings are exhausted.
Compass Comparison
Adjustability & Accuracy
The compasses we’ve asses in our round-up have manufacturer-claimed accuracy of anywhere between one and five degrees. There are a number of factors at play here including the strength of the magnet used, but also the size of the housing and the precision of the increments on its scale. It’s very easy to get fixated with precision when buying any equipment, but it’s worth bearing in mind that absolute precision is not critical for most hiking and outdoor purposes and the hiker’s ability to take an accurate bearing is far more important.
Adjustability relates to the ability to adjust your compass to compensate for magnetic declination. Magnetic declination is the difference between the position of ‘Magnetic North’ – that’s where your compass needle will point – and ‘True North’ – which is the Planet Earth’s geographic North Pole and where the north arrow on your map will point. In some parts of the world – for example in parts of the UK and slightly east of center in the US – the angle of declination is so small – under one degree – that it can safely be ignored for most purposes, but in some places, like the north west and north east of the Lower 48 of the US, it can be as much as twenty degrees (and even more in Canada and Alaska!) – so you absolutely want to compensate for it.
You can find declination data printed on maps or it can also be found for anywhere on earth online at the NOAA website or at magnetic-declination.com. Bear in mind that Earth’s magnetic north is constantly moving, so declination angles for a given place are constantly changing too. If your map is more than, say, a decade old, the declination data printed on it is likely inaccurate.
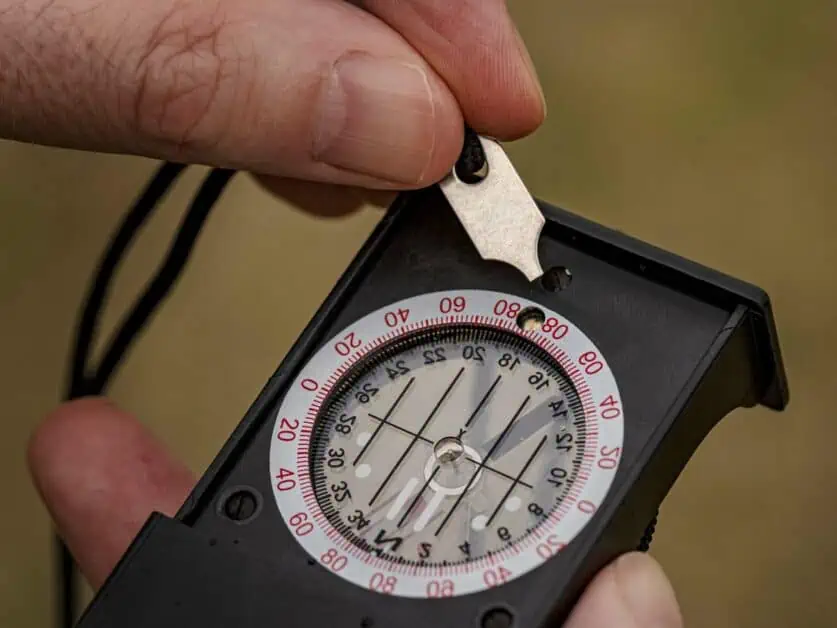
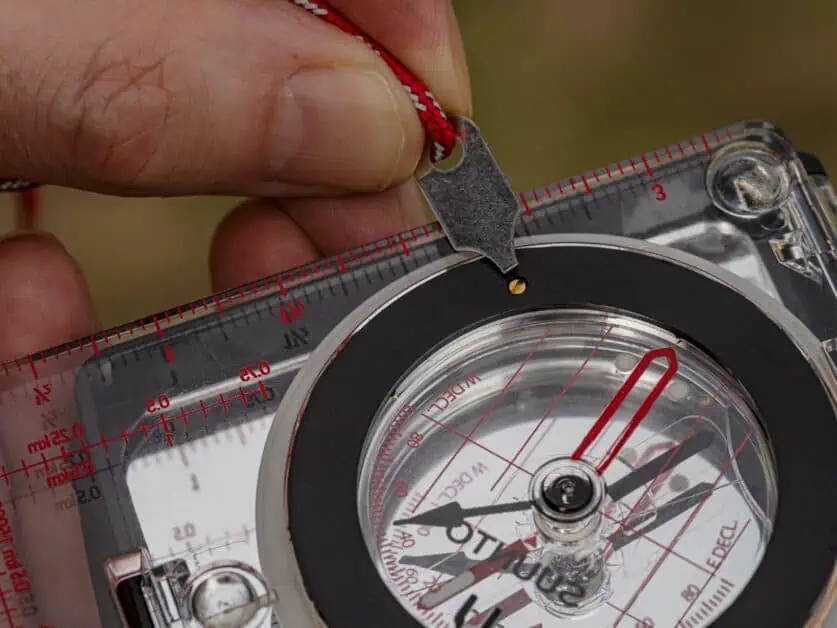
Some compasses allow for a declination value to be ‘dialed in’ – usually by adjusting the dial. Some – like Suunto compasses – include a small tool on the lanyard to do this, whilst others allow tool-free adjustment. Some – typically less expensive or more basic – compasses do not allow for declination correction. If you are using these compasses in an area with meaningful declination, you’ll need to manually compensate this into any bearings you take.
Features
A compass really just needs a single basic feature: the ability to point to magnetic north. However, look at any of the compasses in our round up and you’ll see a wealth of markings, scales, sights etc. All of these features are intended to make navigation with the compass easier and a very basic compass is much slower to work with than a more well-featured hiking compass. That said, you do need to take the time to learn how to use whatever compass it is that you purchase. Using a compass is not a skill that most of us know and, whilst it isn’t particularly difficult, it also isn’t particularly intuitive. To get the most out of your compass, it’s wort taking some time to learn how all its features work and, especially if you are using a compass as a backup to a GPS device, keeping the skills refreshed by using the compass to navigate from time to time.
Size & Weight
Size and weight are major factors to consider with all outdoor gear choices. Whilst there is a big difference between the smallest and lightest and largest and heaviest compasses we’ve assessed, at the end of the day, even the heavier compasses in our roundup are still a relatively small thing. What’s more, larger compasses typically add genuinely useful features relative to their smaller alternatives. A mirror compass is definitely larger and heavier than a regular baseplate compass, but we think the mirror makes the compass easier, quicker and more accurate to use – so we think that feature is worth the extra weight, size and cost!
Durability
Compasses are a precision instrument and ideally, they should be treated very carefully, however, in practice, they’ll be used outdoors in harsh conditions. All the compasses we’ve tested are ruggedized to some degree and can safely be used in tough conditions. Bear in mind, though, that whilst they may be tough, none of them are indestructible and a harsh knock (or being accidentally stood on), could well be enough to destroy or seriously damage them.
Ease of Use
Using a compass is not particularly difficult, but it also isn’t intuitive and, if you’ve never used one before, a well-featured baseplate or mirror compass – which is what we think most hikers will purchase – can seem bewildering with its various scales and moving parts. However, the basics of navigating using a map and compass can be learned very quickly and then it’s just a matter of taking some time in the field to perfect the skills. We think that most people these days will carry a compass as a backup to a GPS device. With this in mind, it’s likely that you won’t use your compass very often. We think it’s important to keep your map and compass skills refreshed so that should your GPS fail, you can rely on your backup skills. So, if you keep your compass as a backup, we think it’s smart to use it as your main navigation device every once in a while, just to keep the skills active.
How to Use and Take Care of a Compass
Properly using and caring for your compass are both important topics. We’ve covered some of the key points below. We’ll assume that a baseplate, orienteering or mirror compass is being used – though you could easily also use a lensatic compass for this.
Taking a Bearing
Taking bearings is the core skill in map and compass navigation and is well worth taking the time to learn and practice. Basically, a bearing is an angle relative to north. We can use a compass to read bearings from routes plotted on maps to work out which way we need to walk to get to our destination. Sighting is a technique of using your compass to determine the angle – the bearing – between where you are and an object in the landscape. A Back Bearing is the opposite of a bearing – it’s the angle from a distant object or feature to where we are. Sighting and back bearings can be used together to determine your position on a map when you don’t know where you are.
The Basics of Taking a Bearing
Let’s say you are stood on a trail. You have a map with a marked route on it and you also know where you are and where you want to go. However, you don’t know which direction to walk in to get there. You need a bearing! You start by laying the map down flat and position your compass so that its edge sits on the line connecting the two points. The direction of travel indicator should be pointing towards your destination on the map. Next, turn the bezel on the compass until the orienting arrow is aligned with the North/South grid lines – the Meridian lines – on the map. Be sure to compensate for magnetic declination here – either by adjusting your compass or by adding or subtracting the relevant number of degrees to the angular scale so the orienting arrow is no longer perfectly aligned with the meridian lines on the map. Don’t worry about the position of the magnetized needle for now.
You can then read off the compass bezel the angle your destination is at relative to north. This angle is your bearing and tells you the direction you need to travel to reach your destination. At this point, don’t touch the bezel – its position is important for the next step!
To follow the bearing, stand holding the compass in front of you and turn yourself and the compass until the magnetized needle and orienting arrow align. At this point, the direction of travel arrow (which will still align with your bearing angle from the previous step – because we didn’t touch the bezel!) is pointing in the direction we need to walk.
You can now walk in that direction and you’re on your way to your destination! You should double check that you’re still on your bearing regularly. One good tip here is not to keep your eye on the compass constantly, but rather to identify a distant object that’s in the same direction and walk towards it – pick something that won’t move like a tree, hill top or building.
Sighting
Sighting is a method of working out a bearing from an object in the landscape. You can do this with any compass, but mirror or lensatic compasses add extra features that make signing both quicker and more accurate. Basically, you hold your compass in front of you at arm’s length and align the object you want a bearing to with the sighting aid (tip: close one eye). Once aligned, you can rotate the compass bezel until the orienting arrow and magnetized needle are aligned. Now, check the bezel to read off the bearing value – remember to compensate for declination at this stage if necessary.
Taking A Back-Bearing
A back-bearing is the opposite of a bearing and it’s basically your bearing plus or minus 180 degrees. When you’ve sighted a distant object, you can calculate a back bearing and create a line on a map. You now know that your position lies somewhere on that line (providing your measurement was accurate!).
Bearings and Map Reading
If you’re lost, or just don’t know exactly where you are, you can use sighting to create back bearings from two or more features in the landscape that you can confidently identify on your map (buildings, the edge of fields, mountain tops etc.). If you mark these bearings on your map, the point where the bearing lines intersect is your location. This is called triangulation and is a very powerful tool.
Maintaining Your Compass
A compass is a piece of precision equipment that, none the less, is likely to be subject to knocks, bumps and less than perfect operating conditions in use. However, if you look after it well, a compass should still las you many long years – decades even.
Cleaning Your Compass
First of all – and this may seem obvious – but it’s worth keeping your compass clean. Most plastic and metal compasses don’t need any special products or tools to clean, but it’s worth wiping them down if they’ve been used in dusty or sandy conditions or if they have been dropped. Pay attention to any hinges or nooks and crannies. A build up of grit or sand can stop the compass bezel from turning smoothly and remember that sea spray can quickly corrode metal parts causing them to lock up.
Avoiding Magnetic Interference
The magnet is the key component of every compass and magnetic interference can make it less accurate. Modern electronic equipment emits magnetic fields and devices like digital cameras, smartphones, GPS devices and laptops can all interfere with your compass, so be sure to keep these away from your compass for the most accurate results. Metal can also interfere with your compass and that doesn’t just mean things like mountaineering equipment, but also deposits of metal in the rocks around you. If your compass is giving unexpected readings, try walking a few meters and try again. There may be a source of magnetic interference.
In extreme cases of magnetic interference, the polarity of a compass can be reversed. This means that the needle now points to the south rather than north. This is rare – we’ve never personally encountered it – but it can cause real problems. Anecdotally, the increased usage of strong magnets in consumer devices (in phones, anything with a speaker) means that reversed polarity in compasses is becoming more of an issue. It’s therefore worth being extra sure to isolate your compass from strong magnetic sources in your equipment bag.
Checking for Bubble Formation
The magnetized needle in most compasses sits in a liquid-filled capsule. The liquid helps the needle move and settle smoothly and quickly. However, small bubbles can form in this liquid – especially when the compass shas been used in extreme temperatures or at altitude. A few small bubbles are no cause for concern. They won’t impact the function of the compass and they will likely disappear once the compass is back at sea level or a more normal temperature range. However, larger, persistent bubbles can be a cause for concern as this can interfere with the needle and may be indicative of a leak in the capsule. There’s little the user can do to fix a problem like this, but most of the main manufacturers will provide a repair and replacement service for damaged devices.
Paying Attention to Wear and Tear
A compass is an important piece of safety equipment. If you are carrying it as a backup to a GPS device, then you won’t use it until you actually need it. Given that it may sit unused in your backpack for a long time, it’s worth checking it every now and then to ensure it still works as it should. With appropriate care, a compass should last many long years – a lifetime even.
Conclusion
Traditional compasses may seem like an anachronism, and we very seldom see people navigating with them on the trial these days. However, it’s still widely recommended to carry a compass and printed map as a backup – especially so when venturing far off the beaten path into unfamiliar territory. Traditional map and compass navigation are certainly skills that needs to be learned by most people, and even if you have prior experience of it, it may be many years since you last practiced it. However, we don’t think that the basics of map and compass navigation are difficult to learn, and they are skills that can genuinely add an extra layer of safety to your hikes and outdoors adventures.
Disclaimer: This article contains Affiliate Links. You won’t pay any more for buying through these links, but we may receive a commission from any purchases made through them. As an Amazon Associate, I earn from qualifying purchases. If you choose to support us by buying through our links, we thank you as it helps us to continue providing the resources we do to help you enjoy the outdoors more!