
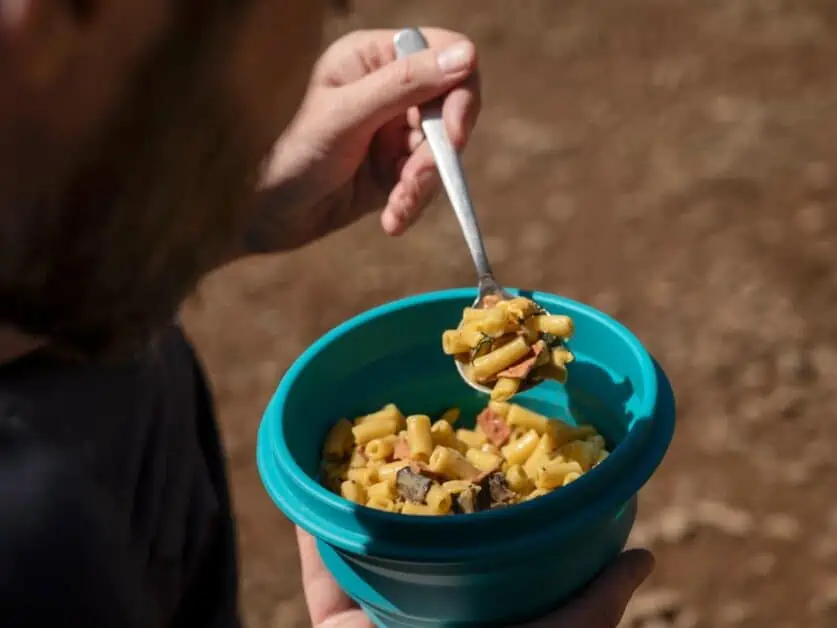
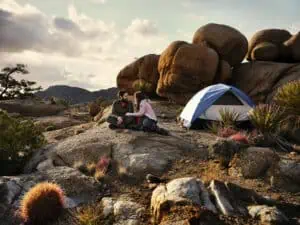
When you are trekking through nature’s vast landscapes, the food you pack can make or break your experience. A backpacking trip can take months of planning routes and equipment in every detail, but sometimes food can be an afterthought.
Backpacking food is all about striking the right balance: you need meals that are lightweight, compact, nutritious, and tasty. Because you are carrying everything on your back, every ounce matters. The goal is to refuel your body after a long day’s hike and to give you the energy to press on to the next stunning view. So, as you plan your next adventure, here are some backpacking meal ideas and food tips to consider.
Editor’s Note: This article is part of our overall guide to camping and backpacking food and nutrition. Check out our other guides:
What Nutrients Do You Need When Backpacking
We cannot emphasize the importance of planning your backpacking food in advance. No matter how fit you are, your hike will be a disaster if you don’t have the right amount and type of food with you. The food you eat has significant effects on your energy levels, overall health, and the enjoyment of your adventure. A well-thought-out menu not only fuels strenuous activities but also boosts morale when on the trail. Enjoying a satisfying meal after an exhausting day’s hike is one simple pleasure that enhances outdoor experiences.
Backpacking is a demanding activity, so you need to plan a menu. There are three main nutrients that are essential for hikers: calories, carbohydrates, and protein.
Calorie Dense
You burn lots of calories when hiking a trail carrying a heavy rucksack. How many depends on things like your body weight, how heavy your backpack is, how much of the trail is uphill or downhill, how many hours you spend walking, and what kind of terrain you are covering. You can find calculators online to make a more accurate estimate. However, the general consensus is that backpackers typically use 3,000 to 6,000 calories. That’s a lot of energy backpackers burn through! By its nature, backpacking trips involve more than one day of hiking. Therefore, it is important to look at the calorie content of the foods you plan to eat and ensure that you replace the calories you have used to have enough energy to enjoy the next day. However, this doesn’t mean you should just eat high-calorie sweets. Your body will quickly burn through the calories from refined sugars, and your energy levels will dip. You need to get your calories from complex carbohydrates to get sustained energy.
Carbohydrate Rich
Carbohydrates fuel your body in two ways. You can get immediate energy from your food, and any excess gets stored in your liver as glycogen. When you are backpacking, ideally, at least half of your energy should come from glycogen. Research has discovered that most people can store approximately 400 to 500 grams of glycogen, split between the liver and muscles. After about 3-4 hours of hiking, if you don’t eat anything, you will have used up all the readily available energy sources, and your body will have to work harder to get energy from your fat stores and muscles. You need to eat enough carbs to give your body immediate energy, but you also need extra carbohydrates to rebuild your glycogen levels. For a moderately challenging hike, a backpacker would need between 60 grams (240 calories) and 90 grams (360 calories) of carbs per hour.
High Protein
About 10 to 20 percent of your daily calorie intake should come from protein so your body doesn’t break down muscle tissue. Backpacking inevitably puts strain on muscles, and they need protein to repair the damage. On average, backpackers should aim for 1.2 to 2.2 grams of protein per kilogram of body weight daily, depending on the difficulty and duration of the trek. This range allows for the increased muscle repair and recovery needs from strenuous activity. For an average 70 kg (154 lbs) man, this works out as 84 to 154 grams of protein per day backpacking. An average 60 kg (132 lbs) woman would need 72 to 132 grams of protein during a day backpacking.
Factors to Consider When Deciding What Food to Take Backpacking
Backpacking requires more forethought than camping. Carrying everything in a rucksack on your back means you must carefully plan to ensure you have everything you need without making your load so heavy you will struggle. When it comes to food, there are lots of factors you should consider before deciding what to take.
Weight and Volume
When you are backpacking, you have limited space in your pack. There are also limits to how much weight you can carry. Backpackers talk a lot about ‘energy-to-weight ratio’ or ‘calorie per ounce’ because this is a primary concern. Here are some things you can do to reduce both the weight and volume of the food you pack.
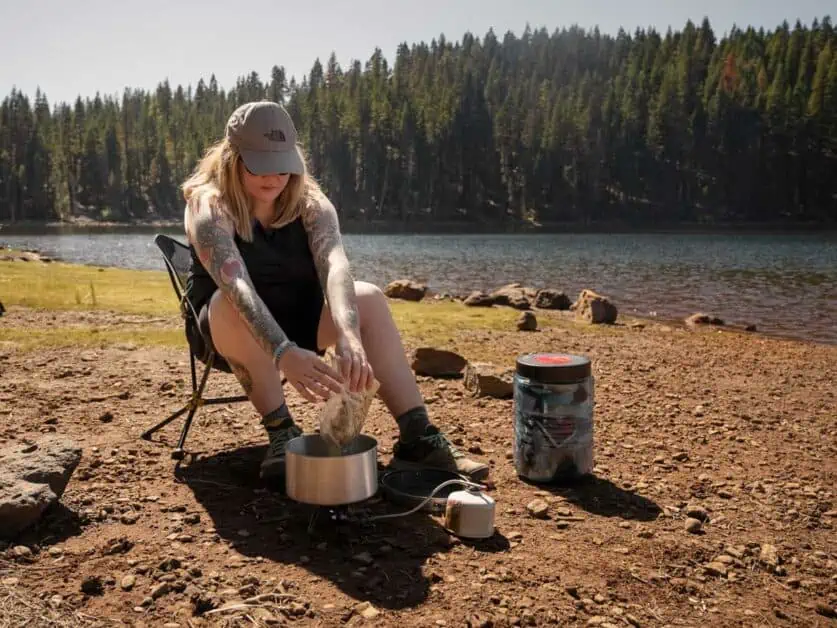
Opt for Freeze-dried or Dehydrated Meals:
Both these processes reduce the size and weight of foods. They are lightweight, and they take up minimal space. If you’re looking for suggestions for freeze-dried meals, check out our guide to the best freeze dried meals for backpackers.
Dry Your Own Food:
A food dehydrator can be used to make lightweight, personalized meals. We would recommend the Excalibur Dehydrator. This is a great way to get nutrients and know exactly what you’re putting into your body. It also allows you to bring food that have the comfort of home.
Remove Excess Packaging:
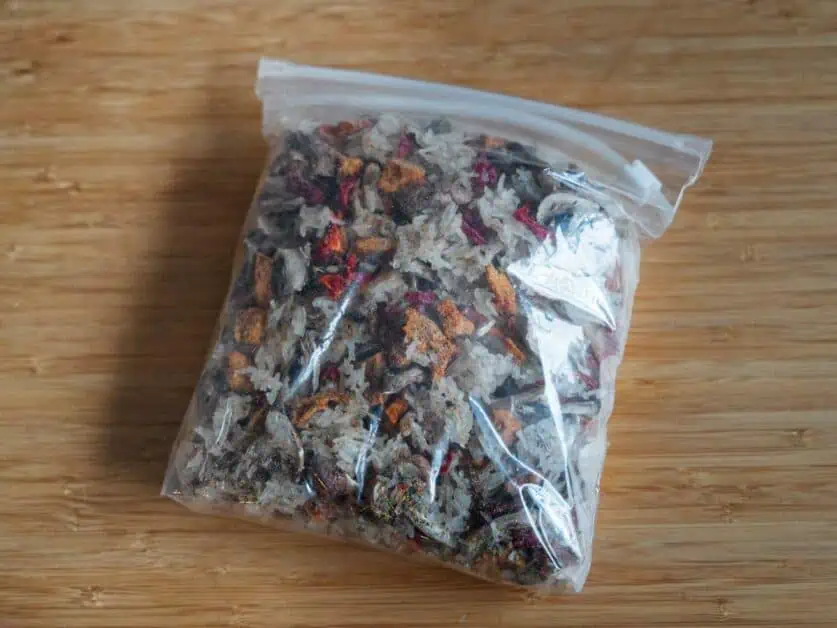
Repackage items into zip-lock bags or vacuum-sealed bags to save space. Make sure that the bags you are using are well-sealed.
Use High-calorie Foods:
Foods like nuts, seeds, and peanut butter provide a lot of energy for their weight.
Plan Meals:
Know your daily calorie and nutrient needs to avoid carrying excess food.
Avoid Canned Goods:
They’re heavy and leave you with waste to carry out.
Limit Fresh Foods:
Fresh food will give you more nutrients than freeze-dried or dehydrated food. However, it is heavier, and it will also go off. An apple or a couple of small oranges will only add a little weight. Sugar snap peas, mangetout, and green beans are lightweight and will keep for a day or two.
Powdered Drinks:
Liquids have terrible energy-to-weight ratios. Instead of carrying liquid beverages, bring powdered versions and have a way to purify the water you find along the route. It’s easy to find drinks like hot chocolate, powdered milk, and cup-a-soup in the shops.
Serving Size
You are exerting more than usual when backpacking, so you need to eat more than usual. Your serving sizes will, therefore, be larger. It is essential to bear this in mind when you are preparing your menu.
If you are using freeze-dried food pouches, you need to check how many servings one packet makes. Many of them are two servings in one packet. So, plan to share with one of your walking companions or save half of your food for another meal. If you are sharing, you will need to make sure your friend likes the flavor you have chosen. If you are saving a portion, you will need to make sure the pouch is well sealed. You also need to carefully check the pouch’s nutrition details as you may find that what they deem to be two portions you would view as one. Even worse, you may take a packet that is one portion and find that it doesn’t provide you with enough food.
Cooking Time
When you are backpacking, you want to spend as much time as possible on the trail enjoying your surroundings. You don’t want to waste time cooking and preparing food for any longer than absolutely necessary. Once you finish hiking for the day and decide to set up camp, you will be tired and likely start to stiffen up. Research suggests there is an ‘anabolic window’ after stopping walking of 30-60 minutes, which is the optimal time to enhance muscular gains and recovery through nutrition. After hiking all day, muscle fibers are damaged and glycogen stores are low. Eating protein and carbohydrates as soon as possible helps prevent further breakdown by initiating muscle protein synthesis and replenishing glycogen stores in the body.
All this means you need your backpacking evening meal to have as short a cooking time as possible. Most freeze-dried meals take around ten minutes to rehydrate, but some can take over twenty. If you are making a meal from scratch, consider if there’s any prep you can do at home to reduce the time spent cooking in camp.
Ease of Making
For similar reasons to why you want a short cooking time, you also want your meal to be simple to make. By the time you have set up camp after a day of backpacking, you will be tired, and it will very likely be starting to get dark, depending on the time of year. You don’t want to be trying to open fiddly packets or following complicated instructions.
Freeze-dried meals usually require water to rehydrate. The amount of water needed tends to be a cup or a cup and a half. In cooking, a cup is 8 fluid ounces or 240 milliliters. You will need to have a container that holds that amount, but you don’t want to waste space taking a special measuring container. The cup you drink out of could be a suitable size. If it is too big, you could mark the outside of the cup with a strip of tape at the correct height. Alternatively, take a clear sealable bag and mark on the outside of the bag the level of 8 fluid ounces with a marker pen or tape.
Taste
While you need a nutritional meal, you also want to enjoy your food. No one wants to force down tasteless mush. Adding salt and pepper can instantly enhance the flavor of a meal. Mix in some chili powder or flakes if you like a spicy kick. Another easy way to improve the taste of a meal is with dried herbs. Choose strongly flavored herbs such as oregano, cilantro (coriander), and rosemary. You can also get powdered garlic and mustard that can be used if they are flavors you enjoy.
You can buy herb and spice containers, such as mills and bags, specifically designed for backpacking. They will keep your seasonings sealed and dry in your backpack. Or you could improvise a container yourself.
Variety
You need variety in your backpacking meals. Aim for a mix of textures — soft, crunchy, crumbly, crispy. You also should try incorporating a range of flavors in a meal – salty, sour, sweet, spicy. It might not be easy to think of different meals, but before you give up and fill your backpack with mac and cheese, here are some reasons to plan a variety of meals.
Nutritional Balance:
Different foods offer a range of essential nutrients. A variety ensures backpackers get a balanced intake of vitamins, minerals, proteins, fats, and carbohydrates.
Palate Fatigue Prevention:
Repetitively eating the same flavor can lead to palate fatigue, where a person loses interest in that food. Or, to put it more simply, eating the same thing is boring, and you will view meals as a chore, not something to enjoy.
Psychological Boost:
A tasty and varied meal can uplift one’s mood. The anticipation of a favorite treat or a change in flavor can act as a morale booster during challenging stretches.
Digestive Health:
A range of foods promotes better digestion, as some foods can be constipating or overly rich, so it’s good to balance them out.
Fuel
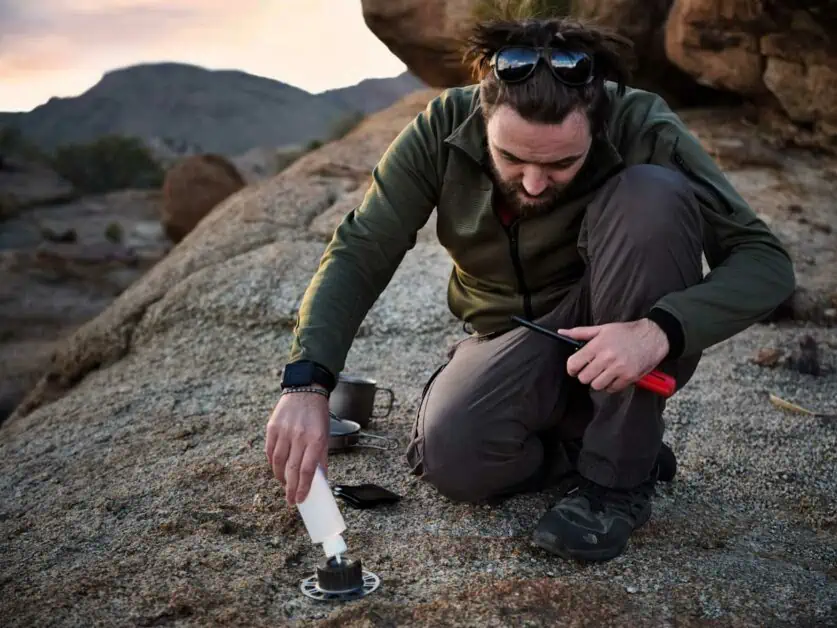
It might seem obvious that you must carry fuel to cook your meals. Most backpackers travel through the backcountry, where campfires are not allowed. No one wants to be responsible for a wildfire that destroys forests. So, you will need to carry some kind of stove and a gas canister. The less fuel you use, the less you will have to carry. Therefore, when planning your menu, try to choose meals that don’t take long to cook.
If you are planning to use freeze-dried food, check the cooking instructions. Most only need boiling water, but some require heating in a pan. The less boiling water needed to rehydrate your freeze-dried meal, the less fuel you will use.
Ease of Digestion
When considering what you would like to eat while camping, it is important to consider the effect the food you choose will have on your digestion. No one wants to try and cope with an upset stomach while hiking. While fat is a good energy source, eating too-rich food can have adverse consequences for your gut. Beans and legumes are complex carbohydrates perfect for providing sustained energy, but they might not make you a pleasant companion. This is a reason why we often go for tofu or similar as a protein source that doesn’t have the same effect.
Water Availability
Water is heavy, and it is impractical for backpackers to carry all they need. The terrain you travel through and the time of year will affect how much water is available. You will need some method to purify any water you find, whether it is filtration, chemicals, or boiling. You will, therefore, need to consider the water demands of the meals you’re planning. You must make sure you know where you will camp, how far away water is, how much water you will need for your food, and which particular days you might be cooking certain meals.
Supplements
However well you plan, you will have limited choices when making camping meals. Taking supplements to boost your nutrition while backpacking can help ensure you get all the vital micronutrients and have enough energy to enjoy your trip. A multivitamin is a simple way to do this. You may also want to consider a probiotic to improve your gut health.
Disposal
Correct disposal of trash and food remains when backpacking is vital for several reasons:
Preserve Natural Ecosystems:
Improperly discarded food can alter wildlife behavior, making them reliant on human food. It can also introduce non-native species or diseases.
Protect Wildlife:
Animals can ingest or get entangled in trash, leading to injury or death. Moreover, animals attracted to human food might become aggressive, posing a risk to future backpackers.
Aesthetic Value:
Trash diminishes the natural beauty of outdoor areas. Future visitors deserve to experience pristine environments.
Maintain Water Quality:
Food and waste can contaminate water sources, making them unsafe for both humans and wildlife.
Ethical Responsibility:
The outdoors should be respected, and it’s every backpacker’s duty to preserve these areas for future generations.
So, how do you ensure you clean up after yourself correctly when backpacking? Here are some tips:
Pack It In, Pack It Out:
Carry all trash with you. This includes scraping all food remains into a bag. Before leaving a campsite or rest area, do a thorough check to ensure nothing is left behind.
Minimize Packaged Foods:
Reducing packaging or repackaging foods can decrease the amount of waste you carry.
Use Biodegradable Soap:
If you need to wash dishes, always use biodegradable soap and do so 200 feet or more away from water sources.
Dig a Cathole:
Dig a cathole 6-8 inches deep and at least 200 feet from water sources for human waste. In some areas, you might be required to pack out human waste.
Use a Bear Canister or Bear Bag:
In areas with wildlife, specifically bear activity, store food and trash in bear-resistant containers or hang them from a tree to prevent wildlife access. If you’re not sure that the area you’ll be camping is prone to bears, be sure to check out the area you’re visiting’s website or visitor center.
Avoid Burning Trash:
Most trash doesn’t burn completely and can release harmful chemicals.
Educate Yourself:
Familiarize yourself with the regulations and recommendations of the area you’re visiting.
Price
The cost of your food has to be a consideration when you are planning what you are going to eat on the trail. Freeze-dried meals are the most convenient option, but they are not cheap. Dehydrating your food yourself is popular, but you have to consider how much the equipment will cost and if you have enough free time to prepare enough food.
Environment Impact
While it is a generalization, most backpackers are people who are concerned about the environmental impact of their activities. They choose to spend their time enjoying the backcountry, which naturally leads to a desire to preserve and protect the wilderness for future generations. So, in what way does backpacking food affect the environment?
Backpacking meals, while convenient for hikers, have environmental implications to consider:
Packaging Waste:
Many backpacking meals come in single-use packaging. Even if some are recyclable, many wilderness areas lack facilities for proper disposal.
Resource Intensive Production:
The production of freeze-dried or dehydrated meals can be energy-intensive, both in the drying process and in the initial production of the food ingredients.
Transportation Footprint:
Importing ingredients for these meals and then shipping the final products to retailers or consumers adds to the carbon footprint.
Waste in Wilderness:
Improper disposal of meal remnants or packaging by backpackers can harm natural ecosystems and wildlife.
Resource Consumption:
The manufacturing and discarding of non-recyclable packaging materials depletes natural resources and contributes to landfill waste.
Over-reliance on Processed Foods:
Some backpacking meals may prioritize long shelf life over sustainability, using ingredients that might not be environmentally friendly.
Water Usage:
The production of certain ingredients can be water-intensive. Though freeze-drying reduces weight, the initial production might have a high water footprint.
Plan Your Backpacking Meals
Planning is key to the success of any backpacking trip. As well as planning your route and deciding what equipment to take, thought must also be given to what food you will eat. Here are our top tips for planning your backpacking menu.
Make Sure You Have the Nutrients You Need
As discussed above, backpacking places different demands on your body than everyday life. You have to check you are getting the correct nutrition levels from your food. To be certain, it is worth taking some time to sit down and calculate how much you will be consuming each day. While doing sums is probably not the most enjoyable task, it is worth doing if it means you will have a fantastic backpacking trip.
As a recap, you need between 3,000 to 6,000 calories a day. Ideally, the majority would come from complex carbohydrates, eating between 60 grams (240 calories) and 90 grams (360 calories) of carbs per hour. The amount of protein needed depends on your size, but usually between 72 grams and 132 grams.
If you use freeze-dried meal pouches, they have detailed nutrition information, making it easy to know what you will be eating. If you are making your own dehydrated meals, then it takes a bit more work. There are lots of calorie calculators online that are very helpful for this. You can’t be exact, but you can ensure you are in the ballpark.
Check How Much You Can Carry
It might seem obvious, but you need to check how heavy your food will be. Backpackers always take time to weigh and organize their camping equipment and hiking clothes, but it is easy to forget to check how much weight your food will add to your load. The great thing about your food is that it will get lighter and lighter as the trip goes on. Don’t forget you will have to carry any trash and leftovers with you.
Repackaging food usually makes it lighter. Reusable zip-lock bags are great for this. Don’t take anything in a can as it is too heavy. If you are worried about food spilling and running the contents of your pack, then double-bag it. If you have anything sharp, like a knife or the end of a trekking pole, make sure there is no way it can pierce your food packages.
Freeze-dried meals and dehydrated foods are the lightest way to transport provisions. Having some fresh food is nice, but it tends to be heavier. You have to decide if carrying some is worth the extra weight.
Try At Home
Only take something to eat on a backpacking trip you have tried at home. This is a vital step that many backpackers do not take. Here are some reasons why it is so important:
You Might Not Like the Taste
It would be disastrous to be stuck trying to eat something that tastes disgusting after a long hike in the backcountry. You need the nutrition from your meal, so you will have to try and eat it, but it will not be enjoyable.
Your Body Might React Adversely
As well as the taste, you need to check how your digestion system handles the food. In everyday life, you will rarely eat freeze-dried meals and dehydrated food, so your stomach might respond poorly to the change in diet. If you are allergic to anything, ensuring you will not react to the meal is especially important.
The Recipe Might Need Adjusting
Waiting until you are in camp to find out your recipe doesn’t work is a bad idea. You want your camp cooking to be simple and straightforward, so practicing at home means you can ensure that everything you are making combines as it should. It also allows you to work out if you should take any extra seasonings. This advice also applies to freeze-dried meals. Sometimes, the amount of water or the length of soaking time needs to be adjusted. It is better to experiment with these things in the warmth and comfort of your home rather than when you are tired and hungry after a long day of hiking.
Take Extra Food
It might seem counter-intuitive when backpackers need to keep weight to a minimum to take extra food. However, all the safety advice is to take at least an extra meal. If you are backpacking for a week, then you need an extra day’s worth of food. Here are some of the reasons this advice is given:
Unexpected Delays:
Unpredictable circumstances like getting lost, bad weather, injuries, or equipment malfunctions can extend the duration of your trip, requiring additional sustenance.
Increased Energy Expenditure:
Backpacking often demands more energy than anticipated, especially when navigating challenging terrains, carrying heavy packs, or facing extreme temperatures.
Emergency Situations:
Extra food can be a lifesaver during emergencies, allowing for sustained energy and clearer decision-making during critical moments.
Morale Booster:
A little extra treat or meal can improve a challenging day. Having more food can uplift spirits and provide comfort.
Sharing with Fellow Hikers:
If you meet unprepared or distressed hikers, having spare provisions allows you to help them.
Variable Appetite:
Altitude, physical exertion, or just the thrill of being outdoors can sometimes increase one’s appetite more than expected.
Protecting Wildlife:
If they need more food, backpackers might be tempted to forage or fish in protected areas or improperly store food, attracting wildlife.
What to Eat
There are many places where backpackers can source food for meals on the trail. While it might be tempting to just opt for one type of meal for simplicity’s sake, it would be better to have a mix of different kinds of food. Not only will this help to make sure you are meeting your nutrition needs, but it will also make your mealtimes more enjoyable.
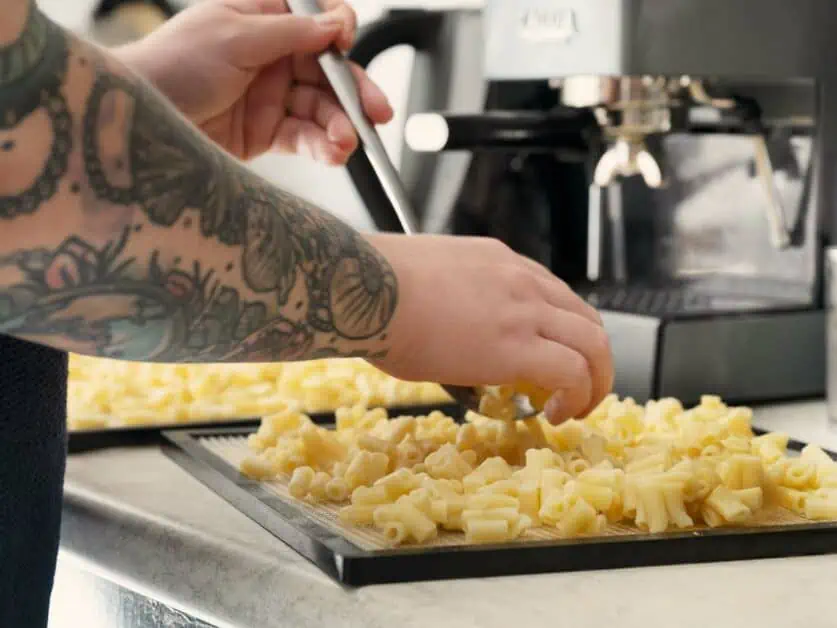
DIY Dried Food
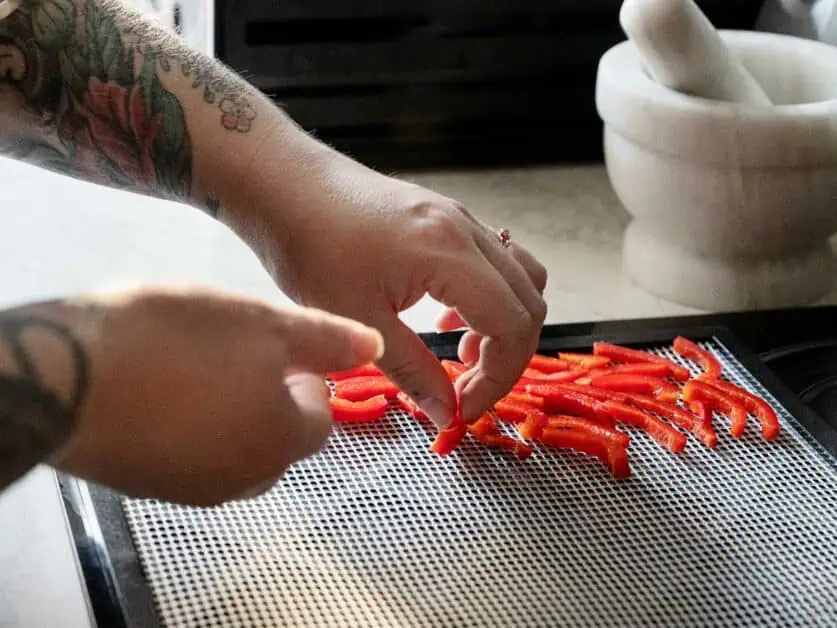
Making your own dehydrated and dried food for backpacking is much cheaper than buying it. If you go backpacking often, it is worth getting a dehydrator machine. Although you can use an oven or an air fryer, they tend to be more expensive to run than a dehydrator machine and don’t produce as good a result. We would recommend buying the Excalibur 2400 Dehydrator – it is the best we’ve tried and we’ve dehydrated countless meals with it.
Dehydrating food aims to reduce the moisture content in the food to preserve it and make it lightweight. To do this, select the fresh produce, lean protein, or whole meals you wish to dehydrate. Wash and thinly slice your chosen items, ensuring uniformity for even drying. For meat, choose lean cuts and cook them thoroughly before dehydration to ensure safety. Some vegetables and fruits, like apples, may benefit from a brief blanching or soaking in lemon juice and water to retain color and nutritional value.
Once prepared, spread the food on dehydrator trays in single layers, avoiding overlap. If you don’t have a dehydrator, you can use an oven set to its lowest temperature but note that this method is less energy-efficient, and you will need to keep checking the food. Depending on preference, allow the food to dehydrate until it’s pliable or crisp. The drying process can take several hours. Meats and proteins should feel tough and leathery when adequately dried.
After dehydration, let the food cool to room temperature. Store in airtight containers or vacuum-sealed bags, removing as much air as possible to prolong shelf life. Before your backpacking trip, you can portion out meals and combine different dried ingredients to create balanced dishes. On the trail, simply rehydrate with cold or hot water, depending on the food.
Freeze-Dried Meal Pouches
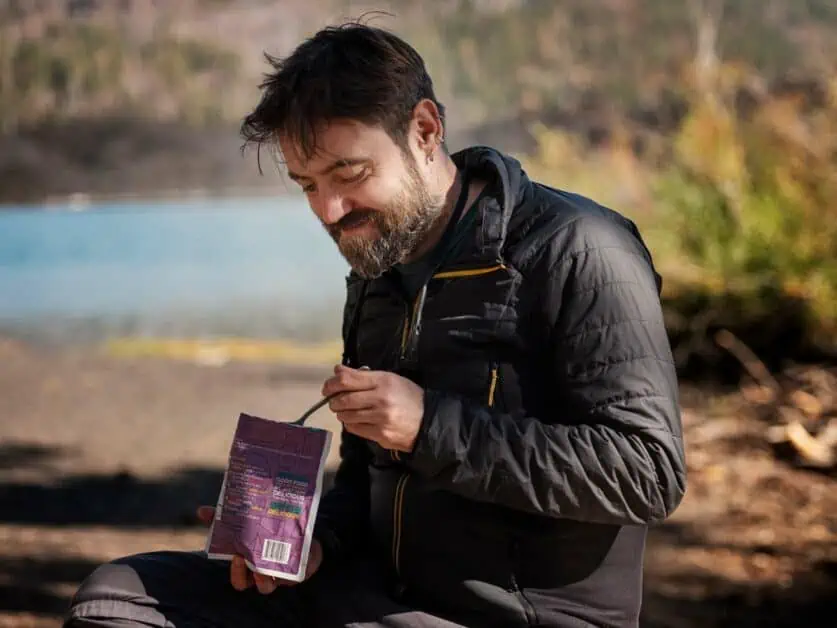
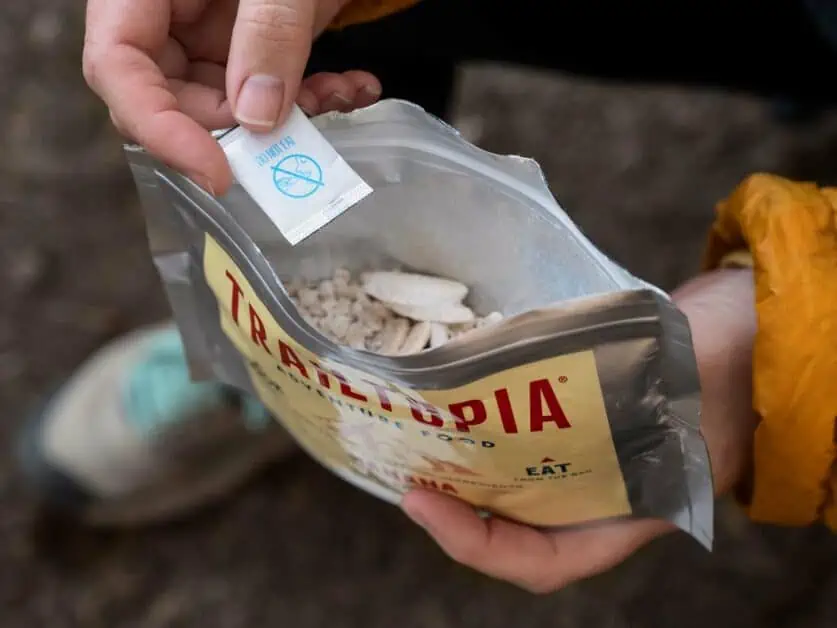
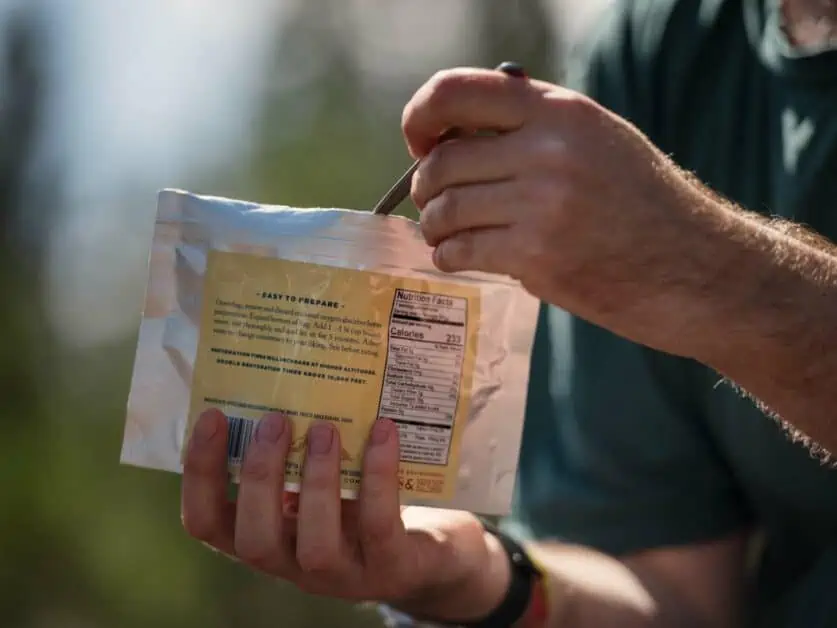
Freeze-dried meal pouches are readily available, in fact, we’ve written a whole guide on the best freeze-dried meals for backpackers. Most of them only need hot or cold water adding to the bag and then leaving to soak. Some might require being boiled in a pan with water. You need to make sure you have some way to measure the necessary amount of water accurately. Some pouches have a fill line marked on the packet, but not all, so you must check.
The design of most packages means you can eat directly from it, reducing the need to carry plates or bowls or wash up. A long-handled spoon is needed to reach the bottom of the pouch successfully. The pouches usually have a good seal, so the empty bags can be used for carrying trash. The serving sizes can vary, so check that they are not too big or too small for your appetite and nutritional needs.
Freeze-dried meals can cater for most dietary requirements. You can easily find vegetarian, vegan, and gluten-free freeze-dried meals. Vegetarian meals often have more spices and seasoning, so they taste better than regular meals—many meat-eating backpackers like to take vegetarian meals and add some meat.
The main issue with freeze-dried meals is that they can be bland and runny. It is advisable to try any meal you are taking at home before going backpacking. This allows you to adjust the taste and experiment with the amount of water and cooking time. Bear in mind that altitude affects the boiling temperature of water.
Freeze-drying food is better than dehydrating in many ways. More nutrition is retained by freeze-drying and more flavor. More types of food can be freeze-dried than dehydrated, and they have a longer shelf life. They are also quicker and simpler to rehydrate and have a less chewy texture than dehydrated food. However, they are more expensive.
Grocery Store
You can buy plenty of things in your local grocery store to take backpacking that only need water to cook. Pasta, rice, couscous, and noodles are obvious choices. Mashed potato or potato flakes and macaroni and cheese are also readily available. Instant quinoa, lentils, and beans can be found that just need water adding. Cup-a-soup, soup mixes, miso soup, and vegetable, chicken or beef bouillon also only need water adding and are lightweight. Powdered milk, creamer, oat milk and coconut milk are also handy.
Good ideas for backpacking breakfasts include instant grits or instant oatmeal, cream of wheat, rolled oats that can be soaked overnight, pancake mix, and powdered eggs. Granola bars and breakfast bars are great for a quick start to a morning. You can also get breakfast shakes and protein shakes that just need water adding.
Pita bread, bagels, and tortilla wraps are your best options for making sandwiches, as they last longer and are not as fragile as other types of bread. Spam, salmon, tuna, or chicken come in handy vacuum-sealed pouches. Cured meat such as pepperoni, summer sausage, and salami or cooked bacon are easy to transport and can be kept unrefrigerated unless you are in a hot climate. Hard cheeses such as parmesan, cheddar, or gouda can also be unrefrigerated for several days. However, you might want to grate the cheese if you plan to add it to a meal, but that might make it go off faster.
You can find many kinds of dried fruit in a grocery store and dehydrated fruit and vegetables sometimes. Peanut butter is a good energy source or any type of nut butter. Snacks for the trail can also be found. Try to choose ones that don’t have a high sugar content to give you longer-lasting energy. Bear in that chocolate might melt, and anything fragile, like chips, might disintegrate when tossed around in your backpack. Nuts and seeds are good choices, and you can buy or make your own trail mix. Fruit leather strips are not just for kids but can also be good for backpackers. And there is always the hiker’s favorite – jerky! (Which you can usually find a vegetarian and vegan alternative to now as well).
Fresh Food
Fresh food is generally heavier than the other options, but the main problem is keeping it from going off or being damaged. You can’t take anything that needs refrigeration, but some things can survive in your backpack. Carrots, spring onions, sugar snap peas, mangetout, and bell peppers last well and are not too heavy. Oranges, apples, and pears are good options and fairly robust without being too heavy. You could take tofu, boiled eggs and hard cheeses like cheddar and gouda. Your pan and bowl can be used to store more delicate items to try to protect them. You could also consider taking a small cooler – they’re lightweight and provide protection and a bit of insulation to prolong the life of your fresh food.
Drinks
Hydration is vital when you are walking, and a hot drink can warm you up quickly. Instant coffee and tea bags are lightweight and take up little room. Hot chocolate comes in individual sachets and a range of flavors. Or just add a spoonful of powdered milk or plant based oat milk, for example, and some cinnamon to some cocoa powder to make your own. You might also like hot apple cider, instant ginger tea, or matcha. There are various ways to flavor your water to keep it interesting. True Lime and True Lemon sachets are one of our favorite ways to add some flavor to our drinks. As well as flavor drops, you could add an electrolyte tablet that gives you some nutritional benefits and improves the taste simultaneously.
Alcohol
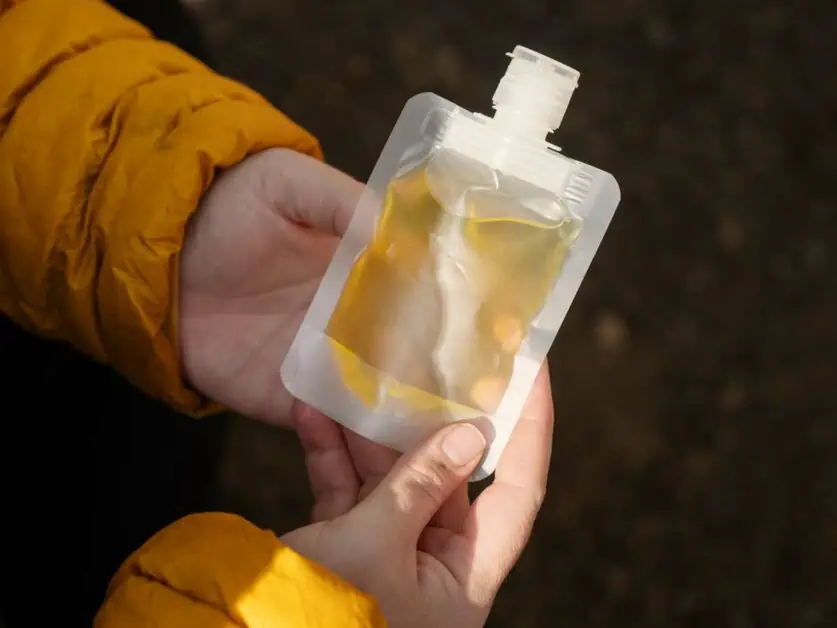
Alcohol is unnecessary on a backpacking trip as it has no nutritional benefits. However, it can be an enjoyable way to end a day. If you like spirits such as rum and whiskey, they are usually drunk in smaller quantities than wine or beer and would be a better choice. Taking a bottle is impractical, so you need to find another way to transport your tipple of choice. A hipflask is traditional but not particularly lightweight. Unsurprisingly, there are several options for transporting alcohol available online.
Ideas For Easy Backpacking Meals
Here are some of our suggestions for what to eat while backpacking. We have given the recipes as single servings, but they can easily be scaled up to feed more people.
Breakfast
If you are happy with the taste of powdered milk or a plant based alternative, then cereal and granola are easy choices for breakfast. Oatmeal is a great option, especially if you stir in some dried fruit. Eggs are another popular choice. You can use powdered eggs or try a freeze-dried meal. Don’t forget a hot drink – a coffee or cup of tea can be a great boost in the morning!
- Instant oatmeal
- Granola or cereal with powdered milk
- Powdered eggs, instant hash browns, and cooked bacon bits
- Peak Refuel Breakfast Skillet
- Mountain House Biscuits & Gravy
- Nomad Nutrition Cali Breakfast Bowl
- Breakfast or granola bars
- Bagels with peanut or almond butter
- Pop-tarts
Breakfast Recipes
These are some of our favorite breakfast recipes when we’re backpacking. All the ingredients can be found in grocery stores such as Walmart and Trader Joe’s.
Caribbean Overnight Oats
This recipe is packed full of dried fruit with a coconut, lime, and spice taste. There are lots of complex carbohydrates to give you plenty of energy at the start of your walk and tons of vitamins and micronutrients to give you a boost.
Ingredients:
- 75 grams (1/2 a cup) of rolled oats
- 12 grams (1 tablespoon) of chai seeds
- 24 grams (2 tablespoons) of flaked coconut
- 12 grams (1 tablespoon) of dried pineapple
- 12 grams (1 tablespoon) of dried bananas
- 12 grams (1 tablespoon) of dried mango
- 24 grams (2 tablespoons) of peanut butter or almond butter
- 24 grams (2 tablespoons) of powdered milk or coconut milk powder
- 4 grams (1 teaspoon) of pumpkin seeds
- 4 grams (1 teaspoon) of flaked almonds
- 2 grams (1/2 teaspoon) of cinnamon
- 2 grams (1/2 teaspoon) of nutmeg
- ½ a sachet of True Lime
- Pinch of salt
- Individual portion of honey or maple syrup
At Home:
If the dried fruit is in large chunks, chop it into smaller bits. Combine all the ingredients except the nut butter and put in a zip-lock bag. Add an individual portion of almond or peanut butter to the bag. If you can’t find individual portions to buy, place a spoonful of the nut butter on some foil. Fold over in alternate directions to form a packet. Put it in the zip-lock bag with the other ingredients and seal.
In Camp:
Before you go to bed, tip the bag’s contents into a cup or bowl. Mix in the nut butter and add half a cup of water. Cover with the zip-lock bag (we use one big enough to fit our bowl inside so we can seal it. In the morning, stir and then add the honey or maple syrup. If it is too dry, add more water. If you want it sweeter, add a spoonful of sugar to the dry ingredients.
Notes:
We use almond butter because my husband is allergic to peanuts, but any kind of nut butter will work. You may like more or less dried fruit, so experiment at home to get the right combination for you. Use less water or add more chai seeds if it is too runny. If it is too dry, reduce the amount of chai seeds and powdered milk. We found a whole sachet of True Lime was too much, but you might prefer a stronger citrus taste.
Super Oatmeal
It’s great for a cold morning, and there are plenty of carbs from the oatmeal and nuts to provide an excellent start to a hike.
Ingredients:
- 1 packet of instant oatmeal
- 12 grams (1 tablespoon) of dried tangerines
- 12 grams (1 tablespoon) of dried apricots
- 12 grams (1 tablespoon) of seedless golden raisins
- 4 grams (1 teaspoon) of sunflower seeds
- 4 grams (1 teaspoon) of flaked almonds
- 24 grams (2 tablespoons) of powdered chocolate protein shake (can also be plant based protein shake)
- 2 grams (1/2 teaspoon) of ground ginger
At Home:
Chop up the dried fruit into smaller bits if necessary. Combine all the ingredients except instant oatmeal and put in a zip-lock bag. Add an individual portion of instant oatmeal to the zip-lock bag with the other ingredients and seal.
In Camp:
Tip all the ingredients into a bowl and stir. Add the amount of boiling water the instant oatmeal packet directs and mix well. Give it a couple of minutes to cool down before eating.
Notes:
You can buy instant oatmeal with flavors added to it. Protein shakes also come in flavors other than chocolate and vanilla is a popular alternative. Experiment at home to find flavors you prefer.
Lunch
You don’t want to stop for long in the middle of the day when you are hiking, but it is a good idea to fuel your body, even if you have been snacking. You need to eat something that is easy to digest but will still give you energy. If you are organized, you can make a wrap or sandwich at the start of the day. If it is a cold day, soup is a great quick way to get some nutrition and warm up. A pack of Ramen or noodles can be made quickly, too.
- Tortilla wraps, bagels, and pitta bread.
- Jerky, cured meat, meat sticks, tofu and hard cheese
- Dehydrated hummus
- Energy or protein bars
- Instant soups
- Nut butter pouches
- Ramen or instant noodles
- From some Asian groceries, you can pick up cured packaged tofu
- Pre-packaged tuna, salmon, or chicken in oil or mayonnaise
- Nomad Nutrition Ukrainian Borscht
- Good To-Go Roasted Corn Chowder
Lunch Recipes
If you want more than just a sandwich, these recipes have been popular when we’re backpacking. All the ingredients can be found in Walmart and most grocery stores.
Couscous Salad
This requires a bit of prep in the morning, but it travels well.
Ingredients:
- 75 grams (1/2 a cup) of couscous
- 12 grams (1 tablespoon) of sundried tomatoes
- 12 grams (1 tablespoon) of sultanas
- 12 grams (1 tablespoon) of dried apricots
- 2 grams (1/2 teaspoon) of dried basil
- 2 grams (1/2 teaspoon) of dried oregano
- Salt and pepper
- 1 spring onion
- 1 or 2 pepperoni meat sticks (or other protein, such as beans, tofu or vegetarian meat)
At Home:
Chop the sun-dried tomatoes and the dried apricots into smaller pieces. Put everything into a bag apart from the spring onion and meat sticks into a zip-lock bag.
In Camp:
Boil the amount of water the couscous packet directs, then tip the contents of the zip-lock bag into the pan, stir, and take off the heat. Chop up the spring onions and protein and add them. Once the mixture has cooled and the liquid has been absorbed, put it back in the zip-lock bag and seal. Put it in your rucksack until lunchtime, and then enjoy.
Notes:
If you can get individual portions of olive oil or butter, adding some with the hot water would improve the taste. You can buy couscous with flavors added to it, such as garlic, that you might prefer. If you find it too bland, add a packet of cup-of-soup to the pan at the same time as the couscous mix.
Trail Ramen
Ramen is an easy backpacking meal, but it can always be improved. This is our version, but you may prefer other ingredients.
Ingredients:
- 1 packet of instant ramen or instant noodles
- 1 instant miso soup packet
- 75 grams (1/2 a cup) of dried porcini mushrooms
- 2 grams (1/2 teaspoon) of ground ginger
- 2 grams (1/2 teaspoon) of garlic powder
- 2 grams (1/2 teaspoon) of chilli flakes
- 2 grams (1/2 teaspoon) of cumin
- 4 mangetout or sugar snap peas
- 2 green beans
- 1 spring onion
At Home:
Put the spices in a zip-lock bag along with the mushrooms.
In Camp:
Bring the amount of water the ramen packet specifies to a boil. Add the ramen, the miso soup, and the contents of the zip-lock bag. Chop the mangetout, beans, and spring onion and add it to the ramen. Wait 5 minutes, stirring occasionally, until the noodles and mushrooms are softened and ready to eat.
Notes:
You could also add a bell pepper as they travel well. Ramen usually has a flavor packet that you might want to use if you like the taste.
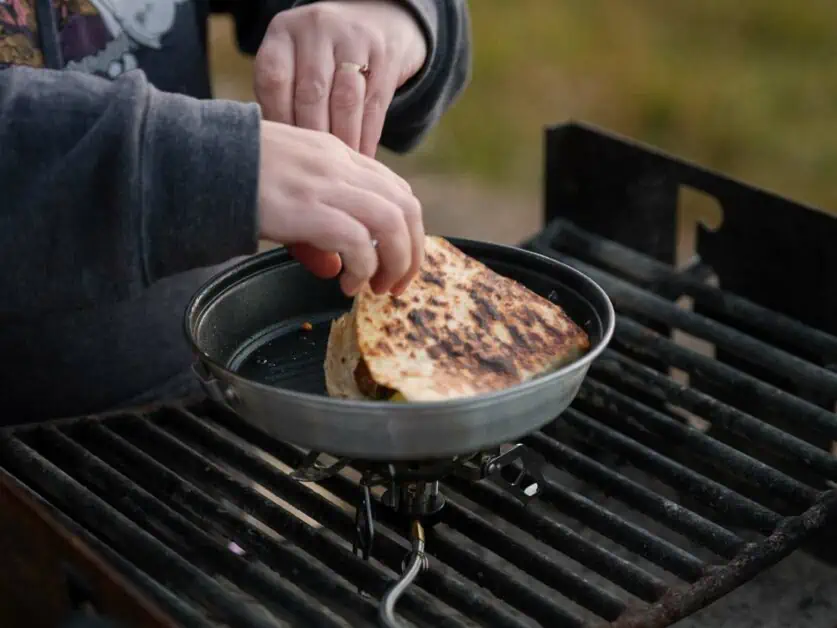
Main Meal
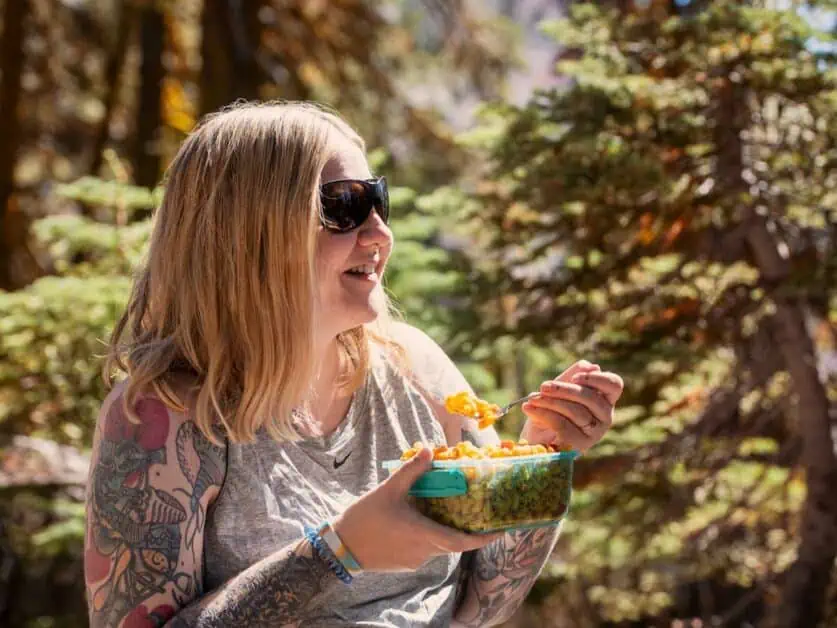
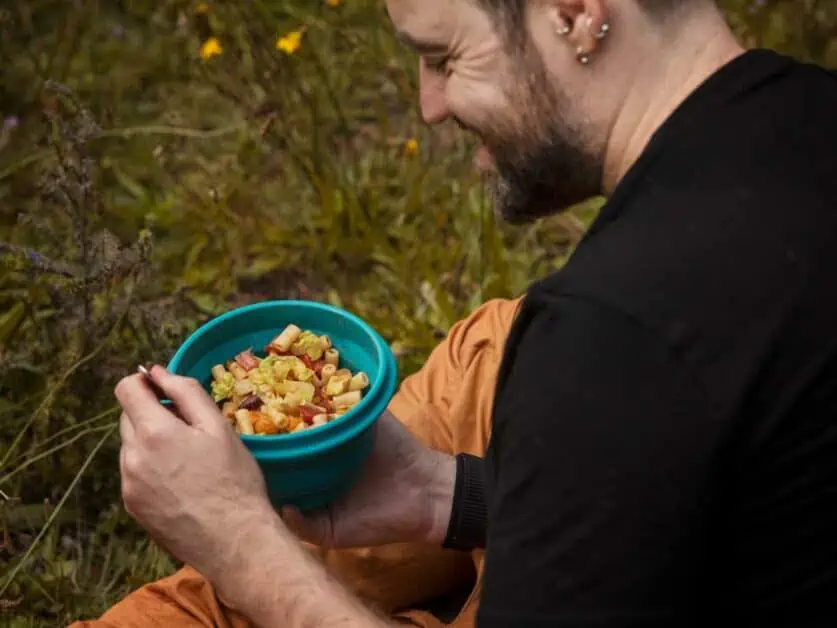
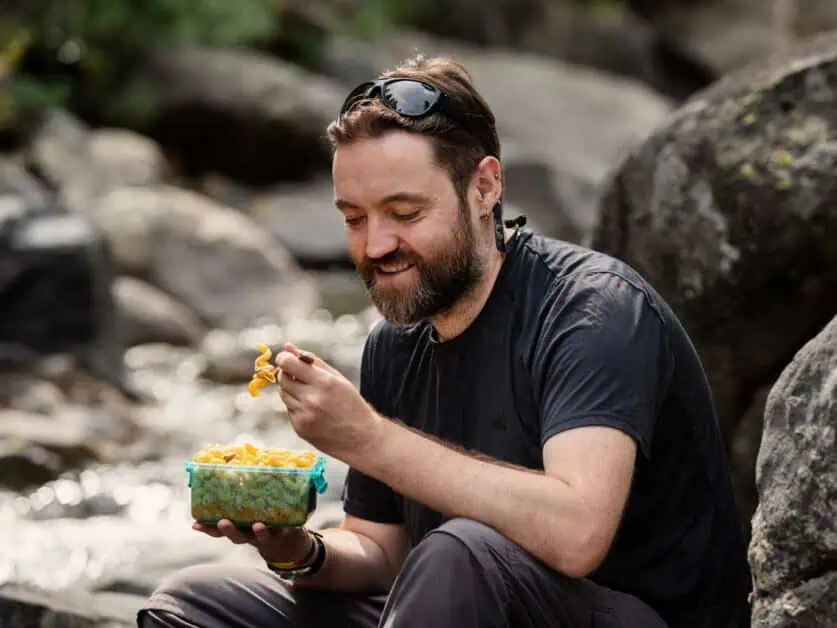
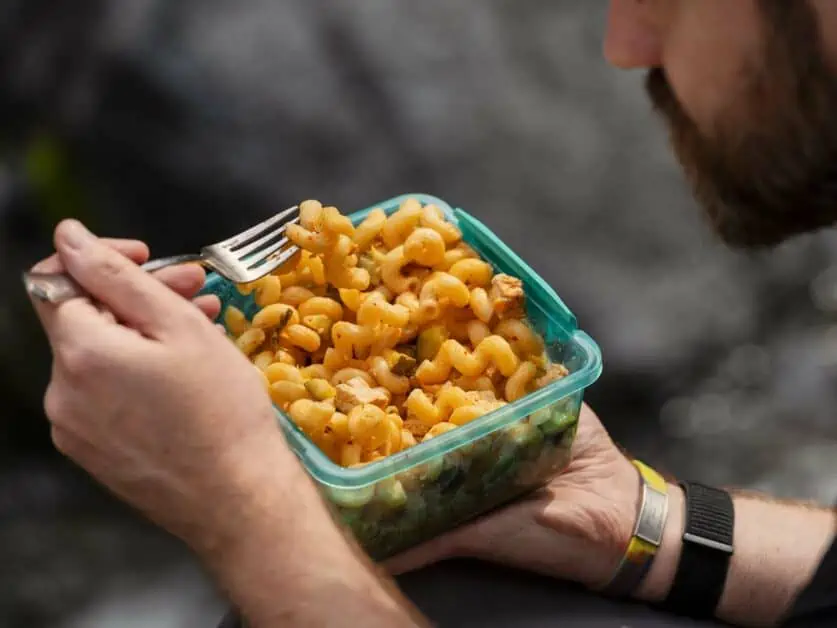
You would normally eat your main meal of the day in the evening after you have finished walking. Having a big dinner in the middle of your hike would not be good for your digestion or energy levels. Freeze-dried pouches are popular for a main meal when backpacking as they are quick and easy to make. If you prefer to make your own meals, you can find many lightweight options in a grocery store. Using packets of instant potato, rice, lentils, and quinoa is a simple way to increase the carbs in a freeze-dried meal or as the basis of a meal. You will need a protein source such as packets of tuna or salmon, jerky or meat sticks, tofu, vegetarian meats, beans, or legumes.
- Pasta and Sauce
- Instant Rice Risotto
- Quinoa Bowl
- Chicken and Rice Curry
- Lentil Soup
- Thai Peanut Noodles
- Instant Mashed Potatoes
- Instant Mac and Cheese
- Tuna or Salmon Pasta Salad
- Beef Stroganoff
- Moroccan Couscous
- Asian Rice Bowl
- Nomad Nutritions Vegan Irish Sherpherd’s Pie
- Peak Refuel Sweet Pork and Rice
- Mountain House Beef Stroganoff
- AlpineAire Foods Pork Jambalaya
- Nomad Nutrition Vegan Caribbean Curry
- Good To-Go Thai Curry
Main Meal Recipes
These are some of our favorite meals to eat at the end of a day’s backpacking. These use ingredients that can easily be found in grocery stores like Walmart and Trader Joe’s.
Mega Mashed Potato
A firm favorite. It’s quick and easy to make and very filling.
Ingredients
- 1 portion of instant mashed potato
- 75 grams (1/2 a cup) of grated cheese
- 74 grams (1 pouch) of tuna in oil
- 1 small tin of sweetcorn
At Home:
Take the sweetcorn out of the tin and put it in a zip-lock bag. If you don’t want to take a grater with you, you need to grate cheese and put it in a separate zip-lock bag.
In Camp:
Boil the amount of water required for the mashed potato and add the potato flakes. Stir in the cheese, tuna, and sweetcorn.
Notes:
We like to use mozzarella, but gouda and cheddar can also be used.
Salmon Pasta
This is a creamy pasta with plenty of salmon to provide lots of carbs and protein.
Ingredients:
- 74 grams (1 pouch) of salmon in oil.
- 100 grams of dried pasta (small pieces such as macaroni or farfalle)
- 60 grams (5 tablespoons) of powdered milk
- 1 pack of Alfredo Sauce mix
- 12 grams (1 tablespoon) of sundried tomatoes
- 12 grams (1 tablespoon) of parmesan
- 1 spring onion
- 2 grams (1/2 teaspoon) of garlic powder
- 2 grams (1/2 teaspoon) of chilli flakes
- 2 grams (1/2 teaspoon) of dried basil
- 2 grams (1/2 teaspoon) of dried oregano
- 2 grams (1/2 teaspoon) of black pepper
At Home:
Put the pasta in a zip-lock bag. Put the Alfredo Sauce mix, parmesan, powdered milk, garlic, chili, pepper, and herbs in a separate zip-lock bag. Chop the sundried tomatoes into small pieces and put them in a separate zip-lock bag.
In Camp:
Boil water, add the pasta and cook. Tip the cooked pasta into a bowl and pour the pasta water into a cup. Tip the bag of sauce mix, powdered milk, and seasoning in the pan. Slowly add half a cup of cold water, stirring constantly to make sure there are no lumps. Next, add the cup of hot pasta water and bring to the boil. Boil for a couple of minutes until thickened. Add the cooked pasta, salmon, and tomatoes. Stir well and heat for a minute, then it’s ready to eat.
Notes:
If you don’t like salmon, you could use cooked bacon bits. If you don’t like the chili, you can leave it out; if you like it spicy, you can double the amount. You could also take some pine nuts to sprinkle on top. If you like citrus, you could add some True Lemon, but make sure you do this to taste as you may find yourself using only half a packet.
Desserts
A little bit of sweetness at the end of the day is the perfect way to unwind. Choosing sensible desserts that provide some complex carbs and protein, as well as sweetness, will help you meet your nutrition needs. You must ensure that what you take for dessert is shelf-stable and can handle being jostled around in a backpack. Also, if you are taking anything with chocolate, consider the temperatures in the area you will be walking in and if it will melt.
Some freeze-dried breakfast meals could be repurposed for dessert. Some of the snack food can also be used for dessert. Flapjack or granola bars can be broken up and stirred into instant pudding mix with some dried fruit to make a satisfying dessert.
- Tortilla Wraps with Nut Butter
- Instant Pudding Mix
- Chocolate Crepes with Nutella
- Hot Chocolate with Mini Marshmallows
- S’mores
- Peak Refuel Peach Cobbler
- AlpineAire Foods Cinnamon Apple Crisp
- Backpacker’s Pantry Blueberry Peach Crisp
- Trailtopia Rocky Road Chocolate Pudding
Dessert Recipe
There are not a lot of homemade recipes that are practical to take backpacking, but these are some of our favorites when we want a bit of sweetness at the end of the day. These use ingredients that can easily be found in grocery stores like Walmart.
Mocha Rice Pudding
- Rice provides plenty of carbohydrates, while chocolate and caramel provide the sweetness.
- Ingredients:
- 75 grams (1/2 a cup) of instant rice
- 28 grams (1 serving) of chocolate pudding mix
- 60 grams (5 tablespoons) of powdered milk or plant based milk
- 12 grams (1 tablespoon) of instant coffee
- 6 grams (1/2 tablespoon) of chopped walnuts
- 6 grams (1/2 tablespoon) of caramel cubes
- 4 grams (1 teaspoon) of cocoa powder
- 2 grams (1/2 teaspoon) ground cinnamon
- 2 grams (1/2 teaspoon) ground nutmeg
At Home:
Put the rice in a zip-lock bag and seal. Put the rest of the ingredients in another zip-lock bag.
In Camp:
Boil half a cup of water. Add the rice and take off the heat, cover and leave for 5 minutes. Meanwhile, shake the other bag to make sure all the ingredients are well mixed. Tip into a bowl and slowly add half a cup of water while whisking with a fork. Whisk with a fork vigorously for several minutes until it thickens. Add the rice and mix together.
Notes:
Add the water slowly to make sure there are no lumps. This is one to experiment with at home to adjust the amount of water if it is too runny or stiff. If you plan on eating this in the evening, consider using decaffeinated coffee. We love coffee and chocolate, but you could adapt this using banana pudding mix and coconut milk powder, leaving out the coffee and cocoa powder, and adding some dried banana and coconut flakes.
Snacks
Ideally, a backpacker needs 60 grams (240 calories) and 90 grams (360 calories) of carbs per hour. This means that you need to pack snacks. It is nice to have a mix between sweet and savory. Sucking mints and boiled sweets may be tasty, but they don’t give you much in the way of nutrition. Try to have some complex carbohydrates with your sweet snacks to provide longer-lasting energy. Crackers and chips (crisps) are an option if you have somewhere safe to pack them; otherwise, they can disintegrate into crumbs.
- Granola Bars
- Trail Mix
- Nuts and Seeds
- Liquorice
- Marshmallows
- Yoghurt Covered Raisins
- Babybels
- Meat Sticks
- Popcorn
- Wasabi Peas
- Crackers
- Dried Fruit
- Fruit Leather Strips
- Jerky
- Crackers
- Candy
- Peak Refuel Chocolate Fudge Brownie Bites
- Heather’s Choice Packaroons
- Mountain House Mint Chocolate Chip Ice Cream Sandwich
- Backpacker’s Pantry Astronaut Neapolitan Ice Cream Sandwich
Snack Recipe
There are few homemade recipes that can be taken backpacking. While it might be nice to have a slice of cake or a piece of brownie, carrying them in a backpack without them getting squashed into crumbs can be problematic.
Orange and Ginger Flapjack
Flapjack is a perennial favorite for hikers. This version has an orange and ginger kick that we love.
Ingredients:
- 200 grams of jumbo rolled oats
- 100 millilitres of golden syrup
- 60 grams of butter or margarine to make plant based
- 60 grams of almond butter
- 1 orange
- 100 grams of dark chocolate
- 12 grams (1 tablespoon) of candied diced orange peel
- 12 grams (1 tablespoon of diced crystallized ginger
- 2 grams (1/2 teaspoon) ground ginger
At Home:
Heat oven to 200C/180C fan/gas 6 and line a 25 x 18cm baking tin with baking parchment. Zest and juice the orange. Roughly chop the chocolate. Melt the butter or margarine in a small pan with the sugar and syrup. Once melted, remove from the heat and cool for a couple of minutes. Add the orange juice and zest. Put the oats, half the chocolate, and all the other ingredients in a bowl, add the contents of the pan, and mix well. Tip it into the prepared tin and distribute the rest of the chocolate into the mixture, using your finger to push it under the surface. Press down gently with the back of a spoon to make an even layer. Bake for 15-20 mins, until golden. Cut into squares and let it cool in the tin for about half an hour. Lift out and separate the squares and leave to finish cooling. Once cool, wrap individual pieces in cling film or greaseproof paper and pack in your backpack.
In Camp:
Enjoy with a hot chocolate or a shot of whisky.
Notes:
The almond butter adds protein and a pleasant, nutty taste. You could also look at adding peanut butter or any other nut butter. Or you can just use regular butter for the whole amount. Add a teaspoon of orange essence if you want a stronger orange flavor. You could also mix some chopped fresh orange and stem ginger pieces.
Equipment for Making Backpacking Meals
You will need to take cooking equipment, but plenty of lightweight options are available. Fuel will probably be your heaviest piece of kit, so it is worth looking for fuel-efficient stoves. You will need a pan to boil water and cook. It’s possible to make do with one pan and use a foil sheet for a lid. It’s also a good idea if you love a good cup of coffee in the morning to take a coffee filter. We’ve tried not using a filter, but it is easier to clean up if you use one. These are the essentials we take backpacking:
- Lightweight stove
- Gas Canister
- Pan
- Bowl
- Long Handled Spoon or Spork
- Sharp Knife
- Fork
- Non-Scratch Scrub Sponge
- Bags for Trash
- Biodegradable Liquid Dish Soap
- Coffee Dripper
- Foil
- Zip-lock bags
Enjoy Backpacking and Hiking with the Best Food
Choosing the right food for your backpacking adventure can make a world of difference. Whether you opt for dehydrated meals, DIY trail mixes, or lightweight energy bars, the key is to balance nutrition, taste, and weight. By picking foods that are high in energy, easy to prepare, and lightweight, you’ll fuel your journey effectively without weighing down your backpack. We hope some of the tips and advice in this article help you plan your food for your next hike.
Disclaimer: This article contains Affiliate Links. You won’t pay any more for buying through these links, but we may receive a commission from any purchases made through them. As an Amazon Associate, I earn from qualifying purchases. If you choose to support us by buying through our links, we thank you as it helps us to continue providing the resources we do to help you enjoy the outdoors more!