The choice of food to take hiking and what you eat on the trail is vitally important. Hiking and trekking can be very physically demanding activities and it’s important that we keep ourselves adequately fueled during these activities – especially so as they get more physically demanding. You might have heard of ‘The Bonk’ – and probably most people will have experienced it at some point too. This is what happens when you experience a total energy crash, and you feel like you just can’t go on. It’s not a pleasant experience and can cause real problems if you ‘Bonk’ far from home. We need to make sure we eat enough calories during an activity to avoid the dreaded ‘Bonk’!
Aside from this practical purpose, food has a major psychological part to play in hiking too: looking forward to a good meal or a tasty snack can give you the incentive you need to push through the last difficult section of a route or a give a group a positive end to a long day. Many hiking food guides focus on fueling only and this can be far from appetizing. We don’t think it needs to be like this, though, and we think that’s it’s perfectly possible to enjoy great hiking food on the trail. Read on for our top tips, suggestions and, of course, some easy camping dinner ideas and recipes.
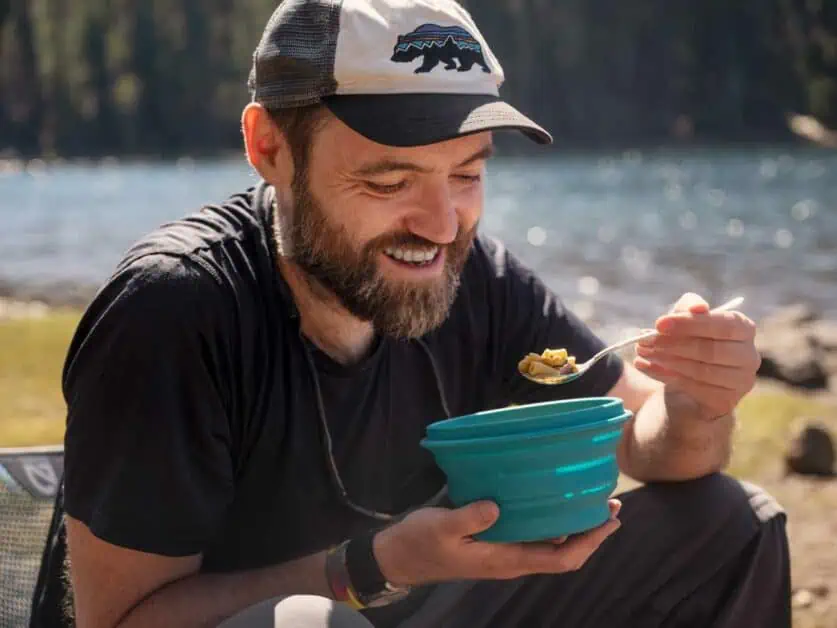
Editor’s Note: This article is part of our overall guide to camping and backpacking food and nutrition. Check out our other guides:
Backpacking Food Ideas
Many guides to backpacking foods seem to focus on planning meals for longer trips or hikes. They’ll focus on preparing hiking meals that’ll last for a very long time and pack in the greatest nutrition to weight ratio. This is a fantastic approach if you’re planning a longer trip, but for shorter hikes – where you might just be out for a day or spending a night or two on the trail – then it’s possible to take a more flexible approach and exchange absolute longevity, lightness or nutritional density of your food for more varied flavors and a bit more ‘excitement’. Dehydrated food plays a large part in many backpacking meal ideas and whilst it’s often a great choice for the trail, it’s not the be-all of camp recipes and pre-prepared or fresh ingredients can add some real variety to your camping dinner ideas.
On long day hikes or multi-day adventures, a hot meal can have a really positive psychological impact. Small camping stoves are the obvious way to warm up meals on the trail – we prefer stoves that run on cheap and readily available propane/butane mix gas cylinders as they heat up quickly, have controllable heat and are small and lightweight items to carry – for example the MSR WindBurner or SOTO Amicus. However, for day hikes, an insulated food container, like this one from Hydro Flask (available in a variety of sizes and colors) makes a great alternative. These can keep food hot for many hours and they have the added bonus that no trail food prep is required. To get the best out of an insulated food jar, fill it with boiling or very hot tap water and seal the lid. Let it stand for a few minutes to pre-heat, then empty it out and dry it (if necessary) just before you add your hot food to it. You can also ‘pre-cool’ insulated food jars with ice cubes or iced water and used them to transport fresh salad ingredients on hot summer days.
Backpacking food should be energy-rich and it should taste good too. But it should also be robust enough to survive without breaking apart if it’s being bumped around in a storage box, or without going bad if you’re hiking in very hot conditions. Pay attention to how you pack your food: A sandwich packed in an oversized lunchbox will likely disintegrate before you get to eat it if you have a vigorous morning of hiking. It’s worth packing smaller snacks or even paper towels around loose items in lunch boxes to help prevent this. Salads – especially fresh lettuce and sliced tomato – and sauces like mayonnaise can become very unappetizing and at worst even go bad in hot weather too, so be aware of how the weather might impact the food you bring along.
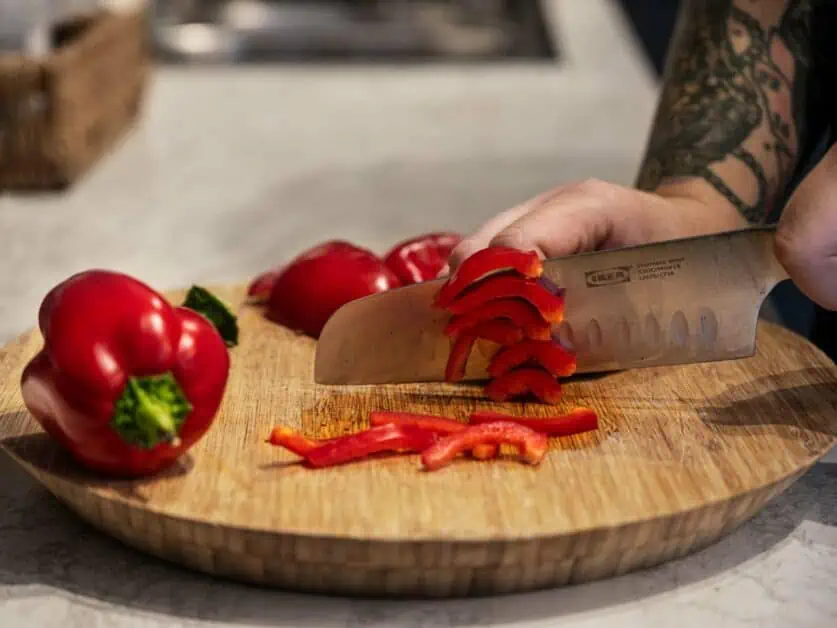
Easy DIY Backpacking Meals
The best backpacking food is something that’s both nutritious and enjoyable. We’ve put together a list of some of our favorite, go-to, backpacking meals below. Versatility is the key with all of these hiking meals and dehydrator recipes. These easy camping recipes really are a starting point that you can easily adapt to suit the ingredients you have or your personal taste. Every one of these hiking meals is either fully plant-based, or very easily adaptable to be plant-based. However, if you love meat, then all of these easy camping recipes can be easily adapted accordingly. The backpacking recipes below are best suited for day hikes or shorter overnight adventures. These dishes feature fresh ingredients so there’s a good chance they could spoil if you carried them for several days on a longer backpacking trip. For longer outdoors adventures, dehydrated foods are a better choice and there’s a whole section on food dehydrator recipes and meals suited to longer adventures further into this article.
Trail Burrito
Who doesn’t love a burrito? This is one of our favorite backpacking recipes for day hikes or overnight camping trips. The beauty of this simple camping meal is how versatile it is. You can make every element from scratch or, as done here, use store-bought pre-prepared ingredients if you’re short on time. This burrito is also infinitely customizable and it’s a great dish to include leftovers in – or really any flavors that take your fancy!
Shopping List (serves two)
- 2x Large soft flour tortillas – allow one per person.
- One 250g/9oz packet instant microwave rice (or cook from dry) – brown rice works great.
- Protein of choice. Chicken pieces, plant-based chicken style pieces, fried tofu or tempeh all work great.
- Grated cheese of choice – can substitute for plant-based cheese if required.
- Guacamole – either pre-made or make it from scratch. If making from scratch, be sure to add a good squeeze of lime or lemon juice to help prevent discoloration.
- Salsa or Hot Sauce to taste.
- Salt and pepper to season.
- Vegetable oil for frying.
- Aluminum foil to wrap.
Method
- Cook the packet rice according to instructions. Set aside.
- Cook the protein to taste – we prefer frying in a little oil until starting to turn golden brown. Set aside.
- Assemble the burritos on a flat surface. Start with the flat tortilla wrap (very lightly moisten and briefly heat it in a microwave if it isn’t pliable). Spoon in half the rice, then add the protein, grated cheese, a generous spoonful of guacamole and salsa or hot sauce to taste. Season as you wish. You want the burrito to be generously filled, but don’t over-fill it as it makes it difficult to roll.
- Roll or fold the burrito. This is an artform! If you haven’t done it before, it can be a bit tricky at first, but it’s an easy skill to master.
- This next step is optional. Heat up a very small amount of oil in a large flat pan and fry the rolled burritos on each side until they start to crisp up. The helps the burrito keep its shape and is a useful step if it will be bounced around in a lunchbox for several hours.
- Tightly wrap the burrito individually in aluminum foil to further help them keep their shape.
Tips
Burritos are a tremendously versatile dish and you can really add whatever you want to them. Roasted potatoes, fried or roasted vegetables, even mac and cheese all work as burrito fillings! As such this is a great recipe to use up leftovers in. We’d often add fresh salad ingredients to burritos if we’re making them at home, but we tend to avoid these if we’re taking them on a hike as they go mushy in warm weather. This dish can be prepared and boxed up the night before a hike to be eaten cold on the trail.
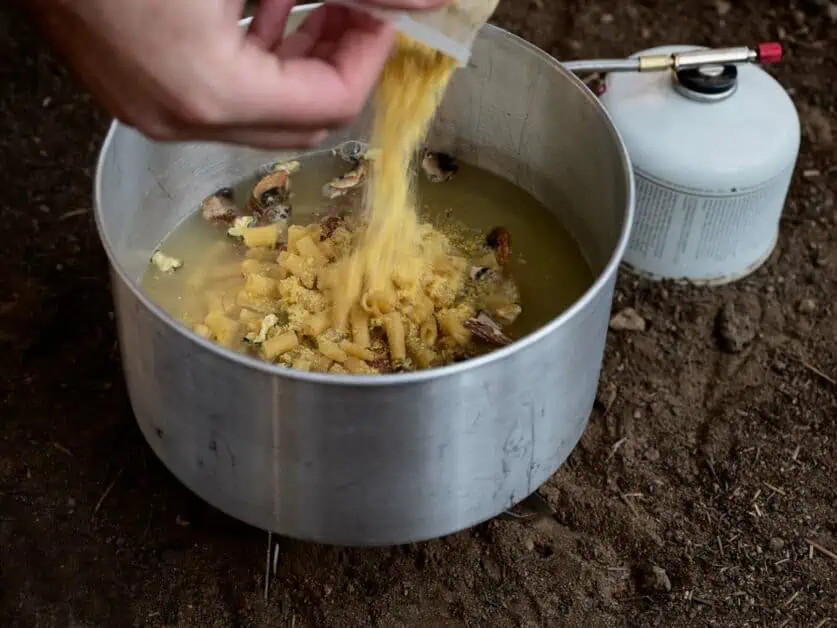
Brown Rice Soup with Chicken, Mushrooms and Kale
If you’re looking for a good food idea, this is it! This delicious rice soup is packed with flavor and nutrition. Prepare it and pack it into an insulated food jar for a quick hearty and warming complete meal on the trail. This easy camp meal is a great choice for day hikes in colder weather and would also be well-suited to bring along on an overnight camping or backpacking trip.
Shopping List (serves two)
- Diced Chicken – quantity to taste – plant-based chicken style pieces also work great.
- One 250g/9oz packet instant microwave rice (or cook from dry) – we prefer brown rice.
- One large handful of fresh kale leaves – remove any tough stems.
- Mushrooms to taste – regular button mushrooms work great, but fresh or rehydrated dried shitake mushroom or fresh oyster or enoki mushrooms add extra flavor.
- 600ml/1pint of boiling water.
- 1 tbsp miso paste.
- 1 tsp low salt soy sauce.
- 1/2 tsp low salt stock powder.
- Oil for frying.
- Chili or hot sauce to taste (optional).
Method
- Cook the microware rice according to instructions. Set aside.
- Fry the chicken pieces in a little oil in a deep pan until fully cooked and golden.
- Add in the mushrooms and continue to fry until cooked.
- In a jug gradually add the miso paste, soy sauce, stock powder and chili or hot sauce to the boiling water and stir to combine to make the soup. Add the ingredients a bit at a time and check the flavor as you go – you don’t want this to become too salty.
- Pour this soup mix into the pan and adjust the heat to a gentle simmer.
- Add the kale and cook until it’s reached the desired texture (it should still have some ‘bite’).
- Mix in the cooked rice.
- Check the seasoning and adjust if necessary.
Tips
This dish can be prepared in advance and microwaved to reheat it before being transferred to a pre-heated insulated food storage jar. If you’ll be carrying a camping stove, it’s also possible to dehydrate the protein, kale, mushrooms and rice and make the stock on the trail to reduce the volume and weight of this dish – though for a day hike, the added wight of carrying the stove, pan and gas cylinder would likely more than offset any weight saving here. This dish also works great with fried tofu in place of the chicken and extra vegetables like bell pepper and onion are also a great addition.
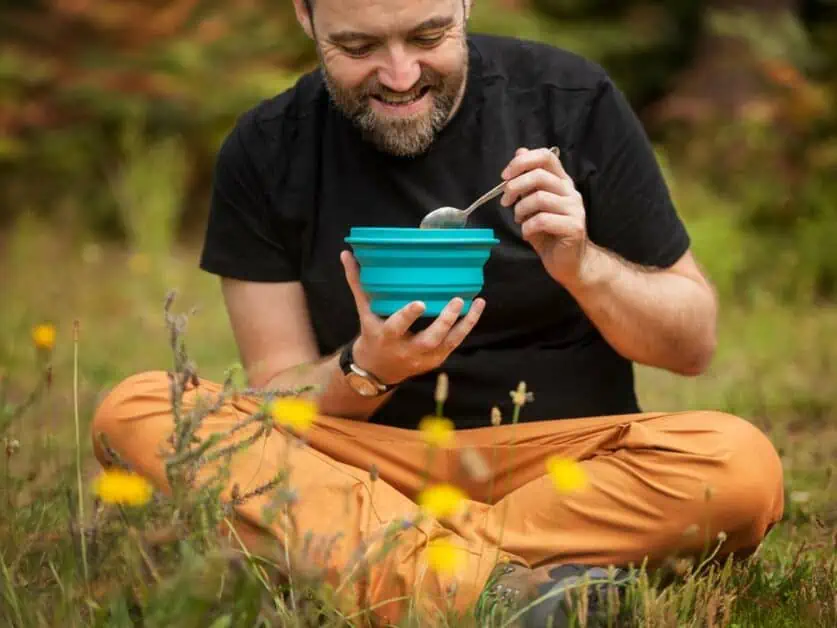
Fajita Pasta
This simple camping meal is super easy to make and delicious too. It can be enjoyed either hot or cold and is a great choice for day hikes and shorter camping trips. It’s worth trying to track down a good seasoning for this dish rather than using a more generic brand, as it really is the key to the dish’s flavor.
Shopping List (Serves two)
- 180g/6.5oz of dried pasta – shapes like macaroni or rigatoni work well.
- Pickled jalapenos to taste – finely chopped.
- 1x bell pepper.
- 1x small red onion.
- Protein of choice (for example minced beef, chicken or plant-based alternative).
- 220g/7oz (eg. ½ a can) black beans – rinsed and drained.
- 50g/1.7oz grated cheese (Pepper jack, Cheddar or plant-based alternative).
- Al pastor/Taco seasoning powder to taste.
- 2tbsp milk – either dairy or unsweetened plant-based.
- A few tortilla chips to garnish.
- Oil for frying.
- Salt and pepper to season.
Method
- Cook the pasta in boiling water until al-dente. Drain and set aside.
- In a large pan, fry your protein of choice in a little oil until fully cooked. Towards the end add the sliced bell pepper and red onion and continue to cook until the onion is transparent.
- Reduce the heat to low and add the cooked pasta, grated cheese, drained canned black beans, Al pastor or taco seasoning and milk. Mix thoroughly and wait until the cheese has melted. Adjust seasoning to taste.
- Place a few tortilla chips in a small Ziploc bag and crush into small pieces with your hand. Keep in the Ziploc bag and use these to garnish the pasta just before serving.
Tips
This dish works great hot or cold. Crushed tortilla chips are not essential, but they add an extra layer of flavor and texture. If you intend to eat this cold and have a spare insulated food jar, you could consider icing the jar and bringing some shredded lettuce and fresh tomato to mix in.
Falafel Wraps with Harissa and Tahini Dressing
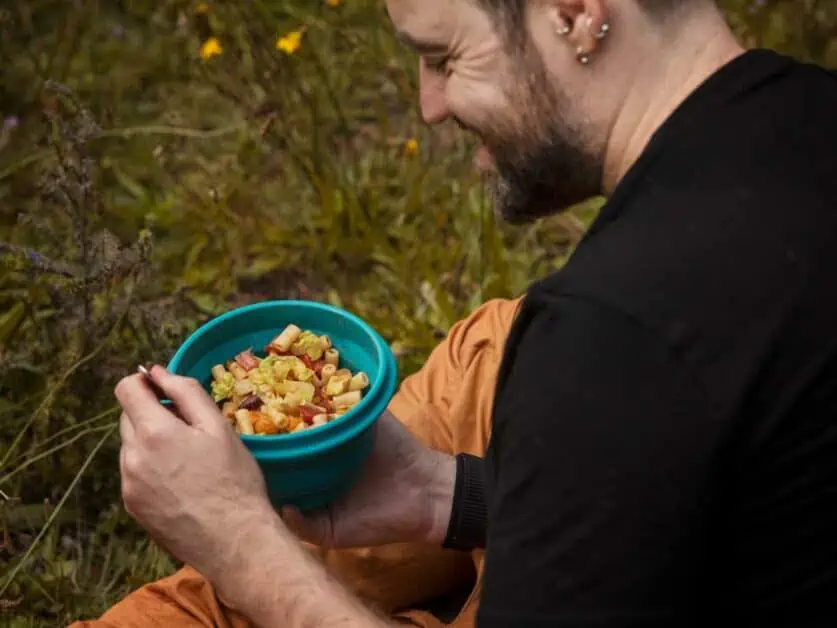
Falafel are packed with protein and taste great too – in this sense, they are one of the best backpacking food there is and also make great snacks on the trail if you make a large batch. Falafel are super easy to make from scratch or can easily be bought ready made or made from pre-packed mix if you’re in a hurry. These wraps combine the falafel with crunchy fresh veg and a creamy and spicy tahini and harissa dressing. Tahini is made from sesame seeds so it adds even more protein to this recipe whilst the vivid red harissa paste adds another layer of spicy flavor. This recipe makes use of raw vegetables, so it’s best for day hikes or overnight camping trips in slightly cooler conditions. It also makes a great backpacking lunch on shorter hikes. This recipe is 100% plant based.
Shopping List (serves two)
For the Falafel (alternatively use pre-packed falafel or dried mix)
- 1x 400g/14oz can of garbanzo beans/chickpeas. Drained.
- ½ a medium onion, very finely chopped.
- 1-3 cloves of garlic to taste.
- 1x tsp dried cilantro/coriander.
- 1x tsp dried cumin.
- A few springs of fresh cilantro or parsley – finely chopped (optional).
- A little Gram/chickpea or plain flour (optional).
- Salt and pepper to taste.
- Oil for shallow frying.
H5 = For the wraps:
- Large tortilla wraps.
- 1 tbsp tahini (available from larger supermarkets or middle eastern stores).
- 2tsp harissa paste (available from larger supermarkets or middle eastern stores).
- 1 medium carrot.
- Fresh spinach leaves.
- A few pitted olives (optional and to taste).
- Salt and pepper to taste.
Method
- Combine the garbanzo beans, onion, garlic, dried cilantro and cumin and the fresh parsley or cilantro (if you’re using it). Either mash the ingredients or briefly food process them to form a chunky paste – you don’t want it to be completely smooth. If it’s too loose and doesn’t hold its shape on a spoon, add a little bit of flour (ideally Gram or chickpea flour, but plain flour will also do) to thicken it up. Shallow fry tablespoons of the mixture in vegetable or olive oil until golden brown. The falafel can also be brushed with oil and baked or air fried. Ensure they are fully cooked through. Alternatively, you can use ready-made falafel.
- Finely grate the carrot and squeeze it to press out any excess water.
- In a small bowl, mix 1 tbsp of tahini with 2tbsp of cold water. The mixture will separate at first but whisk it with a fork and it will quickly combine into a smooth, creamy dressing. Add the harissa paste to this and mix (consider adding more harissa to taste if you like the spicy flavor).
- Assemble the wraps. Allow four falafel per person. Top with grated carrot, fresh spinach leaves, chopped pitted olives (if using) and the harissa tahini dip. Season with a little salt and pepper if you wish.
Tips
The recipe detailed above is 100% plant-based, but, if this isn’t critical to you, many people add an egg to their home-made falafel mix. You could debate how authentic this is, but it does help the mixture bind together a bit better and does, of course, add even more protein to the mix. If you can’t get harissa paste, then hot sauce can be substituted. It is well worth trying to track down harissa though, as it adds a really delicious extra layer of flavor.
Zucchini and Broadbean Fritters
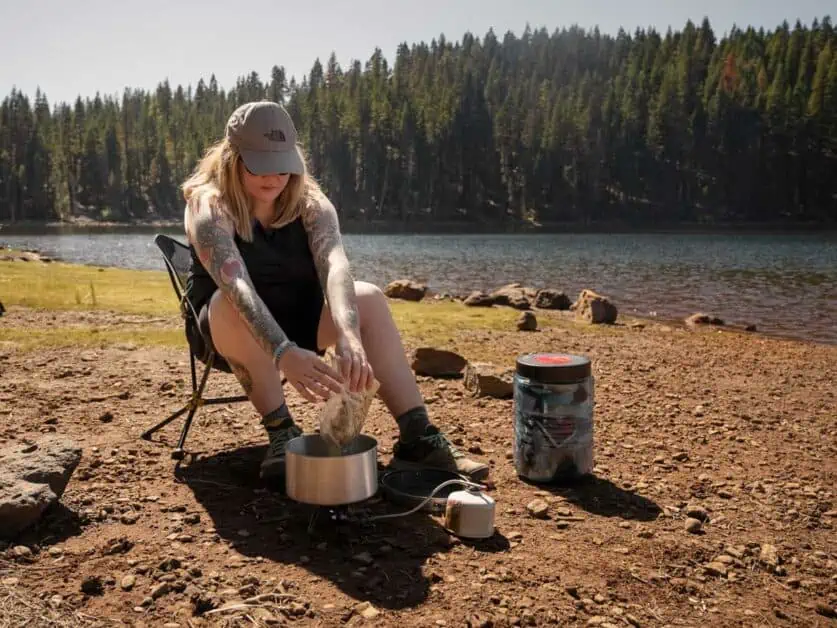
This simple dish is a great camp recipe. It’s easy to make, massively customizable and makes for a great breakfast on an overnight camp or a deliciously filling protein-packed snack or light meal on a day hike. Our recipe is very simple, but this is one of those dishes that cries out for customization – just practice some food DIY and add whatever ingredients you fancy to make this dish your own.
Shopping List
- 1x 400g/14oz can of broad beans (other beans like cannellini, fava, pinto etc. can also be used).
- Plain white flour as required.
- 1x small to medium zucchini.
- Salt and pepper to taste.
- Oil for shallow frying.
Method
- Finely grate the zucchini. Squeeze the grated zucchini in your hand to remove any excess moisture.
- In a large mixing bowl combine the grated zucchini with the drained beans – slightly mash the mixture. Add as much plain flour as necessary to make a dense mixture – it should hold its shape well, but still be slightly elastic. It should not be floury or powdery. The amount of flour needed can vary substantially based on the beans you’re using and how much moisture the grated zucchini holds.
- Season with salt and pepper to taste.
- Heat up some oil in a large, flat-bottomed pan.
- Divide the mixture into four and spoon into the pan. Press flat to form patties and fry on each side until golden brown.
Tips
Customization is the name of the game with this hiking meal! You can add pretty much anything you can think of to this to really mix up the flavor. Sauerkraut and smoked bacon pieces (or plant-based bacon-style pieces) are a great combo. Grated cheese, sweetcorn, leftover steamed vegetables, even spicy ramen noodles all make great additions to these fritters. The fritters themselves are robust and, packed into a lunchbox, they are unlikely to break apart. If you are enjoying these for breakfast at camp, and have a camping stove and frying pan, they can be reheated to give them a little more crispiness.
Essential Backpacking Cooking Equipment
Below, we’ve listed what we think are the essential items for cooking on the trail – this is what you’ll need for camp stove recipes or to rehydrate the dehydrated backpacking meals we’ve listed in this article. This is a long list, and you may already have some items like lightweight utensils, travel mugs or small jars for seasoning at home that you can use instead of buying hiking-specific products. Also, depending on what sort of food you intend to prepare, you may not need some items like the insulated food jar or insulator.
- Camping stove such as the MSR WindBurner or SOTO Amicus.
- Propane/butane mix Gas Cylinder – these cannot be mail ordered in most countries and must be purchased in person at outdoor or hardware stores or larger supermarkets. ID may be required in some locations.
- Lighter or matches (to light the camping stove and as a backup if your stove’s inbuilt ignitor fails).
- Small sharp knife with blade cover – be mindful of restrictions if travelling by air to your hiking location.
- Lightweight cookwear such as this SOTO Navigator
- Lightweight or foldable utensils such as this MSR Alpine Camping Utensils.
- Lightweight or foldable cutlery such as this MSR Spork.
- Insulator such as this My Band Insulated Pouch.
- Collapsible food bowls such as these from STOJO.
- Lightweight mug such as these from STOJO.
- Small refillable pots for seasoning, oil, sauces etc. such as this set from Beyonday.
- Ziploc bags.
- Insulated food jar such as these from Hydro Flask.
Types of Ingredients
We can broadly divide ingredients into several different categories, and all of these are suitable for use in trail meals. However, we should be aware of the limits of each type – fresh ingredients in particular, can spoil surprisingly quickly in warm weather, so they are generally not suitable for longer trips where you’re spending several days on the trail. At this point, we should also mention pre-packaged dehydrated and freeze-dried meals that are widely available both online and from larger outdoors stores. These are a very attractive option, but bear in mind, that it will almost always be cheaper to make your own meals either from scratch or assembled from pre-packaged components. For lengthy trips when many meals are needed, the cost of pre-packed meals can quickly add up! None the less they are a great option if you’re short on time for meal prep or just don’t like cooking.
Fresh Food
Fresh food – especially vegetables and salad – are great, but they are often not an ideal choice for backpacking food. They can spoil quickly in warm weather. For day hikes or one-night camps, you can absolutely prepare meals from fresh ingredients and bring them on the trail in insulated food jars or Tupperware containers, but for longer backpacking trips – especially in warm weather – this isn’t ideal. An insulated food storage jar can be iced for transporting fresh salad for a day or overnight trip and whole fruit like apples, pears oranges and bananas (if they are not too ripe) also make great snacks on hikes though softer fruit like peaches and ripe bananas can get crushed into a messy pulp in your backpack.
Canned Foods
Canned foods are also great for hiking meals. Many of the recipes we’ve detailed in this article make use of canned ingredients. However, cans are not a great choice to bring on the trail – they are bulky, heavy and, of course, you need to carry that bulk back out with you too. So, whilst canned food absolutely has a place on the trail, cans do not! We’d recommend transferring the contents of cans into other lighter-weight containers. If the contents are particularly wet (for example, a can of baked beans), then they can be double bagged in two Ziploc bags (or tightly knotted sandwich bags) to help minimize the chance of spillage. Many canned foods also dehydrate very well. Be aware that canned foods that have been decanted can go bad if you are backpacking for multiple days in very warm weather.
Dried Foods
All other things being equal, dried food is probably the best suited for the trail: it’s as light as you can hope for, and you don’t have to worry about spoilage in warm weather on multiday trips. However, many dried ingredients you’d buy in the store, such as rice, beans and pulses and even some larger pasta shapes are not immediately suitable to cook on the trail – the cooking time is simply too long! With this in mind, we’d always advise cooking and then dehydrating these ingredients at home before including them in your hiking meals. This might seem counter-intuitive, but it will greatly reduce cooking time on the trail. Some store-bought dried ingredients like instant ramen noodles or traditional rice noodles or couscous are perfect when considering your camping dinner ideas as they cook very quickly from dry without any additional cooking and dehydration required. Dried fruit is also a great snack that can be eaten as is without any prep. Remember that if you’re rehydrating food, you’ll need water. Bear this in mind if you’re hiking somewhere you need to carry in your own water.
Tips for the Best Dehydrated Camping Food
We can’t talk about backpacking food without talking about dehydration and indeed, for many, backpacking food is dehydrated food! Dehydration is the process of removing water from something – typically by circulating warm air over it. Dehydrators act like fan ovens, but critically, they work at lower temperatures, so the food dries out before it cooks or burns. In terms of meal prep, dehydration allows us to create lightweight dried meals which we must rehydrate by mixing with water before we can consume them. Water content accounts for a lot of the weight and volume of food, and also limits how long many ingredients will stay fresh and edible for. Dehydration makes perfect sense for hikers as it allows us to create meals that are lighter, take up less space and which will also last longer without spoiling. If you’re researching lightweight backpacking food or long distance hiking food, dehydration is the way to go!
Some regular ovens and air fryers have specific dehydration modes or functions, and some will jut work at low enough temperatures to make them suitable for use as dehydrators, and if you search online, you’ll even find plenty of plans for building DIY or home made food dehydrators. However, a dedicated dehydrator like this Excalibur 2400 does not have to be an expensive appliance and is the best way to go if you want to start making dehydrating backpacking food recipes.
Dehydrating your own food might seem daunting, but it’s actually a very simple – though admittedly also very time-consuming – process. One of the key challenges is understanding portion size. A full meal’s worth of ingredients will often dehydrate down to a fraction of their size and there’s always a temptation to dehydrate way more than is actually needed which can turn out to be very wasteful.
What can you make in a dehydrator? Well, probably more than you might think, but it’s also necessary to rethink how you prepare meals when dehydrating and regular recipes often need to be adapted to rework them into dehydrating recipes. Fat, whether it’s oil, butter or animal fat – is often seen as the foundation of flavor in cooking and most people will surely be familiar with frying ingredients as a first stage of a recipe to establish flavor. However, fat is the enemy of dehydration – basically, it won’t fully dehydrate, and it can cause a dried meal to go rancid during storage or in warm weather. So, we need to adjust how we cook to minimize fat – though we can certainly add some in when rehydrating a meal to serve to add flavor – packing a small bottle or jar of olive oil and mixing in a little when rehydrating your meal is a great way to do this.
Dehydrating Meat
Meat is perfect for dehydration and dehydrators can even be used for making jerky. As mentioned above, fat is the enemy of dehydration, so it’s best practice to start with lean cuts of meat and remove any fat, skin, bones and membranes as part of your preparation. Often, recipes suggest that you can dehydrate raw meat, however, many dehydrators don’t get hot enough to kill off all the pathogens that can be found in raw meat, including E. coli. The US Department of Agriculture suggests that meats should be cooked to an internal temperature of at least 72C/160F and Poultry to an internal temperature of 75C/165F before dehydration. Meat should be cut into regularly sized pieces prior to dehydration, so the batch dehydrates evenly, and it’s advised to use a paper towel to blot off any fat or oil droplets that form on the surface of the meat at regular intervals during dehydration. Precooked meats can also be very successfully dehydrated and indeed with chicken, you may find that boiling or pressure cooking the meat until it’s fully cooked prior to dehydration will give results that rehydrate much quicker than if the meat was semi-cooked according to USDA recommendations and then dehydrated. In terms of how to dehydrate ground beef or other ground meats, it’s best to start with ground meat that’s as lean as possible. You should cook the meat and drain as much fat as possible from it as it cooks (you can also boil it and skim the fat form the surface). The meat can then be dehydrated. Some hikers swear by mixing dried packeted breadcrumbs with ground meat prior to cooking and dehydration.
Dehydrating Vegetables
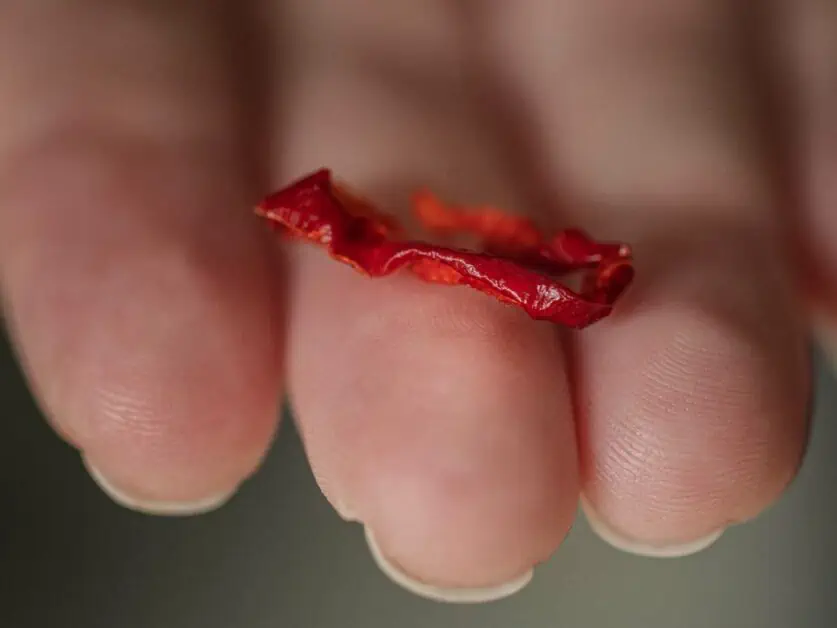
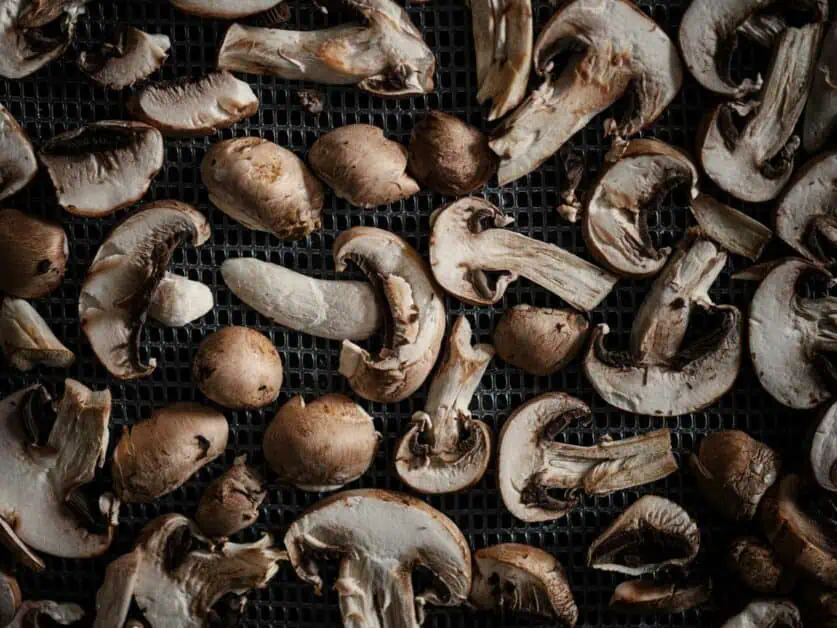
Vegetables are easy to dehydrate and are a core ingredient in many of our favorite backpacking food and meal recipes. Bell peppers, zucchinis and mushrooms, can generally just be dehydrated from raw. Harder vegetables like potatoes and carrots and green or leafy veg like peas, kale and broccoli will benefit from being steamed or boiled before dehydration. You can pan-fry or barbecue vegetables to add extra flavor before dehydration too – though remember to keep any oil used at this stage to an absolute minimum and avoid it entirely if you can. As with all dehydration, you should aim to cut vegetables into small, regularly sized pieces before dehydration. This is to ensure that the vegetables dehydrate consistently and evenly across the batch.

Dehydrating Fruit
Fruit dehydrates beautifully and a bag of dehydrated fruit pieces makes a great hiking snack on its own or can be mixed with seeds and nuts to make trail mix or, with the addition of rolled oats, even granola. Some fruits – apples, pears, peaches and bananas in particular – can discolor during dehydration. This doesn’t impact the flavor but can make the fruit less appetizing to look at. You can minimize discoloration by dipping fruit slices in lemon, lime or pineapple juice or by preparing a dip from ascorbic acid powder mixed in water. Citrus fruits and berries can also be dehydrated very successfully. With firmer-skinned berries like blueberries or even grapes, it’s advised to plunge them in boiling water for a few seconds to split the skin before dehydration. Fruit can also be pureed and dehydrated to form ‘leathers’, basically slightly sticky sheets of fruit concentrate. These can be surprisingly sweet, even when you don’t add any sugar and rolled up, they make a great energy-boosting snack.
Dehydrating Carbs
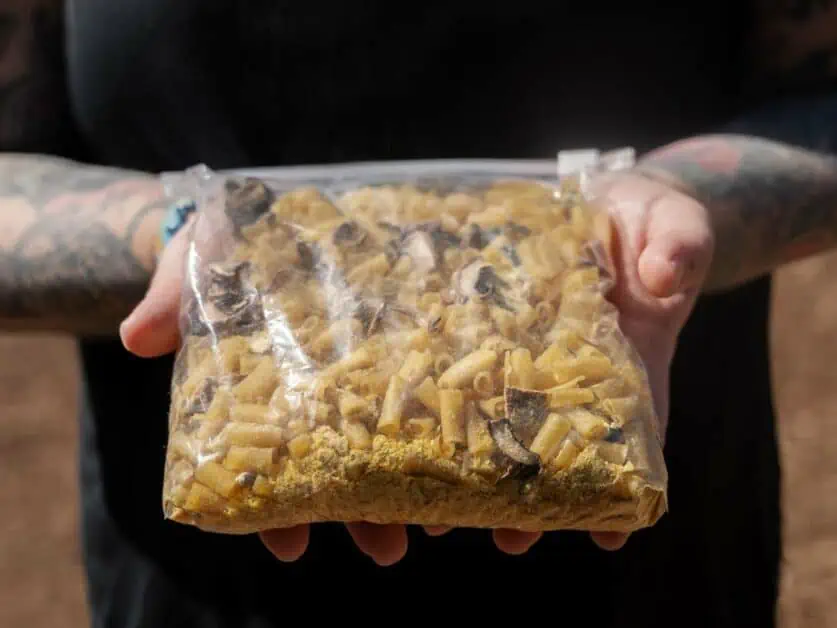
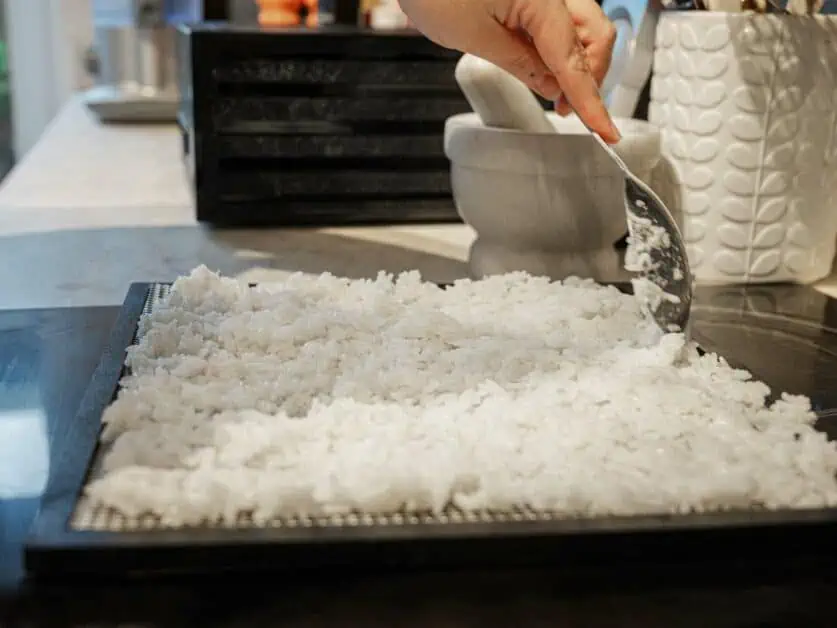
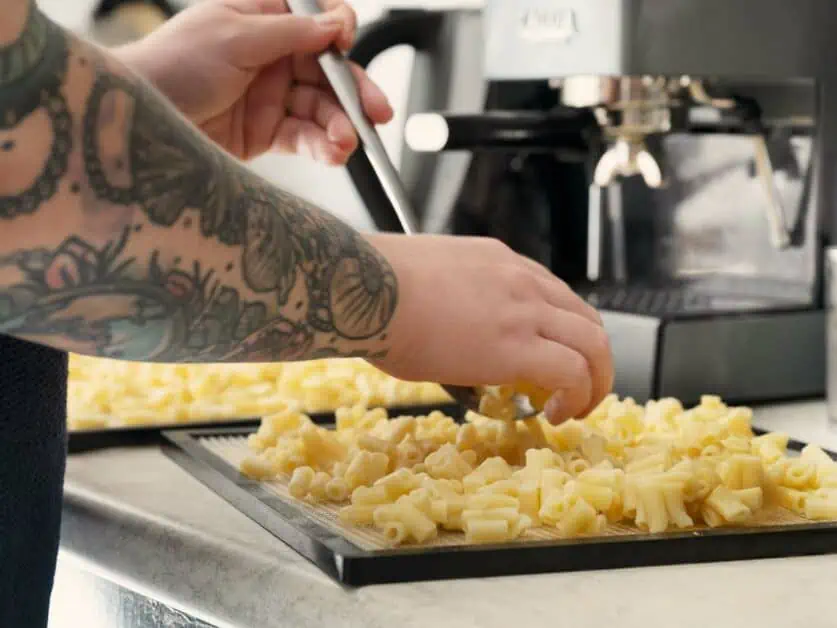
Rice, pasta and noodles can all be dehydrated. You’d usually cook these ingredients from dry, so cooking them and then drying them out again might seem a bit odd. However, if you’re preparing homemade backpacking meals, this approach makes sense, as dehydrated rice and pasta will rehydrate to a cooked state far quicker than just cooking these ingredients from scratch. This saves time and valuable cooking fuel on the trail, it also reduces the weight when dehydrated compared to pasta or rice just as it comes straight from the store. With noodles, this advantage is less clear cut, and you can often add uncooked noodles straight from the packet to your complete hiking meals. When dehydrating pasta and rice, it’s useful to rinse the cooked food in clean water before spreading it on the dehydrator’s shelves. This helps remove excess starch and gives better separation to the individual rice grains of pasta shapes. One negative comment often levelled against dehydrated meals is that they can look like plates of mush and this step or removing excess starch after the initial cooking is a great way to help prevent this.
Equipment For Dehydrated Backpacking Meals
The most obvious piece of equipment you’ll need to dehydrate food is a dehydrator. These come in various forms, but stand-alone electric dehydrators are the most convenient. Note that some air fryers can be used as dehydrators and some ovens with low minimum settings can too. However, dehydrators that are made especially for purpose are generally better and the food you’ll produce in them will often have a longer shelf life than food dehydrated in an air fryer for example as it does a better job of removing the water from the food. Dehydration can be a slow process. Expect a tray of food to take a day at least to fully dehydrate in an electric unit.
Excalibur is a brand that regularly top the list of recommended dehydrators and their 2400 four-tray model will serve most backpackers preparing hiking meals for one or two people well. If you prepare dehydrated backpacking meals for larger groups of people, then a higher capacity model like Excalibur’s nine-try 3926TB might make more sense.
Generally, you’ll store dehydrated food in sandwich bags or Ziploc bags. You might hear these being called camping food bags. However, if you intend to use your dehydrator a lot, then a vacuum sealer – like this Garyon unit – is a sensible addition to your kitchen. Vacuum sealing not only reduces the space taken up by packaged food, but also reduces the risk of spillage, odors and can also even further prolong the shelf life of food. Certain foods can also be cooked within the vacuum sealing pouch – though this is more relevant to fresh food rather than dehydrated food.
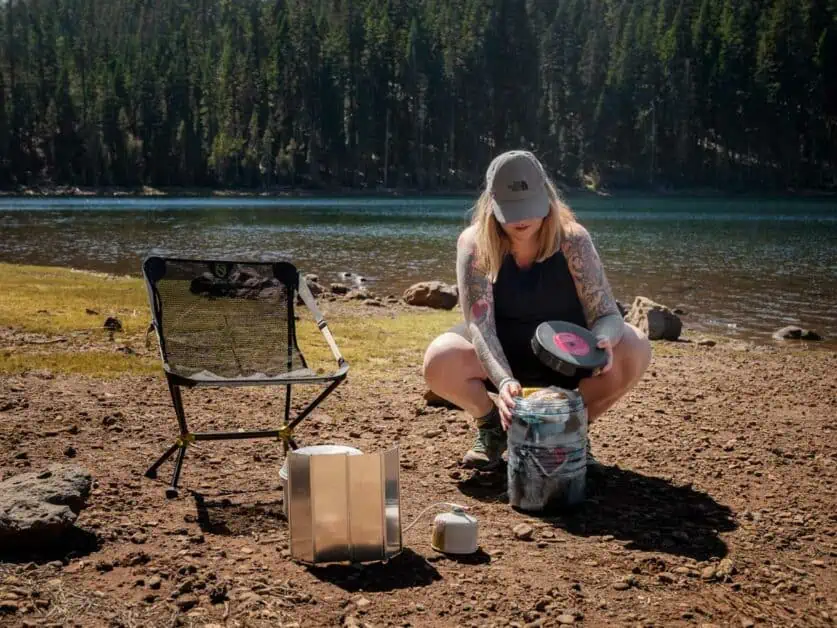
With the exception of fruit and jerky, you generally rehydrate dehydrated food by adding it to hot water before eating it. Camping stoves take many forms, running on different types of fuel, but we think that compact stoves that run on inexpensive and readily available butane/propane gas mix cylinders like the SOTO Amicus or MSR WindBurner (which comes as a set with a small lightweight pot and insulator, making it a great value choice if you’re building your kit) are the best choice for most hikers. Being able to control your flame is important if you want the best hiking food, as it allows you more control when cooking – this way you can create not just camp stove meals, but truly gourmet camping recipes.
You can pick up gas cylinders for this type of stove at pretty much any outdoor store and also usually at supermarkets, hardware stores and service stations in more rural areas. Be sure that the cylinder you buy will fit your stove before you head out onto the trail as there are a few different connector standards.
We think a set of lightweight camping pans made from thinner material that heats up quicker like this Navigator Cook Set from SOTO is a sensible thing to purchase at the same time as your camping stove. If you’re not hiking as far, equipment weight isn’t a primary concern, and want a more fully-featured cooking experience, then be sure to check out our guide to the best backpacking grills.
In many cases, after adding hot or boiling water to your dehydrated food, you’ll need to let it stand for a while in the pan – typically with a lid on. An insulator is something that you can wrap around the pan to help it keep its heat. The MSR WindBurner stove we linked to above comes with a pan and insulator or, you can buy them separately. An insulator is not essential, but can be useful to keep your food piping hot and minimize stove use/conserve gas if you are preparing it in cold or windy conditions.
Dehydrator Recipes for Hiking Food
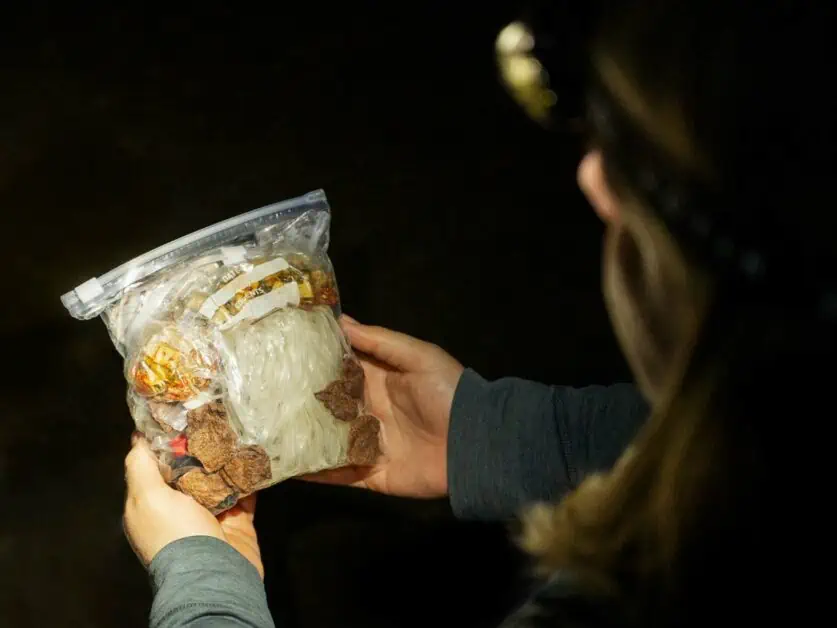
The following dehydrated meal recipes make use of a dehydrator for some or all of the elements. These recipes produce backpacking meals that minimize the amount of food weight you need to carry and are also perfect for multi-day adventures as dehydrated or dried food is far less likely to spoil on the trail. Dehydration can be a slow process, so some of these meal recipes make use of store-bought dried ingredients to speed up initial prep time (sometimes be using non-dry elements). You’ll need a camping stove and pan to prepare all of these meals on the trail.
Recipes Combining Grocery Store Ingredients
These are the simplest hiking recipes. These camp stove meals combine store-bought, prepacked ingredients to create tasty meals for the trails. These recipes are a great choice if you are short on time – or just don’t like cooking – but don’t want to purchase ready-made hiking meals.
Fast Mushroom Risotto
This tasty and hearty camping dinner recipe is quick to assemble at home, fast to cook on the trail and tastes great on a cold evening after a long hike. It’s also a great idea for an easy camping lunch.
At Home
This serves two. Pack the following: One 250g/9oz packet of microwave rice – short grain white or brown rice works well. In a separate container or Ziploc bag, mix 2-3 tsp of stock powder (to taste), a handful of thin dried mushroom slices and 1 tbsp of either dried grated parmesan or nutritional yeast for a plant-based option. You can also add salt pepper and a little chili powder to taste. You can optionally bring a small container of olive oil (say, 2 tsp) for more flavor.
On the Trail
Bring a pan of about 150ml/5oz of water to the boil on your camp stove. Reduce the heat to a simmer and add in all the ingredients. Stir thoroughly and keep stirring – be prepared to add extra water if necessary, but only do this a little at a time – the risotto should not get too wet. If it starts to stick to the pan, turn off the heat, cover and allow to stand – use an insulator if you have one. Once the dried mushrooms are cooked through, the risotto is ready to eat.
Tips
Dried sliced ceps or porcini mushrooms are available in most larger supermarkets and have a delicious flavor. You could add unsweetened powdered milk – either dairy or plant-based – to the dried ingredients to get an extra-creamy consistency. You can also dehydrate the instant rice (or rice you’ve cooked yourself), to make this dish even longer-lasting and lighter weight.
Pesto Pasta with Sundried Tomatoes
Pesto and pasta are a delicious combination and perfect food for hiking. This dish is the very definition of comfort food. It’s super quick to prepare on the trail too. This tasty dish uses a lot of fresh ingredients, so, whilst it’s good food for backpacking, it isn’t suitable to carry for several day on longer hikes.
At Home
This will serve two. Cook, drain and rinse in cold water, 180g/6.5oz of pasta – smaller shapes work better than spaghetti. Drain any excess water from it and allow it to cool. Pack it in a Ziploc or sandwich bag. In a separate container mix 2tbsp of jarred pesto, five or six sliced sundried tomatoes and a little extra grated cheese if desired. Season with salt, pepper and chili to taste. Separately, bring a small container of olive oil (1-2tsp).
On the Trail
Bring a small amount of water – 2-3tbsp to the boil on your camping stove. Once boiled, turn down the heat very low and add in the pasta and olive oil. Stir for a few moments to start it heating through and to ensure the shapes are not sticking together too much. Add in the rest of the ingredients and stir thoroughly until pasta is well coated with the sauce. If you’ve used grated cheeses, but sure it has melted. Once the pasta is piping hot, the dish is ready to serve.
Tips
Add extra protein to this campstove recipe by adding cooked chicken (this can be bought pre-packed), or plant-based protein. If you want to make this dish 100% plant-based, be sure to check the pesto you buy as non-plant-based pesto sauces will surely contain parmesan cheese.
Hoisin Instant Noodle Bowl
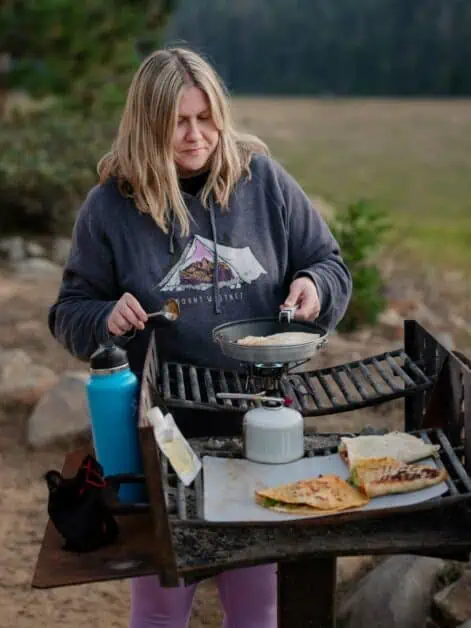
This easy camping recipe is quick to prepare at home and even quicker to serve up on the trail. If you’re not a fan of slightly sweet hoisin sauce, then this can be substituted for an alternative like black or yellow bean sauce – all of which are easily available in larger supermarkets.
At Home
Serves two. Pack the following items: two blocks of dried instant ramen noodles, some sliced, dried mushrooms. In a separate bag or container, mix 2tbsp of hoisin sauce, cooked protein of choice (smoked tofu pieces work great in this). You can add a little soy sauce or chili to the mix if you wish.
On the Trail
Boil some water on your cooking stove. How much you boil depends on how soupy you’d like the final dish to be – also different instant noodles absorb water at different rates, so it’s difficult to give exact figures here! Start with around 200ml/7oz and work from there. Once the water has boiled add all the ingredients and use a cooking utensil to break up the noodle blocks (be sure not to knock the pan off your stove!). This dish will cook very quickly, so keep an eye on it. You can continue to cook for a few minutes once cooked to get a thicker consistency to the sauce or add more water for a more soupy dish.
Tips
This easy camping recipe is very customizable! You can substitute any number of sauces for the hoisin sauce and the protein or any vegetables you choose to add can really change it up too. If you don’t like pre-packed sauces, some good quality miso paste, soy sauce and chili makes for a great sauce.
Camping Tacos
This hiking meal is a bit more involved to make – but we think well worth the extra bit of effort, because who doesn’t like tacos! This Camping Taco recipe is infinitely customizable too – the only limit is your imagination! This easy camping recipe uses fresh ingredients, so it’s best suited to day hikes or overnight camping, but this could easily adapted to use less fresh ingredients to bring along as a treat on a longer backpacking adventure.
At Home
Serves two. Allow four to six soft small corn tortillas per person – you’ll always want more! Fry your protein of choice with some thinly sliced bell peppers until cooked and ad din some al pastor seasoning to coat. Transfer some store-bought guacamole, chopped cilantro and a few lime wedges to small resealable containers. If you’re hiking somewhere very hot, this can be kept cool and fresh in an iced insulated food jar. Bring a small container with a few tsp of vegetable or olive oil.
On the Trail
Reheat the protein and bell pepper mix over a camping stove – add a little oil if necessary. To assemble the tacos, place a small scoop of the protein and pepper mix in the middle of the small tortilla. Add guacamole, fresh cilantro and a squeeze of fresh lime to taste. Fold the taco and enjoy!
Tips
Tacos are delicious and a great sharing food. If you’re hiking with a group, you could bring a few different fillings and have a camping taco party! The fillings you choose are only limited by your imagination: Chili con carne (or non carne!), fried fish, tofu or tempeh all make great proteins and grated cheese, salsa or refried beans all make fantastic extra fillings. You can likely purchase every element ready made in a large supermarket or make it all yourself from scratch – the choice is yours!
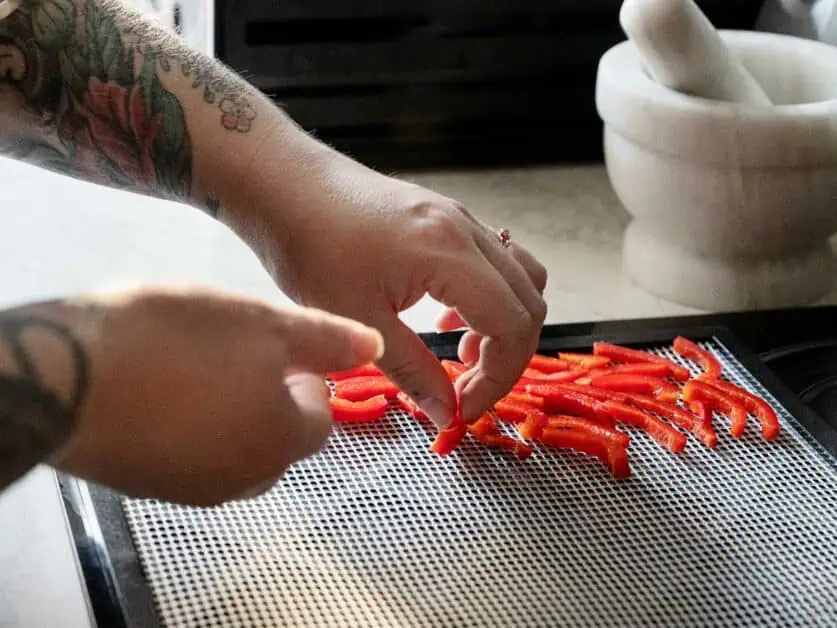
Recipes with Dehydrated Components to Make While Camping
The recipes below use a mix of home-dehydrated ingredients alongside store-bought ingredients. These dehydrated food recipes generally give a dryer final product that’s great for taking on longer hikes where weight of food and food spoilage due to the time the meals won’t be refrigerated is a real concern. All dehydrators vary in terms of power output, air circulation etc. and food can vary from one batch to the next in terms of its water content. With this in mind, we haven’t listed dehydration times and temperatures in our recipes, as these can vary quite considerably. It’s best to follow your dehydrator’s specific settings and use your judgement on when an item is fully dehydrated.
Backpacking Pad Thai
Pad Thai is one of those dishes that seems to lend itself very well to dehydration and this easy camp dinner has become one of our top favorite dehydrated food recipes.
At Home (serves two)
- 2x blocks medium-wide rice noodles – available from Asian stores or larger grocery stores. Pack these separately.
- 1 Tbsp unsalted peanuts – dry fried and coarsely crushed. (Pack these separately).
- Protein of choice – fired chicken or tofu works great – cook and dehydrate.
- Vegetables of choice – 1x Bell pepper, a few mushrooms etc. – finely slice and dehydrate.
- Sachet or small container of soy sauce.
- Sachet or small container of peanut butter.
- Sachet of small container of siracha hot sauce (optional).
On the Trail
Boil approx. 250ml/8.5oz of water on your camping stove. Once boiled, turn the heat down a simmer and add the dehydrated vegetables and protein. Stir regularly and keep an eye on these. When they are close to being cooked, add in the rice noodles – these will cook relatively quickly. Keep an eye on the water levels throughout. You don’t want the dish to go dry and start sticking to the pan, but it also should not be too wet and soupy. Once everything is cooked through, stir in the peanut butter, soy sauce and siracha. Serve up and garnish with the crushed peanuts.
Tips
If you’re on a day hike, a small iced insulated food jar can be used to bring fresh herbs like cilantro, beansprouts and even some wedges of fresh lime to add some extra taste and texture to this dish.
Instant Noodles with Spicy Sichuan Style Sauce
These Sichuan style noodles have a distinctive and very spicy flavor. This gourmet camping recipe is not only easy to put together but also packed with flavor and goes to show that dehydrator recipes and hiking meals do not have to be bland! Even though this hiking meal uses several wet ingredients for the sauce, the components of this are all naturally long-lasting or preserved so this sauce won’t spoil if brought on a longer multi-day hike.
At Home (serves two)
- 2x blocks instant ramen noodles (pack separately).
- 4tsp Sichuan chili oil (available in Asian stores or large supermarkets) – add to sauce bag.
- 2tsp Chinese Black Vinegar (available in Asian stores) – add to sauce bag.
- 3tsp good quality light soy sauce – add to sauce bag.
- ½tsp sugar (optional) – add to sauce bag.
- 1tbsp pickled Chinese vegetables like mustard shoots (available in Asian stores and optional) – chop finely and add to sauce bag.
- Dehydrated or dried protein of choice – add to dry bag.
- 1bsp unsalted peanuts – dry fry, and allow to cool – add to dry bag.
On the Trail
Boil approx. 250ml/8.5oz of water on your camping stove. Once boiled, reduce heat to a simmer and add the contents of the dray bag. Add the noodles and stir until cooked. Add more water if necessary, but generally, the dish should not be too soupy. Once the noodles are cooked, add in the contents of the sauce bag and stir to combine thoroughly – add a little water if needed here.
Tips
The bright red Sichuan chili oil will stain any fabric it touches, so be sure to make sure it’s stored in a leak-proof container or doubled-bagged (or both!). The chili oil can be very hot and if it’s too much, the dish can be watered down to make it more soupy and less spicy. Chili oil can vary in flavor and heat from brand to brand. It’s worth trying a few to find your favorite.
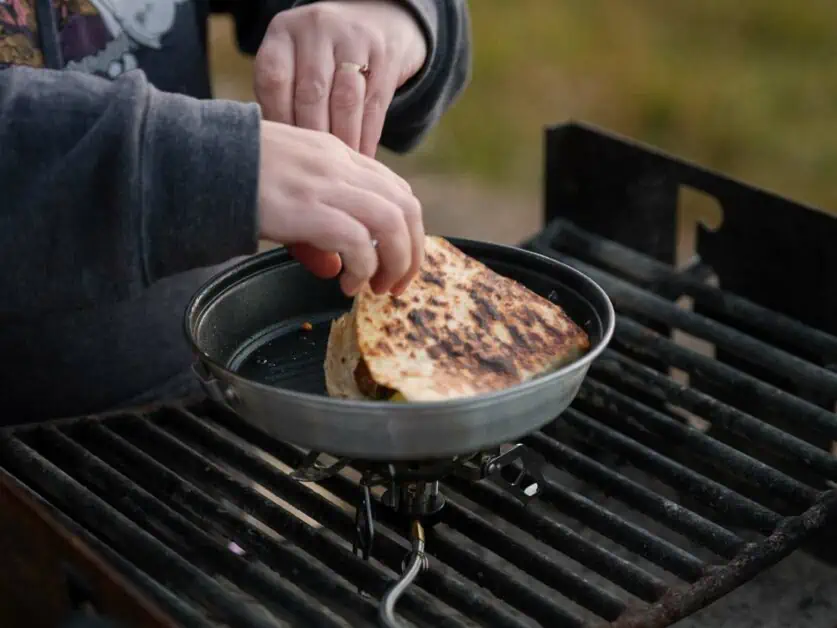
Chicken Noodle Soup
This ultra-comforting backpacking dinner is a delicious and hearty camp recipe that’s always welcome after a long day on the trail. This easy camp dinner is a complete meal that can be customized with extra dehydrated veg and if you have the space to carry them, it’s delicious served (and mopped up!) with some crispy bread too.
At Home (serves two)
- Allow two to three nests of fine vermicelli noodles per person. Pack into a noodle bag.
- Cook and dehydrate cubed chicken – quantity to taste. For a plant-based option, chicken style pieces work just as well. Add to dry bag.
- Finely slice and dehydrate a variety of vegetables: a small onion, bell pepper, mushrooms etc. Add to dry bag.
- 1-3tsp stock powder (to taste). Add to dry bag.
- 1 tsp dried mixed herbs. Add to dry bag.
- Salt and pepper to taste. Add to dry bag.
- 1-3tsp of olive oil (to taste) in a small container.
On the Trail
Bring roughly 500ml/17oz 0f water to the boil on a camp stove. Reduce it to a simmer and add the contents of the dry bag. Once the protein and veg is almost cooked, add the vermicelli – this will take a few minutes to cook. Add a little olive oil to boost the flavor. Keep an eye on the water levels and top up if needed – remember, this is a soup!
Tips
Stock powders vary greatly in terms of their strength and saltiness, so adjust the amount of stock according to your personal taste.
Trail Tikka Masala Curry with Naan Bread
The creamy, tomato Tikka Masala sauce can be made either hot or mild and is deliciously comforting. This camping meal recipe takes a few liberties with the ‘true’ recipe to make it suitable for dehydration – be sure to see the Tips section below for an important note here.
At Home (serves two)
- 4tsp Tikka Masala Powder – or more to taste. Tandoori Masala can be used as a close-to substitute. Add to dry bag.
- Chili powder to taste (optional).
- 1tsp cilantro/coriander/dhania powder.
- 2tbsp unsweetened dairy or dairy free powdered milk (or equivalent to make 250ml/8.5oz). Add to dry bag.
- 1tsp plain flour. Add to dry bag.
- 2x bell peppers, sliced and dehydrated. Add to dry bag.
- 1x small onion, finely sliced and lightly fried in minimal or no oil. Dehydrated. Add to dry bag.
- 4x tomatoes – sliced and dehydrated. Add to dry bag.
- 2-4tsp of vegetable oil (to taste) in a small container.
- Protein of choice in quantity of choice. Chicken is the authentic option, but plant-based chicken style pieces or plain tofu or even garbanzo beans/chickpeas work just as well. Cook, dehydrate and add to dry bag.
- Store-bought Naan breads. Allow 1x medium or 2x small naan breads per person. Keep in original packaging.
On the Trail
Bring 300ml/10oz of water to the boil on your camping stove. Reduce to simmer and add the contents of the dry bag and the oil. Stir thoroughly and keep stirring regularly. Add more water if necessary. The sauce should be loose, but not overly liquid/soupy. The naan breads can either be eaten directly from the packet or briefly dry-fried in a pan to heat up. If you do choose to heat them, they should be warm and fluffy, not toasted and crispy.
Tips
This camp stove recipe uses powdered milk in place of the yogurt or cream normally used. Powdered milks vary in terms of how much water is advised to rehydrate them. We want approximately 250ml/8.5oz of milk after rehydration, so follow the instructions on your milk packet to make the equivalent. This recipe can also easily be made fully plant based. However, most store-bought naan breads contain yogurt, so be sure to check this if relevant. The curry also works great with instant packet rice. For many, the iconic Tikka Masala is slightly sweet. If this is you, consider adding a small amount of sugar or some pieces of dehydrated apple to the dry bag.
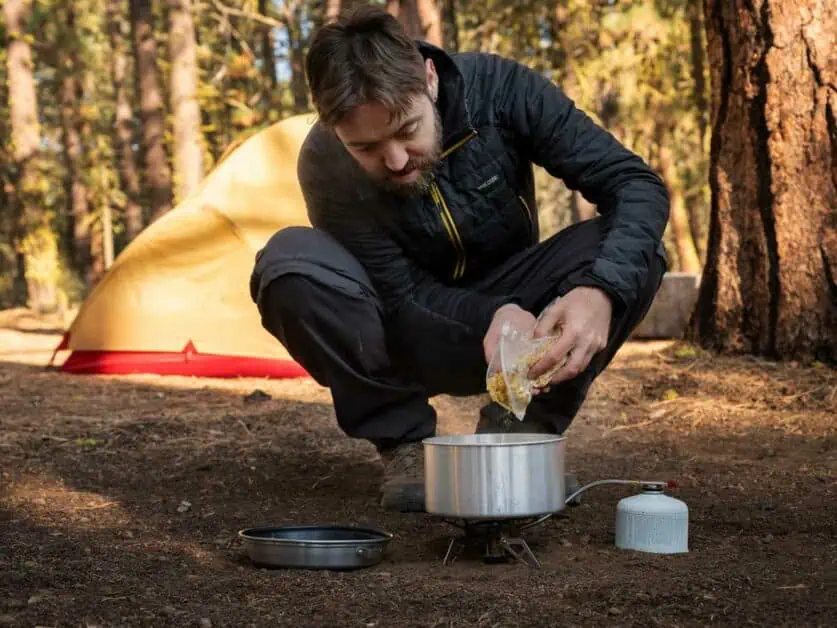
Recipes for Cooking and Dehydrating a Whole Meal
The backpacking meals below are fully dehydrated. They might take a little longer to prepare, but we think they are all worth the effort. In their dehydrated form, all of the backpacking meals below will last a very long time on the trail, making them a great choice for longer, multi-day backpacking trips or expeditions. Dehydrators vary considerably from model to model in terms of their power and air circulation and food’s moisture content can vary too, so we haven’t listed dehydration times and temperatures in any of our recipes. It’s best to follow your dehydrators instructions for the best temperatures/settings for each type of food and use your judgement in terms of when things are fully dehydrated.
Paella
This dehydrated backpacking paella makes no claim to authenticity, but it is none the less a delicious and relatively easy dehydrator recipe. This complete meal is one that lends itself well to dehydration and it’s customizable to adapt to your personal preferences too. What’s more, all the ingredients go into one bag, making it super-easy to prepare on the trail.
Ingredients (serves two)
- 150g/5.5oz of dry white rice – arroz rice is authentic, but any white rice can be used.
- Protein of choice in quantity of choice. Chicken or plant-based chicken style pieces work great here. Chorizo (or plant-based chorizo style) pieces are a very popular addition but are not considered authentic.
- 2x bell peppers – red or orange if possible.
- 6-8x button mushroom.
- 2-3x fresh tomatoes.
- 2-3tsp of stock powder (adjust quantities based on strength/saltiness of powder).
- A few strands of saffron. If not available, use 1tsp turmeric and/or 1tsp paprika or cayenne pepper.
- Chili powder to taste (optional).
- Salt and pepper to taste.
- 2-4tsp olive oil (to taste).
Method
- Cook the rice and dehydrate it.
- Slice the mushrooms, tomatoes and bell peppers and dehydrate.
- Protein like chicken should be cooked and dehydrated. Chorizo that doesn’t require cooking and plant-based meat substitutes can be dehydrated without cooking.
- All other ingredients – apart from the olive oil – can be combined as they are.
Package
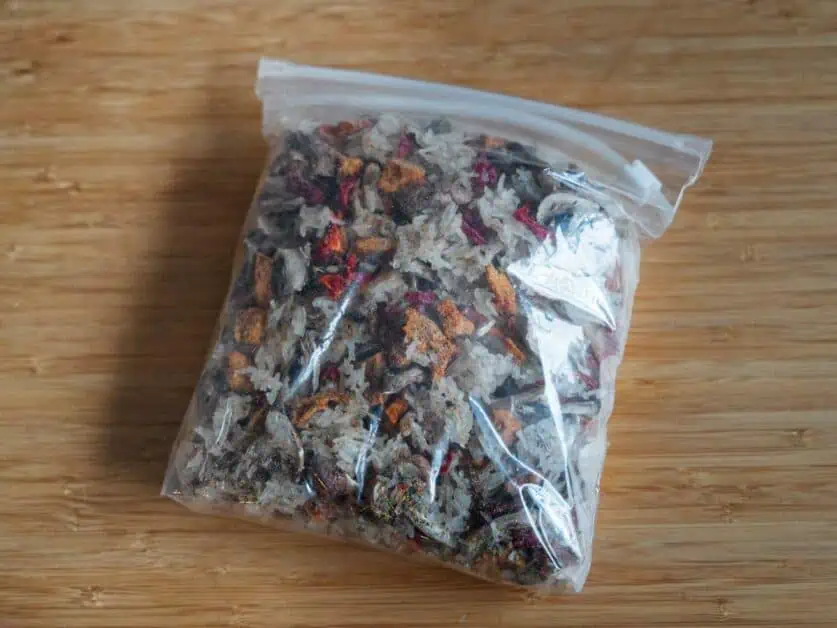
- All the dehydrated and powdered ingredients for this dish can go into one bag.
- The olive oil goes into a small container.
On the Trail
Boil approx. 400ml/13.5oz of water on your camp stove and then reduce to a simmer. Add the contents of the dry bag and stir thoroughly. Check the water levels and ensure the paella isn’t drying up as it cooks – it’s better that it’s slightly wet. Once you’re happy that everything is rehydrated and piping hot, remove the pan from the heat, stir in the olive oil, cover and allow to sit for five to ten minutes before serving. Use and insulator if you have one. This will allow the rice time to absorb any leftover liquid, giving the paella a delicious, unctuous quality.
Tips
This dish is very customizable. It works very well with vegetables like green beans or even small broccoli florets (these should be steamed or microwaved before dehydration) or even pulses like garbanzo beans/chickpeas. Chorizo is a contentious issue in paella! It’s not an authentic addition, but many people add it none the less. This paella recipe has been modified to make it suitable for dehydration and it can’t really be said to be authentic in many ways, so don’t feel inauthentic about adding in some chorizo or plant-based chorizo style pieces – they do great things to the flavor!
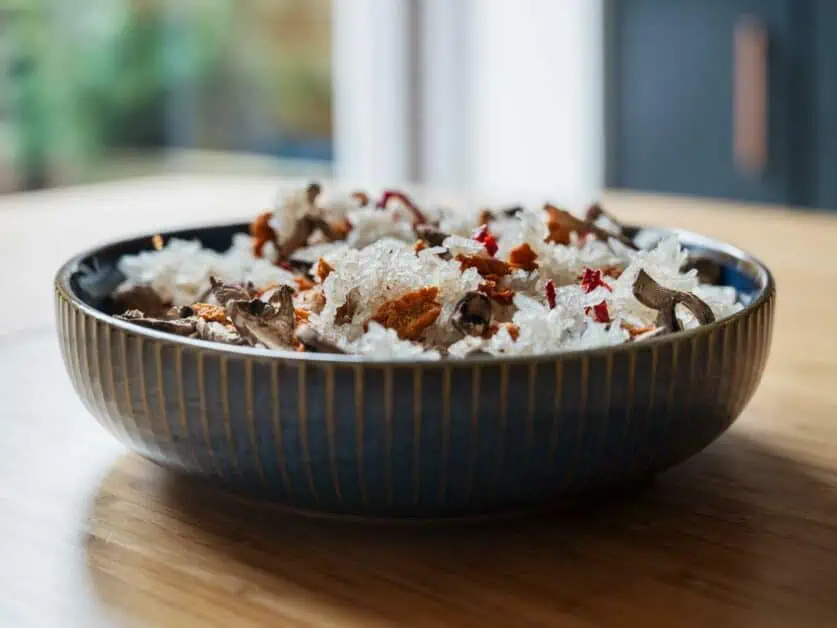
Pearl Barley, Mushroom, Broccoli and Chicken Risotto
This dish is a delicious twist on a conventional risotto, using pearl barley instead of rice. Its rich, creamy texture comes from a combination of unsweetened powdered milk (either dairy or dairy free) and either dried grated parmesan or nutritional yeast flakes (if you want a plant-based option). This complete meal packs into a single bag, making it quick and easy to prepare on the trail.
Ingredients (serves two)
- Chicken or other protein of choice in quantity of choice.
- 250g/5.5oz dried pearl barley.
- 2tbsp unsweetened dairy or dairy free milk powder.
- 3tbsp dried grated parmesan cheese or nutritional yeast flakes.
- 2tsp stock powder (adjust to taste based on strength and saltiness of stock).
- 6-8 button mushrooms.
- 1x medium head of broccoli.
- Salt and pepper (to taste).
- A little chili powder (to taste and optional).
- 2-4 tsp olive oil (to taste).
Method
- Chop the protein into evenly sized cubes. Cook and dehydrate. Plant-based proteins like chicken-style pieces can just be dehydrated and don’t need pre-cooking.
- Slice the mushroom into regularly sized pieces and dehydrate from raw.
- Slice the broccoli into regularly sized florets, steam or microwave until cooked, but still firm and dehydrate.
- Combine the milk powder, grated parmesan (or nutritional yeast), stock powder and season to taste with salt pepper and chili.
Package
- All the dehydrated and dry ingredients can go into one bag.
- The olive oil should go into a separate container.
On the Trail
Bring approx. 400ml/13.5oz of water to the boil on your camp stove and then reduce to a simmer. Add the contents of the dry bar and stir to combine. Keep stirring regularly and keep an eye on the water levels – the risotto should not be allowed to dry out if it isn’t fully rehydrated, so add more if necessary. Once it’s fully rehydrated, remove the pot from the heat, stir in the olive oil and allow to stand, covered, for approximately ten minutes before serving. Use an insulator to keep the pot warm if you have one.
Tips
Pearl barley risotto is a deliciously versatile dish and you can mix it up easily with your own choice of extra ingredients. Smoked bacon, or plant-based bacon style pieces are great in this dish. Pumpkin or squash and green beans (be sure to steam these before dehydration) is another great alternative to the mushroom, broccoli and chicken combo detailed above. Fennel bulb, which should also be steamed prior to dehydration also makes for a delicious alternative version of this dish.
Mac and Cheese
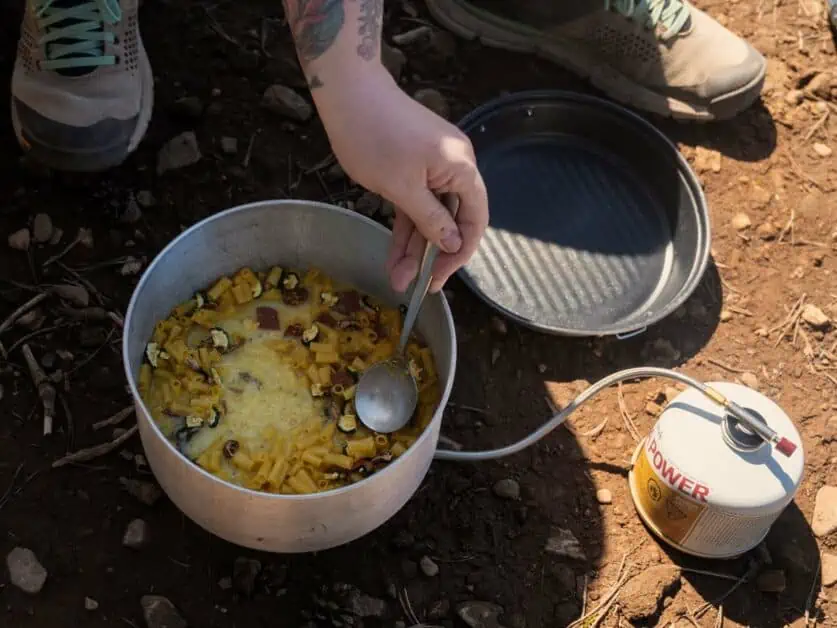
Mac and Cheese is probably the iconic comfort food. We think it’s one of the best foods for dehydration. This version is completely dairy free, using vitamin B12-packed nutritional yeast (a by-product of the brewing process – it’s easily available in larger supermarkets, health food stores and online) to give the cheesy flavor. One other advantage of this camp stove meal is that nutritional yeast is very lightweight in comparison to regular cheese sauce mix so this meal will be lighter than a traditional dehydrated mac and cheese – worth bearing in mind if you’re counting every last gram or fraction of an ounce in your bag on a long-distance hike!
Ingredients (serves two)
- 180g/6.5oz dried macaroni or other pasta shapes.
- 200g/7oz protein of choice.
- 3tbsp nutritional yeast.
- 2tbsp unsweetened powdered plant-based milk.
- 1-3tsp stock powder (to taste – based on strength and saltiness of stock).
- Salt, pepper and chili powder to taste.
- 1-3 tsp olive oil (to taste).
Method
- Cook the pasta in boiling water, drain, rinse in cold water and dehydrate.
- Slice the tofu into small, regularly sized pieces and dehydrate.
- If you are using an alternative protein, cook it first, if necessary, before dehydrating.
- Combine the rest of the dry ingredients (nutritional yeast, milk powder and seasoning).
Package
- Pack all of the dry and dehydrated ingredients into a single bag. If the dehydrated pasta shapes have sharp edged, consider placing a baking parchment liner in the bag to prevent tears.
- Put the olive oil in a small container.
On the Trail
Bring roughly 300ml/10oz water to the boil on your camping stove and reduce to a gentle simmer. Add all the packed ingredients – including the olive oil and stir thoroughly. Keep an eye on the texture – add more water if necessary, but be careful that the dish does not become too soupy. Once the pasta is fully rehydrated and hot through, the dish is ready to serve.
Tips
This dehydrator recipe is tremendously versatile and perfect for customization. If you’re looking for inspiration for camping dinner ideas, this is a great place to start.
Ratatouille with Herby Couscous and Spicy Sausage
Ratatouille is wonderfully warming and something to really look forward to after a long day’s hike. This dehydrated meal includes couscous for added carbs and spicy sausage to add both extra flavor and protein.
Ingredients (serves two)
- 120g dried couscous.
- 4x spicy sausage – plant-based sausages work great here, too.
- 2x 400g/140z cans of passata or tinned tomatoes food processed until very smooth.
- 1x medium zucchini.
- 1x medium eggplant.
- 1x medium onion.
- 4-6x button mushrooms.
- 1-3 cloves of garlic, crushed (to taste).
- 1x bay leaf.
- 4x tsp dried, mixed herbs.
- Salt and pepper to taste.
- Chili powder to taste (optional).
- 2-4tsp olive oil (to taste).
Method
- Add the passata or food processed tomatoes to a pan with the bay leaf, garlic, salt and pepper, chili (if you’re using it) and 2tsp of the mixed herbs. Simmer gently for around 20-30mins, stirring regularly and being sure that the tomatoes don’t burn and stick to the pan – this should be done at a very low heat.
- Remove the bay leaf and discard (or reuse in another dish), allow the sauce to cool a little and then dehydrate to make a ‘leather’.
- Slice the sausage into small pieces. Cook and dehydrate. Plant based sausages also benefit from being cooked for this dish prior to dehydration.
- Slice the vegetables into small, regularly shaped pieces and gently fry until cooked. Try to use very little or no oil here – a good non-stick pan is a real help for this. Dehydrate the vegetables.
- Mix 2tsp of the mixed herbs with the dry couscous – add a little salt and pepper too if you wish.
Package
- Add the tomato leather, dehydrated vegetables and sausage to one bag.
- Add the dry couscous and herb mix to another bag.
- Add the olive oil to a small container.
On the Trail
Start by cooking the couscous. Boil 180ml/6oz of water, turn the heat right down and add the couscous. Cover the pan. Check regularly until the couscous has absorbed the water, is fluffy and thoroughly cooked through (add more water in small amounts if needed). Once cooked, set the couscous aside – try to keep it covered or in an insulator to keep its heat. Now boil roughly 200ml/7oz of water and reduce this to a simmer. Add the main bag of tomato leather, vegetables and sausage along with the olive oil. Stir regularly, but keep the pan covered in between. Add more water if needed. The ratatouille should have a thick consistency and not be too runny. Serve up when the veg and sausage are rehydrated and piping hot through.
Tips
There’s plenty of scope to modify this dehydrated meal if you want. Garbanzo beans/chickpeas can be added or can completely substitute the sausage as protein. Many other proteins will work well with this too. The couscous can also be substituted for rice, pasta or, if you’re on a shorter hike where it will stay fresh/not break up, crusty bread.
Repackaging Dehydrated Food
Once you’ve dehydrated your food, it will need to be packed up. If it has been fully dehydrated and is stored correctly, dehydrated food can have a phenomenally long shelf-life – running into years for some types of food. The key thing is to keep the food in a clean, air-tight container and for anything beyond short-term storage, it should also be kept in a dark place too. Most hikers will start off by using Ziploc bags to pack their dehydrated food, but this isn’t the only way. Anything that meets the above criteria is suitable.
Vacuum Sealing
Vacuum sealing is a great way to store dehydrated food and is often recommended as the method that gives the best long-term storage life. Vacuum sealing is also beneficial for those going on long backpacking trips or expeditions who need to carry a lot of food with them as it minimizes the volume taken up by the food. A vacuum sealer such as this unit from Geryon is a relatively inexpensive purchase and if you dehydrate a lot of food, you may find it invaluable. However, the vacuum bags are not reusable and soft plastic can be difficult or impossible to recycle in many places.
Packaging Tips
Dehydrated food is, by its very nature, dry, and dehydrated pasta shapes, rice and grains can be sharp. If you’re packing your food in any kind of flexible bags, and that includes ziplocs and vacuum packing, these sharp items can sometimes cause tears. Consider either double-bagging the food and creating a baking parchment liner to fit inside your bags. Many hikers will feel uneasy about the amount of single use plastics being mentioned in these last few paragraphs but remember that Ziploc bags and parchment lines can all be reused and the dry nature of dehydrated food really helps out here. They won’t last forever, but you can typically get a lot more than one use out of them!
Enjoy Your Backpacking Meals
The food you have on the trail is not just fuel for your hiking but can also have a tremendous impact on your enjoyment of your time outside. Too many hiking recipes focus purely on nutritional volume at the expense of flavor and texture. However, with a little thought and planning, it’s absolutely possible to eat tasty and varied food on the trail. Having something you actually want to eat is important psychologically and it can make a big difference when you’re at altitude too – where your sense of taste and appetite can both feel diminished. In this case, having good food to look forward to actively helps you keep fueled! Beyond all of this, though, good food is a good thing, and it’s safe to say that most of us hike for the enjoyment of it, so whatever you do, enjoy your food on the trail!
Disclaimer: This article contains Affiliate Links. You won’t pay any more for buying through these links, but we may receive a commission from any purchases made through them. As an Amazon Associate, I earn from qualifying purchases. If you choose to support us by buying through our links, we thank you as it helps us to continue providing the resources we do to help you enjoy the outdoors more!
