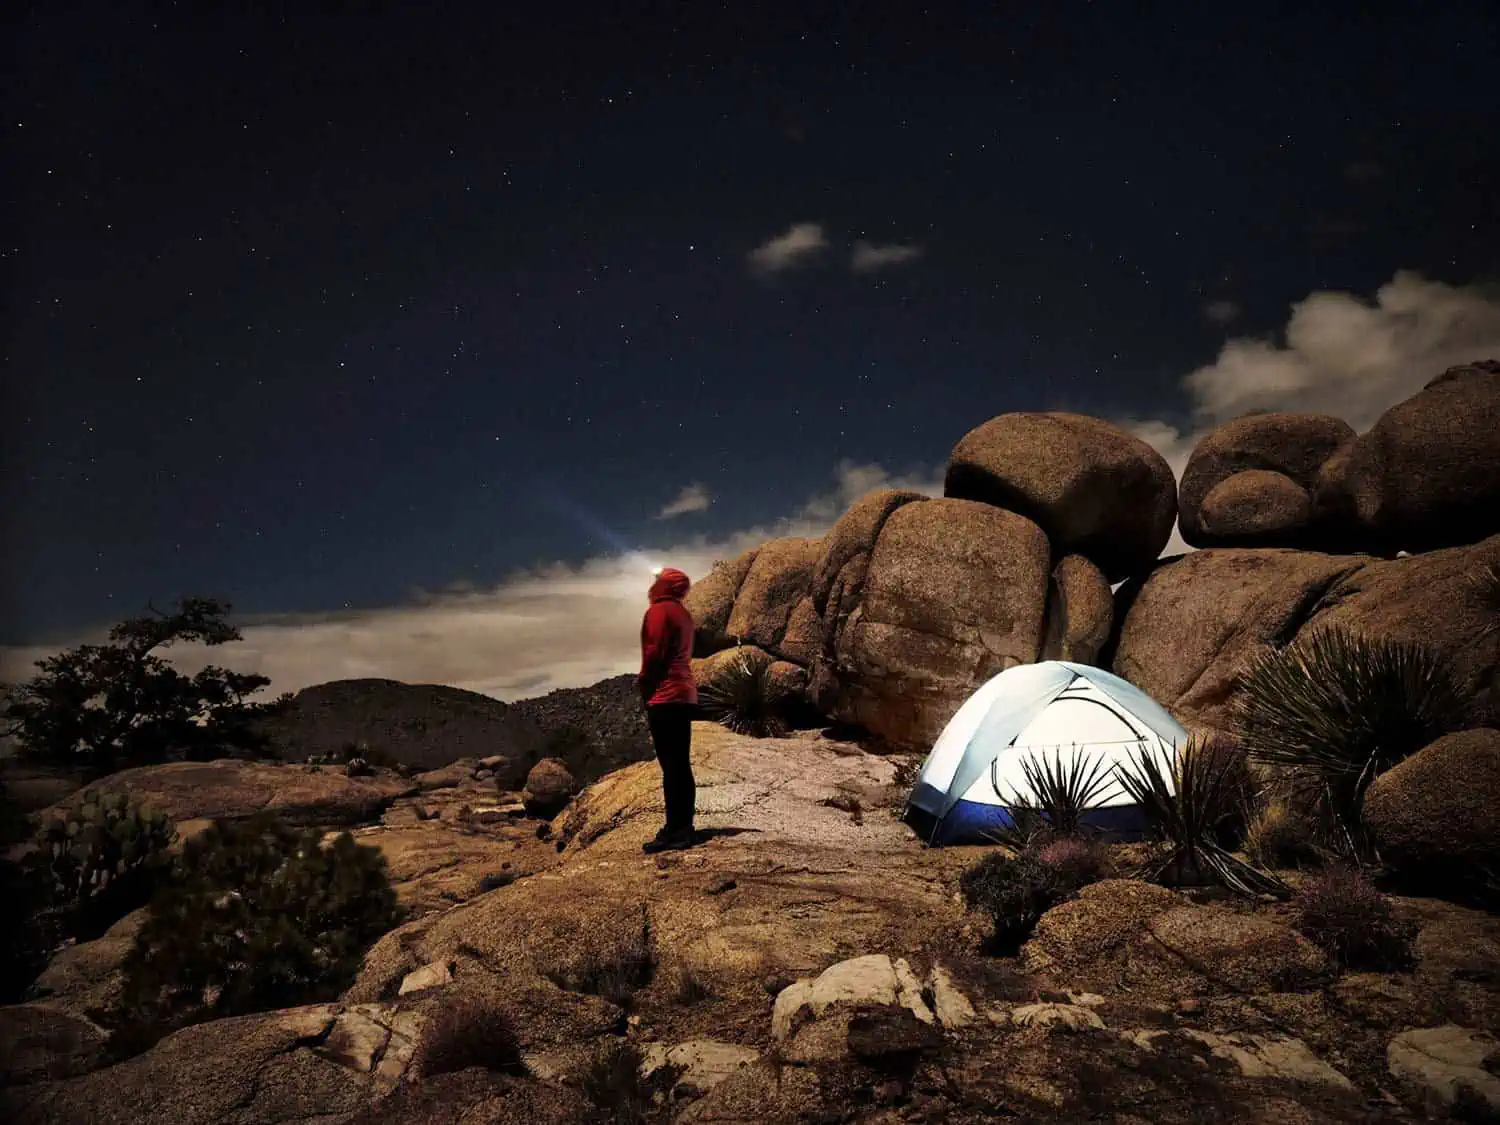
How To Choose the Right Small 2 Person Backpacking Tent

A man sits in the door of a two person MSR Hubba Hubba backpacking tent he wears a blue jacket green sleeping bag and grey hat

The tent you choose can and often does make a big difference to your trip – from the weight and how heavy it feels to carry in your pack all day to how roomy and liveable it is and how well it withstands the weather and elements you encounter. However, not all tents are the same, and choosing the right tent for your needs can be the difference between a tent you need to replace quickly and an investment that will stand the test of time for your continuing adventures.

Editor’s note: This article is part of our guide to the very best small 2 person backpacking tents in 2024, be sure to check out the rest of this guide for our top buying tips:

Double-Wall Tents

Double-walled tents are constructed of three main parts – an inner tent with a waterproof floor and a canopy which is pretty much always made of a mesh material. The poles you’ll use to construct the shape, height and maximum width of the tent and a waterproof rainfly. Double walled tents are some of the most popular tents on the market when it comes to hiking and backpacking due to the fact that they are generally easy to pitch. There’s also the fact that depending on where you’re camping, you may even be able to get away without the rainfly for some camping nights – allowing for a lighter pack weight, more ventilation in summer and potential start gazing whilst still protecting you from bugs and insects. This type of tent is also generally heavier due to the double wall of fabric and the specific poles needed to keep the tent construction solid. Double walled tents can also come in a number of configurations and varieties:

Freestanding tents

This is one of the most common and iconic designs you’ll see when looking at and researching tents and a popular tent for car camping, overnight trips or backpacking and can be generally used for a variety of weather situations from heavy wind and rain through to summer conditions. This type of tent, as the name suggests, uses nothing other than the construction it is created with to stand up – with the addition of ground stakes or tent pegs to hold it in place to create a sturdier shelter.

Part or Semi-Freestanding tents

This type of tent has been gaining popularity over the last few years as it provides most of the same benefits of a free standing tent whilst reducing some of the pole structure to create more lightweight models which can be better suited to long backpacking trips where pack weight is at a premium. Basically, with a semi-freestanding tent, you’ll still have poles, but these will likely be reduced to combine them with stakes and guys – this can help to shave weight off the overall design as poles are traditionally one of the heavier sections of a tent package. It’s worth considering the type of terrain and weather conditions you’re most likely to experience on your camps. Full free standing tents can still be constructed on rocky and hard terrain. Whilst you’ll want to use guylines and pegs for the maximum stability, it is possible to install your tent without. However, free standing tents that rely on guylines and pegs for part of their structure may be unsuitable for camps where you’ll be needing to pitch up on hard rocky surfaces.

Canopy or Tree tents

This is a type of tent that takes the traditional hammock design and turns it into a tent system that can either be put up around strong, weight bearing trees or against the ground if a suitable hammock area isn’t available. Generally, these models create a small, one person tent which can often be zipped together to form a number of tents. They rely on the same kind of pole system as a freestanding tent, except many of the guys and stakes are replaced with similar hardware to what you’d see on a camping hammock.

Tunnel tents

A tunnel tent is a semi freestanding cylindrical structure that relies on guy lines to keep them sturdy and upright. Tunnel tents are generally longer and narrower than the traditional dome tent, however because of their shape, they are usually less tolerant to heavy wind. They can be very economical with space whilst creating a sensible sleeping environment. Since they require guy lines to stay upright, they can’t be pitched on rocky or hard terrain.

Tarp Tents

A tarp tent can be a much simpler model and often present a more lightweight solution since the tent only has a single wall. With a tarp tent, you remove the mesh canopy layer and built-in floor and the rainfly you’d expect to find on a double walled tent becomes the ceiling and is permanent. However, this type of tent can also struggle to wick moisture due to the less breathable nature and you’re likely to experience condensation. You’re also removing the ability to sleep with just the mesh layer in summer on guaranteed rain free nights, which reduces the flexibility depending on where you’ll be camping.

Ultralight Shelters

Whilst an ultra light shelter like the ones we’ve outlined below are very versatile and offer a lot when it comes to a lightweight solution, you’re also a lot more exposed to the elements. For example, a flat tent or A frame tarp has two open ends, so you’re really forgoing the luxury that you’ll get from a more traditional tent. If you’re going to use a flat tarp, it’s essential to find a camp site which is fit for purpose and protected from the elements. If you’re experiencing very heavy rain for example, a flat tarp will be unlikely to give you the protection you need unless your campsite is very sheltered.

Flat, shaped or tarp tents

You’ll generally find that tarp tents come in three different varieties – flat, shaped or tarp tents. Flat tarps are one of the simplest options out there to create a shelter. A flat tarp is a piece of square or rectangular material with flat edges that is constructed using poles, ropes or guy lines at generally 45 or 35 degree angles. This is a very basic design that can be very exposed to the elements, as you’ll generally have no doors or fittings to turn the shelter into an enclosed space. Shaped tarps are generally multi sided, for example in a hexagonal shape, or have curved edges which are designed specifically for more precise pitching. It is more flexible than a flat tarp and can be pitched into a variety of shapes and configurations. However, is still more exposed to the elements in much the same way as a flat tarp is due to the fact that there are likely gaps between the tent and the floorspace that you’re pitching on. This means that the weather protection is nowhere near the same as what is offered by a traditional tent, however in certain circumstances a tarp tent can be a great lightweight solution.

Interior of Near Zero Ultralightweight tent

Materials Used

Fabrics

Most backpacking tents you’ll find on the market currently are made of either nylon or polyester or a combination of both. When looking at tents, and through our reviews, you’ll see the word ‘denier’ or D coming up usually with a number in front – this refers to the thickness of the fibres that make up the fabric being used. Generally, the higher the denier, the heavier and thicker the fabric is. So, for example, if you know that you’re going to be camping on rocky surfaces, going for a tent with a heavier denier for the bottom (or using a thicker tent footprint) would likely be your best option.

Coated fabrics and polyurethane

You’ll generally find polyurethane used as a cost effective way to waterproof the fabric of your tent to help protect it from the harshest conditions and is often a waterproofing that is used on much cheaper models. However, you’ll find this material may break down over time, especially in hotter or wetter conditions, which will render it less fit for purpose, and in some circumstances not waterproof anymore. When this happens, you might find the coating flakes off the material, removing a lot of the protection you once had.

Silicon Nylons

Silicon Nylon is a much more advanced coating, and you’ll often find that it stands the test of time much more than polyurethane. This is generally found more on the higher end tents out there and can dramatically improve the usage life of your tent. Silicon Nylon is also a lot lighter and more durable, not to mention more breathable.

Poles

Tent poles are generally intrinsic to a tent set up, providing the basic structure to which holds up the tent. You’ll find tent poles made of a variety of materials, fibre glass, aluminium, carbon fibre, but generally, most poles are made from aluminium. The pole material can have an impact on the overall pack weight – for example, carbon fibre is lighter than aluminium. However, carbon fibre poles may not be suitable for tents that are going to be used in very cold conditions. The epoxy in carbon fibre can harden in colder conditions making it more brittle and susceptible to breaking. You’ll also generally find the same advice given with lightweight hiking poles not being used for ski touring or snowshoeing if you want to prolong their life for the same reason.

Stake and Guy lines

Depending on how or where you’ll be planning to use your tent for the majority of the time, stakes and guy lines may not be necessary. For example, if you know you’re going to be pitching up on hard rock most of the time, these items may well become pretty redundant for you. However, in much windier or wetter conditions, they can give you an extra sense of security and comfort if used correctly. It’s worth checking the stakes that come with your tent to see if they will also work well for the situations you intend to use in – as you can generally buy good quality tent stakes quite inexpensively, so it may be worth reinvesting in some better ones than those that come with the tent itself. There are a huge range of different tent pegs or stakes out there, with different textures and grips suitable for different uses. You can also cut your pack weight down by opting for lighter weight options than those your tent came with. Generally, the higher end tents come with better fixtures and fittings, so making these upgrades to a cheaper tent if this is what your budget allows can really ‘do up’ your setup.

a night time image of a tent in the mountains with a starry sky

Tents and Ultralight Shelter Comparison Comfort

Comfort

The comfort you get from your tent or shelter is a really personal preference – your idea of protection from the elements, acceptable living standards and liveable feel may be very different from the next person. With this in mind, you’ll want to consider how much space there is in the tent. For example, if you’re going to be backpacking alone, considering the difference between a one and small two person backpacking tent can make all the difference when it comes to your comfort and if you have enough space. Think about things like the trail distance you’re most likely to use your tent for, the ventilation, space for cooking, reading, hanging out in the evening.

Weather Resistance

Weather resistance is going to be really dependent on where you intend to use the tent. If you plan to camp somewhere that experiences much more changeable and often wet weather, looking for a tent with a strong (but often heavier) denier rainfly is likely going to be a key factor. If you plan to camp in hotter, desert like or high alpine dry conditions, a tent that takes excellent ventilation into consideration is going to more appropriate for you.

Weight

Weight is pretty much always something on the mind of a backpacker or long distance hiker, and rightly so – you can’t just focus on how the tent is when it’s set up, you need to think about how easy it is going to be to carry it around with you all day. Generally speaking, the higher end models out there are the ones that offer the most lightweight tents. You can also find that tarps, which offer a much simpler design can be extremely lightweight as a solution too. However, the most lightweight model might not be the best option for you, depending on where you plan to use the tent. We believe that looking for the most ultralight weight model shouldn’t be your biggest concern. You also have to look at it in combination with how you’ll be using the tent and the space that you get inside the tent. We advise trying to find the happy medium that ticks as many of the boxes as possible for your particular circumstances.

Packed Size

The packed size of the tent is also important to consider when it comes to working out if the tent would actually fit in your backpack, or at the very least, be worked around your other items to create a well balanced pack. Pretty much all of the tents we’ve reviewed can be removed from the stuff sack and kept in separate elements if needed. This can both reduce the weight of your pack where every single unit counts and make it easier to fit the parts of the tent into areas that might make more sense that would otherwise be seen as ‘dead space’. Some tents are also designed to be able to divide between two packs – great if you’re with another person. However, you’ll want to be careful with dividing your items up from the stuff sack and make sure you know where all the elements are in your backpack. You don’t want to be getting to camp close to dark and not be able to find your poles for example. Tents generally seem to have moved on a long way from a few years ago where it just felt like you were battling with this huge package, now, a lot of the packages seem to be similar in terms of size and will fit quite happily in most backpacks you’d likely take on a backpacking trip.

Durability

Tents that are able to adapt to varying conditions offer the best protection when it comes to durability and a lot depends on where you’re going to be using the tent and what weather conditions you’re likely to experience.

Ease of Setup

We personally think this is a biggie – as ease of set up has always been a deciding factor for us. If you’ve had a hard day hiking, or are at altitude, thinking endlessly about having to set up your tent is really not what you want. Thankfully, many manufacturers have learnt over the years from backpackers and hikers comments and are making things like better pole systems that are easier to set up, or one pole systems which make it easier and harder to loose elements. This is also important if you’re pitching in the dark, rain or wind. We’d always recommend trying to pitch your tent a few times at home in a controlled environment before you head out as well – once you have that muscle memory down, it will be much easier if you know which order things need to happen in.

How to Use and Take Care of a Tent Tips

Pitching

It isn’t always necessary to have guy lines with your set up, however this can make a difference to having a really robust pitch. It’s always a good idea to bring extra cord or make some extra guy lines at home and take them with you so you have flexibility on your side to getting the perfect tension for your tent setup. For extra stability, see what is available in the environment and if possible you could look to use rocks, wood/branches or other elements to put on top of your tent pegs or stakes.

Selecting a Site

If possible, we would always recommend planning ahead when it comes to your site. We generally try to check out a trail in advance of camping there so we know what to expect and to allow us to find suitable camping spots. However, this isn’t always possible, so doing as much research as possible will give you the best spot. Be sure to practise Leave No Trace as well to keep sites the best they can be all round, too. You should generally be looking for camping sites that are:

Away from the trail: try to find sites that are not visible from the main trail. Some trails have guidance of how far off the trail you should be before you pitch up.

Away from areas of danger or hazards: For example, don’t camp right next to the edge of a cliff, away from places that could flood, experience rockfall etc.

Somewhere flat: If possible, this will make things a lot easier for you. Be sure to try and keep your interaction with the site as minimal as possible – if there are large rocks there, try to move somewhere else.

Footprint

A footprint, whilst adding extra weight to your pack, can also help to prolong the life of your tent from any rips and tears, especially if you’re likely to be camping on harder surfaces. It can also provide an extra waterproof layer to the bottom of the tent. If you do choose to buy a tent footprint, most manufacturers offer one that is fitted to the size of your tent which will attach to the poles on your tent exactly. However, a footprint can actually be a costly option, so if you don’t want to lighten the load of the cost of a footprint, you can make your own. To help you decide if you need a footprint, check out our article: Do Backpacking Tents Need a Footprint?

Storage

Always make sure that you store your tent dry rather than wet. It’s Always a really good idea to get your tent out of the bag once you get back from a camp and leave it to air for a few days before putting it back and storing it away. You should also make sure you practise maintenance on your tent in between seasons – if your tent has been packed away all of winter, you should make sure you take it out and repair any damage before you head out on the trail again that season. If you’ve spent quite a lot on your tent, storing it correctly and preventing damp and even worse, mould and mildew will hopefully keep your tent working well for you for years to come!

Color

This is often a personal preference – and we do think that if you’re going to be spending quite a bit of money on a tent, it may as well be in a color that you like! You’ll often find many of the tents out there will come in very bright colors, and aside from the attractive nature, also provides visibility. For example, if you get stuck, it is much easier to see a bright orange or yellow tent than it is to see an olive green or black. If you need to call mountain rescue, this can actually significantly reduce the wait time to find you.

Conclusion

There’s of course a lot to consider when it comes to buying the tent that is right for your needs and can seem to get overly technical and lost in detail, so we hope this no fuss guide to buying helps make that decision easier for you!

Disclaimer: This article contains Affiliate Links. You won’t pay any more for buying through these links, but we may receive a commission from any purchases made through them. As an Amazon Associate, I earn from qualifying purchases. If you choose to support us by buying through our links, we thank you as it helps us to continue providing the resources we do to help you enjoy the outdoors more!