
Photography plays an absolutely key role in our storytelling. Both Fay and I started making photographs seriously in our teens before studying it at University. We both started our careers in commercial photography and, if we were asked to explain what we did in one word, ‘photographer’ would probably be it!We’ve seen a lot of growth and changes in the way we work in the time since we started and this has led to us reinventing and refining our working practices and technique over the years. We’ve written plenty about photography so far, including how we create our aesthetic– the ‘look and feel’ of our work – as well as having an on-going series on the story behind specific images. However, we haven’t spoken much about our workflow – that is, how we go about organising our shoots from preproduction planning through to the shoot day itself and through to post-production and file management. In this article we’ll dive into this process and look at some of the nuts and bolts that underpin our work. We’re asked about our process a lot – especially when it comes to content creation and working with brands. As you may well know, combined, we’ve been working in advertising for over 30 years, and much of the process we use now is underpinned by the industry standard and individual work practises we’ve adopted over the years. So, whether you see yourself as a professional image maker or content creator, a keen amateur or just someone who likes to be able to actually find and look back on snap-shots in a few years’ time, then this article is for you!
Before Shoot Day
Let’s start at the start.Before you head out photographing, it’s good to have a clear idea about what you are planning to shoot.It sounds obvious enough, but it’s worth spending a bit of time exploring this a little more.If we have a commissioned shoot and we know there’s a certain type of image the client is expecting, we’ll create a detailed shot list and this will likely influence the gear we bring with us, but this thought process can also be transferred over into a day of hiking with a camera where you don’t really have any specific photographic goals.We have a lot of gear – including various camera systems covering different formats, a range of different lenses for very different purposes and lighting.There’s no way we’d every bring all of it out on location with us, so planning for each job starts by thinking about what we’re likely to want to shoot and what we’ll need in order to achieve it.Obviously, if you’re just heading out into the hills for a day, you won’t know what images will present themselves, but, with experience, you can make an educated guess about what a certain type of environment might throw at you.

ID: Fay and Matt are close to each other in the centre of this landscape image. Fay stands to the left, wearing purple top and black trousers with blue bag. Fay holds a phone and is logging shots as they shoot a video. Matt is crouched down, wearing a black coat, black trousers and is holding a camera on a shoulder rig. They are stood on the top of a hill, which is brown and grassy. In the background are higher, green mountains and a lake underneath.
Now, even if you have much less equipment, this part of the planning process is a great opportunity to consider trade-offs between being prepared for every eventuality and your comfort on the trail. Of course, it would be fantastic to always have the kit you need for every potential photo opportunity you might see, but if that means carrying, say, 15kg of gear (that might seem excessive, but the weight does quickly add up), then consider if you will be comfortable carrying it on a multi-hour hike?Will carrying excessive gear limit how far into the trail you can get or worse, compromise your safety?
Over time we’ve become quite adept at anticipating what we’ll need on a certain hike.Most of the time, if we want to travel light, we’ll take a camera body each with two different lenses and that’s it. We know that combination will cover perhaps 90% of the possible images we want to produce.It’s fair to say I’ve missed more potential images because I haven’t been able to switch to gear I was already carrying (for instance, changing a lens or fitting a filter) quickly enough than because I’d chosen to leave a certain bit of equipment at home that day to save weight.
If you’re a photographer seeking job opportunities that would enable you to travel and explore new countries, you can search for such opportunities on Jooble.
Once you’ve selected the gear you want to bring, the next step is to ensure it’s prepared in such a way that you can start photographing in the most effortless way. For us, that means batteries are charged, there’s fresh memory cards and that all relevant accessories are in place.This is also a good opportunity to check your sensor for dust and clean it if necessary. It’s also well worth checking that the time and date settings on the camera are correct and adjusted for the time zone where you will be working if necessary.You can learn from experience here: a few years back, we were shooting video on one of our cameras and had removed the strap to fit the camera into a rig.Shortly after this, we went on a two week long travel job short of one camera strap.Since we usually hike with the camera around our necks, this was a serious problem and we had to improvise a solution with a piece of washing line from a hardware store – not a great solution!
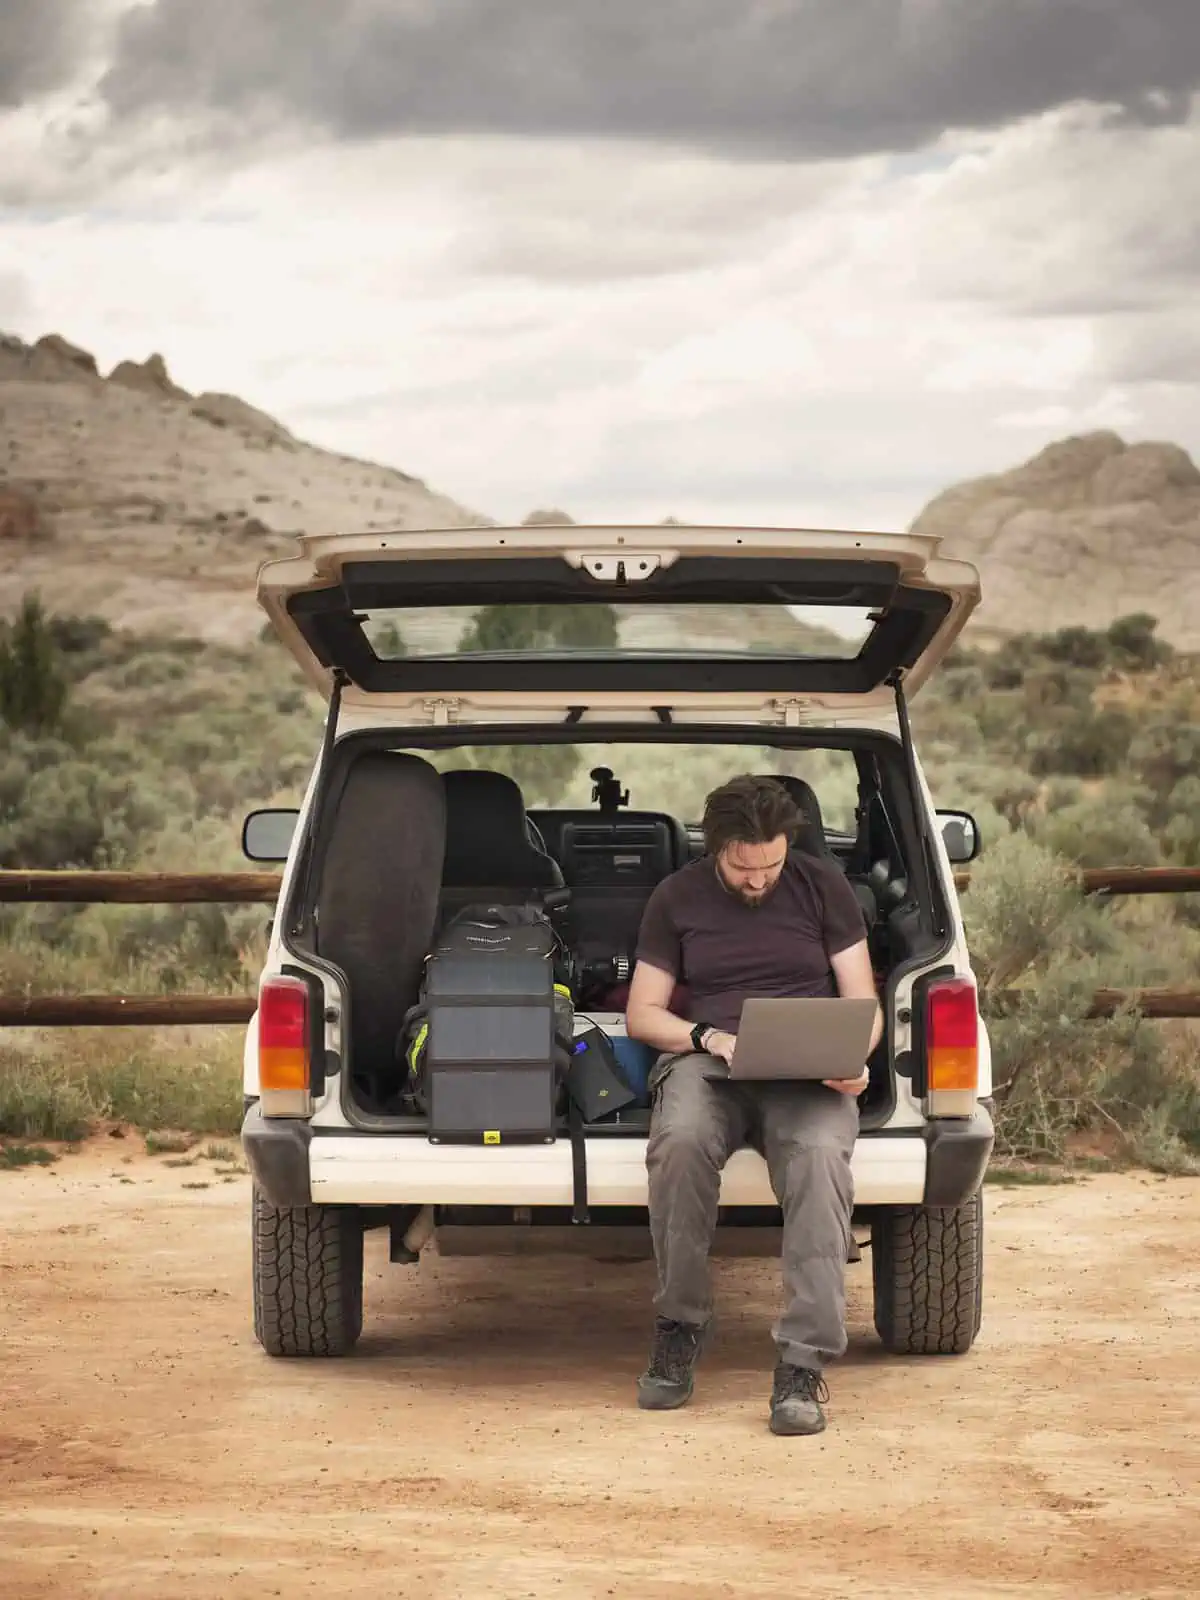
ID: A portrait image. Matt sits on the bumper of the boot of a 4×4 car. He is wearing grey trousers and purple top. He has a laptop on his knee and is working. To the side of him is a solar panel which is charging, and there are other photography kit items in the boot. The car is white and it is parked in a sandy spot. There is a fence behind the car, in the background are mountains.
With the camera gear ready, we can turn to the next piece of the puzzle: what extra gear will we need?This can cover shoot gear like spare batteries, memory cards (or film!), tripods, lighting, chargers, rigs or sound recording equipment (if it’s a film production).
We also need to consider computer gear. We’ll bring a laptop with us 90% of the time (the exceptions are very small shoots, or situations where we know we’re going into a very harsh environment – in these situations, we will often just ensure we have plenty of memory cards).As part of our pre-shoot checks, we ensure that we have sufficient free space on the laptop hard drive to copy over the volume of images we expect to produce, we’ll also pack a portable external hard drive (or two) – again with sufficient free space for our anticipated needs – so we can make an on-location backup (more on this later).We’ll also make sure we have the relevant chargers, card readers and cables.
Take a moment to consider any specialised accessories your camera – and therefore your shoot -might rely on. Our most recently purchased camera body uses Compact Flash Express (CFE) memory cards.Whilst we love the performance these cards offer and we note they are starting to show up in more and more new cameras, the cards themselves are still quite tricky to get hold of – they are certainly very far from as ubiquitous (or cheap!) as SD cards.We have to assume that if we needed to replace a CFE card or card reader, it would need to be shipped in over night.With this in mind, we always double check that our CFE cards and reader have been packed as a slip up here would put that camera completely out of action.
Finally we will consider shot lists.These are certainly relevant on commercial projects where we’ve been briefed to photograph certain locations or product combinations, but they also have some value in day to day photography: if you’re photographing to produce illustrations for a blog article, you might make a list of the various images you know you need to capture – it’s much better than trying to keep a mental track of it all and can provide a ‘peace of mind’ that the job has been completed.These tend to be much more detailed and we will actively take stops when we’re outdoors shooting with a client. However, even if this is just for your own uses, having a list of the types of shots you’d like to get (and this can be broad) can really help you focus on enjoying your time outdoors rather than just thinking about photography.
On Location
All of the above steps are there to make the actual experience of producing the photographs as stress-free as possible.Turning up to a shoot – or even just setting off for a hike – knowing that your camera is working as it should be, that you have a list of images you need to get and that you’re all set to copy your images off to a computer afterwards is always very reassuring and it means that you can give the shoot, or the experience the full attention it deserves.
As you shoot, you’re generating data and at some point – whether you’re working with your camera tethered to computer or shooting to card – that data is going to have to be transferred to a computer.This step, data ingestion, is critical and sets the stage for how organised (or not!) your production and archiving will be moving forward.
The steps we list below will assume we’ve been shooting to card.Tethered shooting is a great tool and very useful in a studio or controlled location setting, but we seldom make use of it in our work outdoors now, except in very particular circumstances.None the less, the steps we outline below, could easily be modified for a tethered shoot.
The image files your camera generates are the single most important part of your shoot – not exactly a ground-breaking statement, but one that’s worth keeping in mind.However, there are numerous steps to any digital capture workflow and at each step it’s easy to ‘lose’ one or several or even all of your files.Given that you might come back from a multi-day shoot with thousands of individual capture files, it isn’t feasible to check each one individually at every stage of the process, so as we wrangle our files, we need to come up with time-efficient, practical ways to ensure that every image is accounted for at every step of the workflow.
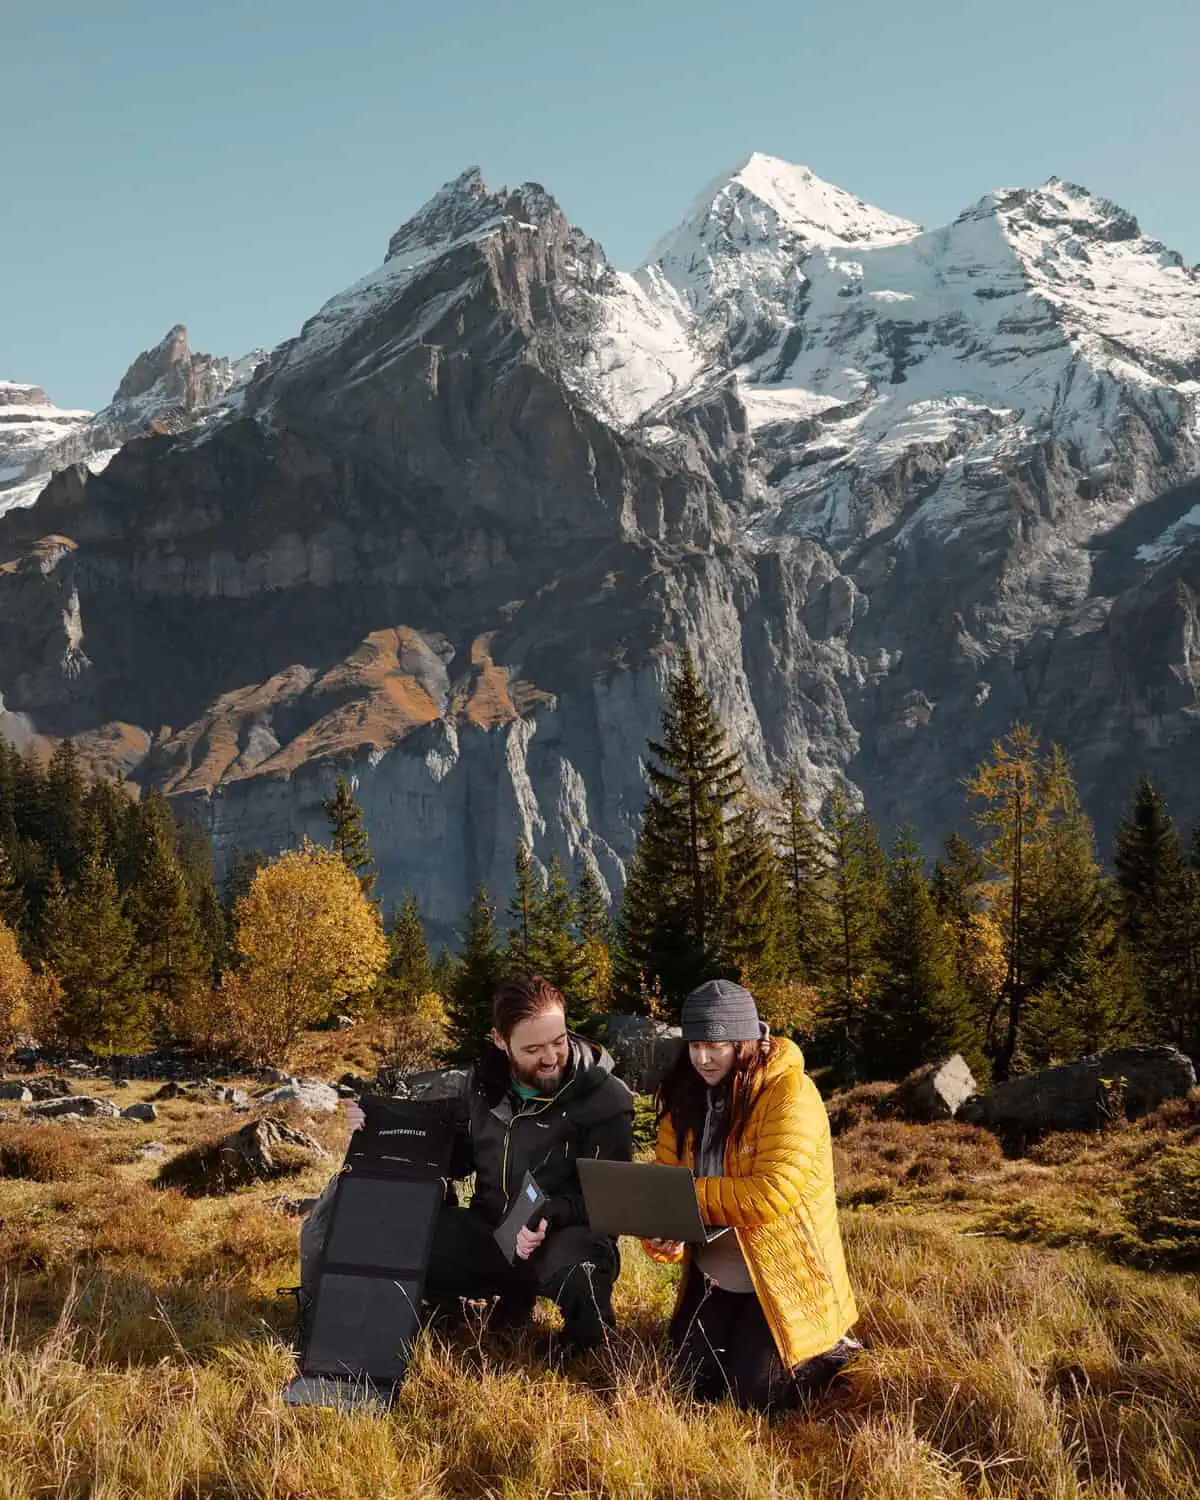
ID: A portrait image. Fay and Matt sit at the bottom in the centre of the frame. They are crouched. Fay is showing Matt something on the laptop as they work. Matt is holding a solar panel on his bag. Fay wears a yellow coat, blue hat, grey top and black trousers. Matt wears all black. Around them are rocks, and in the background are alpine mountains.
The first step is getting your files off the memory card and onto your camera.For us, that means using a card reader.Many will say these are unnecessary and that you can just hook up the camera directly to the computer via USB, but in our experience, we’ve hit a range of problems this way: cameras requiring drivers or specialised software utilities; storage not mounting (eg. Not appearing in the Mac OS Finder or Windows Explorer)… Card readers just seem to be a low hassle solution.Besides, if you have a lot of cards from different cameras to copy at the end of the day, it just seems simpler.When copying a card, it’s important to double check that everything’s actually been copied from it.That means doing a comparison of the file structure on the card and on your computer after the copy has finished.Our process is to place both side by side in detailed list view sorted by date created and check the following: Are there the same number of files? Are the first and last filenames the same? Do the file sizes tally up (if the files are reporting, say 40mb each on the card, but 6kb each on the computer, then something has gone wrong!).We stack multiple cards so they are all the same way up.Once copied, they are placed in a separate pile and physically flipped over – so we can be doubly sure that no card has been missed.
We should take a moment to consider filenames.The default filenames from digital cameras – often something like ‘_DSC5962’ – are generally quite unhelpful, and you may be tempted to rename your files to something a bit more useful.This one area where tethered shooting offers a great advantage as you can set a useful filename at the start pf the job.Be very careful with renaming files! If you’re going to do this, it should be done as the first step after copying your memory card to the computer.Once you’ve shared files with a client or post-production company, the filenames should absolutely be locked down – how else can you ensure you’re referring to the same image! We do not change our filenames after capture.Once an image has been selected to be worked up as a final we do add our job number to the start of the camera’s filename (so ‘_DSC5962’ might become ‘FM1415_DSC5962’), but there’s always an obvious path back to the original.
On a similar note, we never delete anything we have shot.Ever! If I could remove the delete button from our camera, I would do so in an instant!Even with images that I know are rubbish (like when the camera fires taking it out of a bag).
The next stage is logging – that is, making a record of what you’ve shot and where.This step is vitally important for us simply because we travel a lot and we know we will never be able to remember every place we visit.
In practice, logging stills works like this: We class each shoot as a separate ‘job’.It gets a unique number and also some descriptive text in the job folder name: Calling a job ‘FM1293 – Switzerland and Italy’, for instance, isn’t very helpful, but calling it ‘FM1293 – Swiss and Italian Alps – Aug 2019’ gives us more information.If it’s a place we visit a lot, we try to get even more descriptive than that – such as adding a month or year or anything that makes it easier to remember. We have a capture folder in every shoot, and within that, there’s a subfolder for every day.In the folder’s name, we list the various places we’ve photographed that day.
This system means we can easily zero in on the images we want when we want to start edit.For example, let’s say we decided we wanted to look through the images we made at the top of the Jungfrau in Switzerland.Looking through our jobs, we can quickly find all of the jobs from Switzerland, then, looking in the capture folder, we can see a folder called ‘190821 – Junfraujoch Top of Europe’ – that’s where to look.
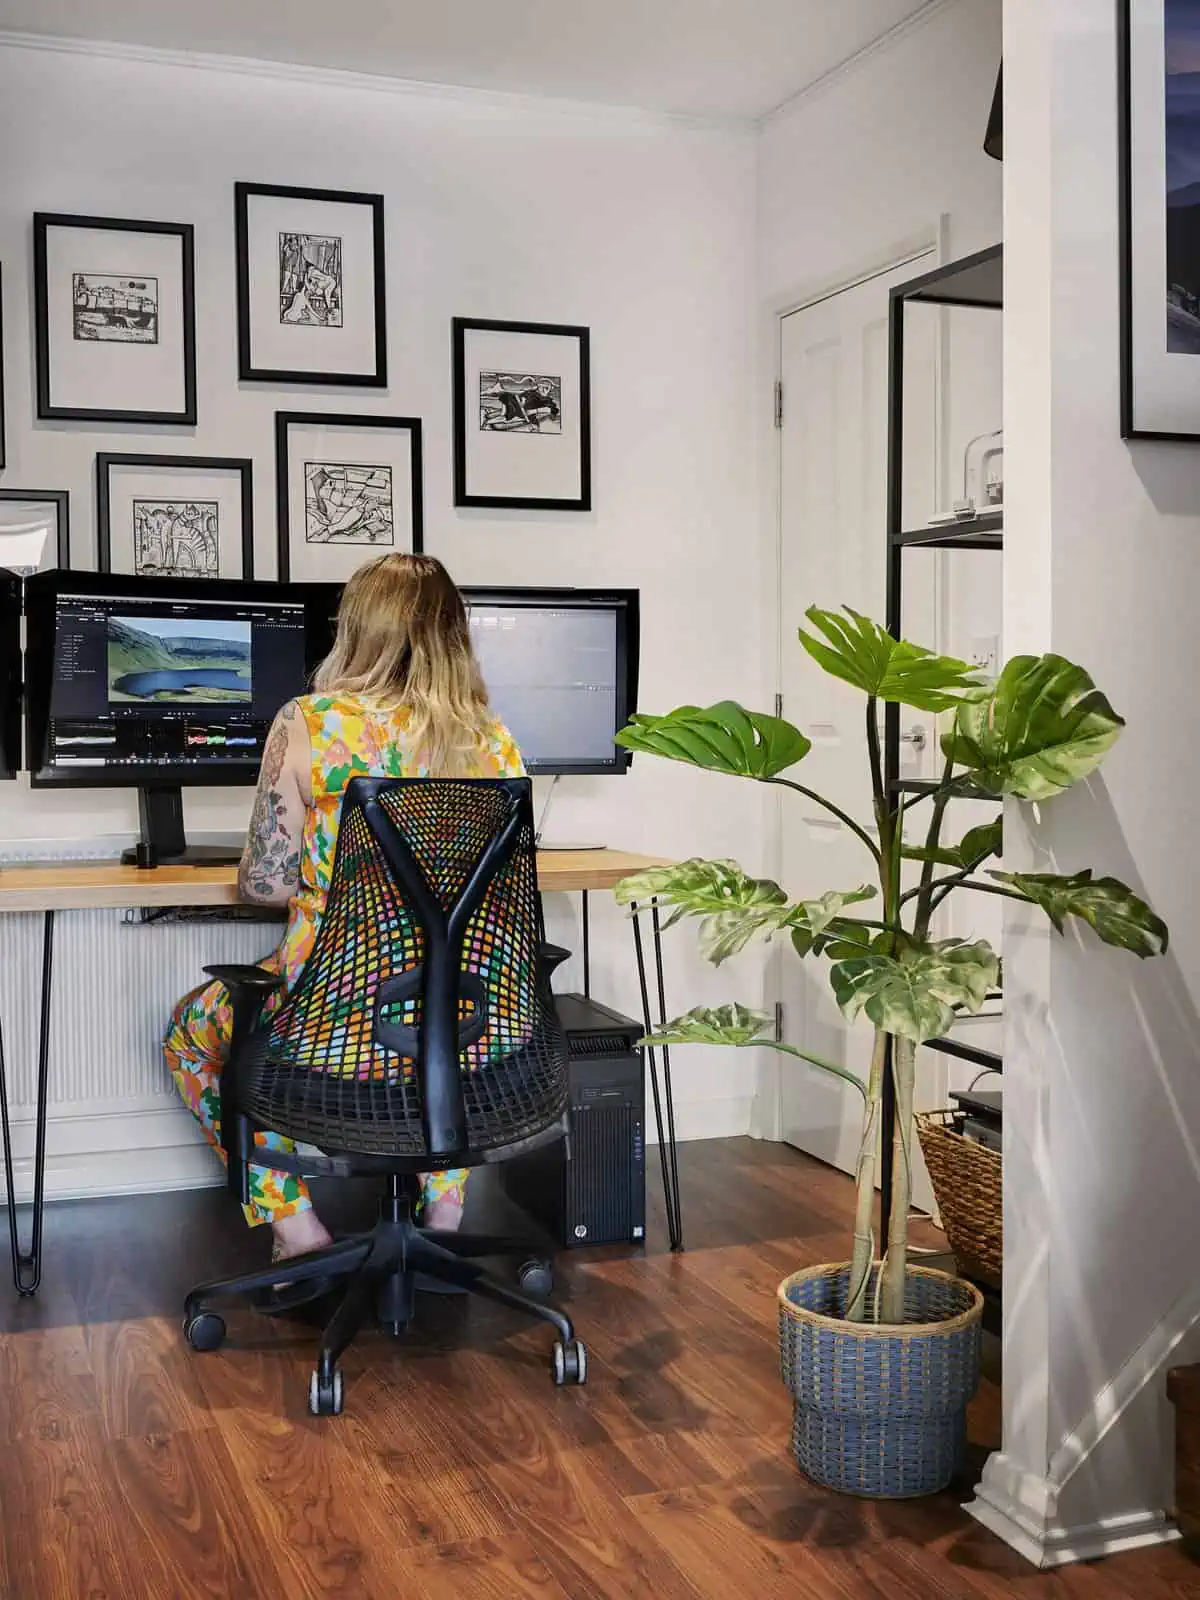
ID: A portrait image. Fay is sat at their desk in the studio. In the foreground is a plant, a wall and shelves. Sat at the desk, Fay is using their computer with two screens on a desk with hair pin legs. Fay is sat in a Sayl chair and is wearing a bright patterned jumpsuit. On the screens is editing software.
We also log days where we haven’t shot anything.Gaps in the sequence of file names in a folder are a reason for concern so, if there’s a travel or rest day in the middle of a long job where we don’t shoot anything, we still create an empty placeholder folder for that day logged as ‘no photos taken’ or something similar.
This system has evolved as the scope and ambition of our projects have grown.One issue we’d encountered was the amount of time it took for Capture One – our favoured raw processing software – to generate previews in folders containing hundreds or even thousands of images (image counts like this aren’t uncommon on our travel jobs when we can pack a lot of locations into long shoot days).With this in mind, we started to split days up by location and also by capture type – if we are producing both stills and video on a certain day, we tend to split these into separate folders.These steps may not be necessary for you yet – or even ever – but they have easily supplemented our existing workflow.
After we have copied our files over and logged the locations, the next step is backup.On location that means ensuring there is at least one more copy of the images.We might make the initial copy to our laptop and then backup to an external drive, or, in some cases, we just work over two external drives.Either way, the important part is ensuring that there is more than one copy as soon as possible.Just as we do with the initial copy from card to computer, we double check the backup to ensure the folder sizes and number of files tally up.
As a rule, we don’t delete anything off the original memory cards until the files from that day are copied over to the location laptop, logged and backed up.This process can take several hours if we’ve shot a lot but, on busy location shoots, it’s vitally important so we know for sure we have the day’s images secured and so we can clear off the memory cards ready to start fresh the next day.
The importance of file organisation cannot be overstated.Thinking back to my days running a retouching company, I can think of numerous instances where poorly organised files led to massive problems in production.There was the client who’d changed the filenames on the very low res files the photographer had provided after the shoot, so we had no way of matching their selects to the high res files other than doing it by eye – turning what should have been a short job into something that took most of a day.Then, there was the photographer who’d decided to ‘tidy up’ their tethered shoot before sending it to us on a hard drive.We found some of the client’s selects in the session trash: the photographer had deleted images the client went on to select for use in an advertising campaign and it was only by good luck that we were able to retrieve them.The take-away is the same: file management is critical.
Post Production and Archiving
By this stage in the production process, we are usually back in our studio.Our first step here is to copy the shoot onto our studio server.If we are returning from a multi-day or week project, this can be a lengthy process – indeed, I’ll often start copying a shoot over to the server with the understanding that it will be on overnight task.
We do sometimes work up final images on location, but we generally prefer to do this work on studio workstations – they are much more powerful than our laptops, have hardware calibrated screens plus the studio itself is designed so that we have a comfortable, ergonomic workspace in an environment where ambient light does not interfere with the screens (you get neither of these benefits when working in a hotel room, however, it sometimes is the only option when you’re on a tight deadline).
I won’t detail our post production workflow in too much detail as it’s beyond the scope of this article, but it’s worth noting that we have ‘tiered’ storage in our studio.That means that we use different types of computer storage for projects that are at different stages of their lifecycle. We are often working to tight deadlines, so active projects are stored on fast storage – high speed spinning hard drives and, increasingly, SSDs.Finished jobs are moved to archive storage – NAS servers built around ‘Green’ hard drives that prioritise energy efficiency and low cost over speed.
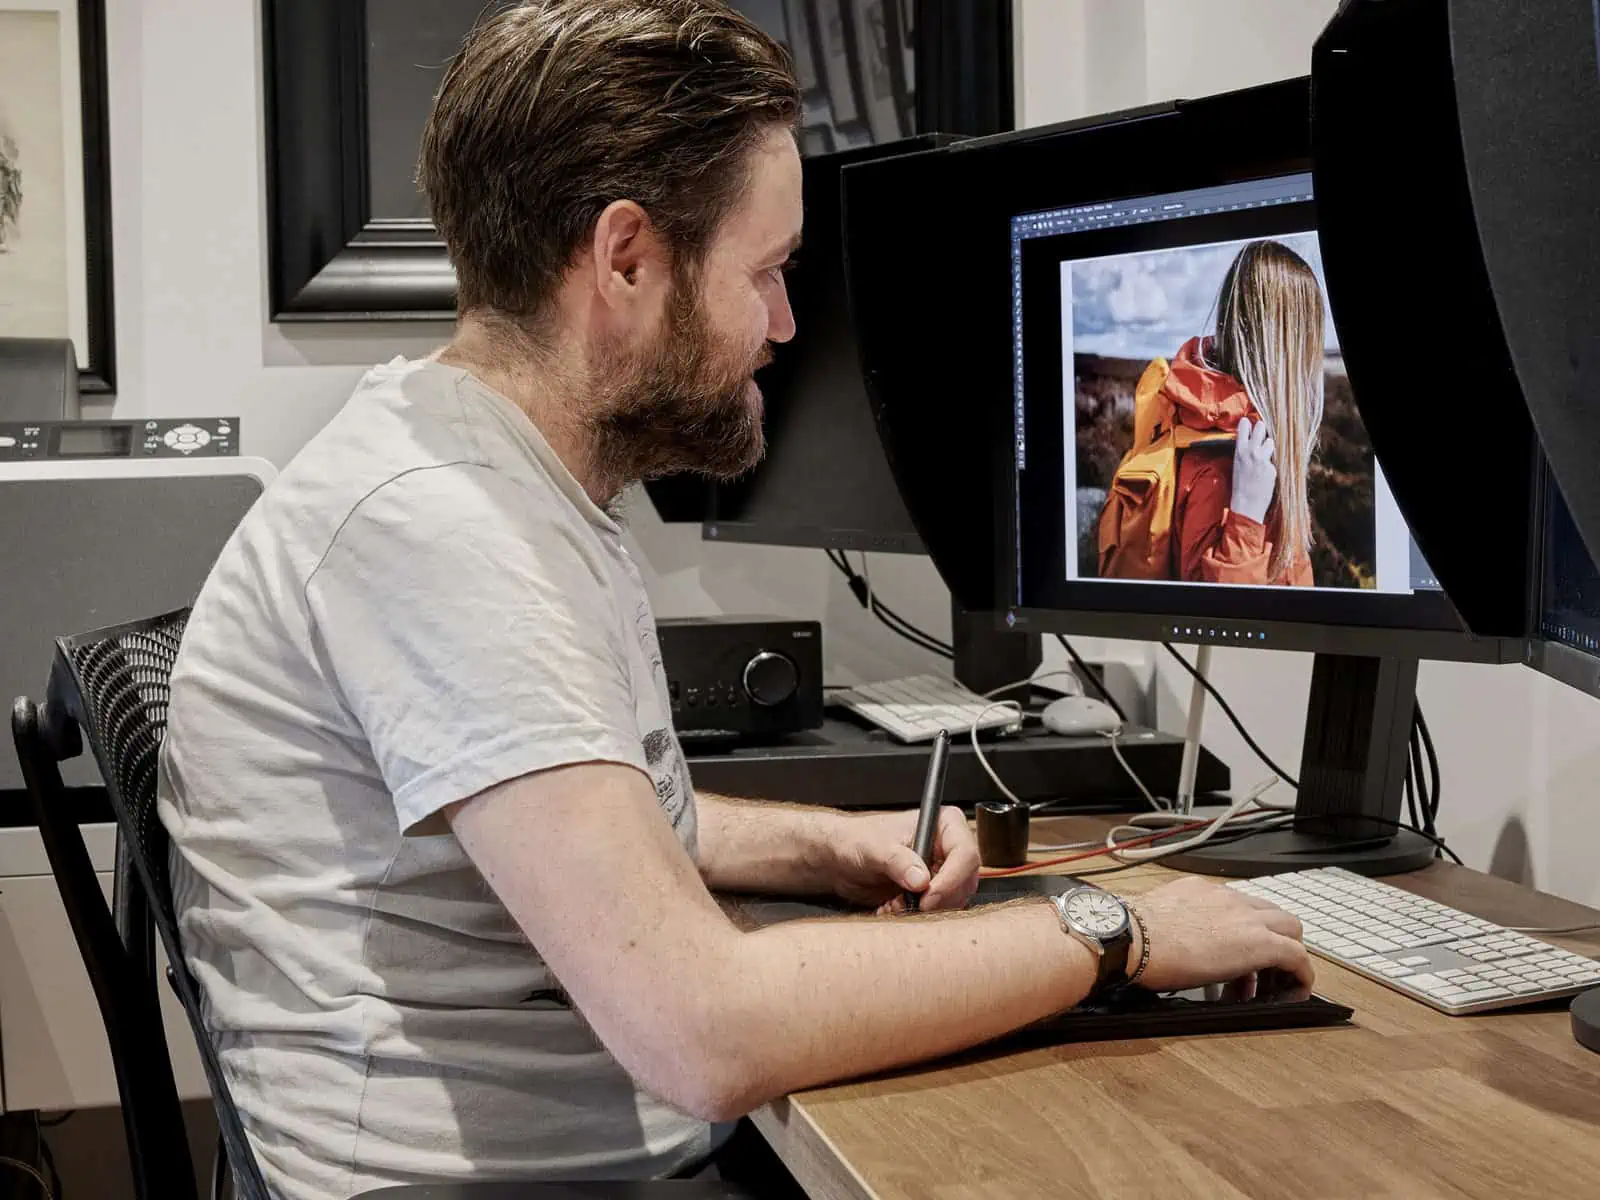
ID: A landscape image. Matt is sat at his desk working on an image at the computer. He is seen from the side. He is wearing a white tshirt.
The key point to bear in mind with post-production is to keep a ‘paper trail’ of versions.The is vitally important when working with clients. Every time a file receives substantial edits, we generate a new version.This means that if a client ever wants to walk back their revisions, it’s easily possible.This also flows through to video production and has the same process.
Data management and archiving are huge topics for sure.There are probably many experts in the field who would identify huge problems with they systems we have in place.However, our system has grown with us through our decades spent working with images.It is the foundation of our working practice and its reliability has been proven many times over on commercial projects.I would urge anybody reading this to put some time into thinking about what happens to your files.There’s a phrase I’ve heard many times in relation to archiving: If you can’t find something – whether that’s a digital file or a physical print or negative – then you may as well not have it.As we produce more and more images than at any other time in history, this adage is vitally important.Whether you are currently just copying the images from your DSLR to your laptop after every shoot, or trusting all of your images to a cloud service, it’s is definitely worth thinking about what you can do to ensure not just that you’ll have these image sin the future, but also how you will be able to find them.This is of vital importance to businesses that deal with images, but also of great importance to individuals too: The images we make are our memories and they should transcend time.Let’s ensure they do!
Let us know in the comments if you found this helpful and if you’ll be taking on board any of the points from this insight into our working practise!